You might try contacting a plastic welder. I've seen tanks that were heated and formed a bit to clear diffs, but I've never seen or heard of someone shortening the entire width of a tank.
Chevelle SS Resto-Mod Thread
101,281 Views |
491 Replies |
Last: 6 yr ago by lb3
Can you send a photo of the tank and what needs to move?
What kind of plastic? How much are you bending it? etc.
Might be able offer help on that with a better idea.
~egon
What kind of plastic? How much are you bending it? etc.
Might be able offer help on that with a better idea.
~egon
Here is the tank about as high up as it will go. Bottom flange of c-channel is 2IN wide, probably need 4IN of additional clearance.
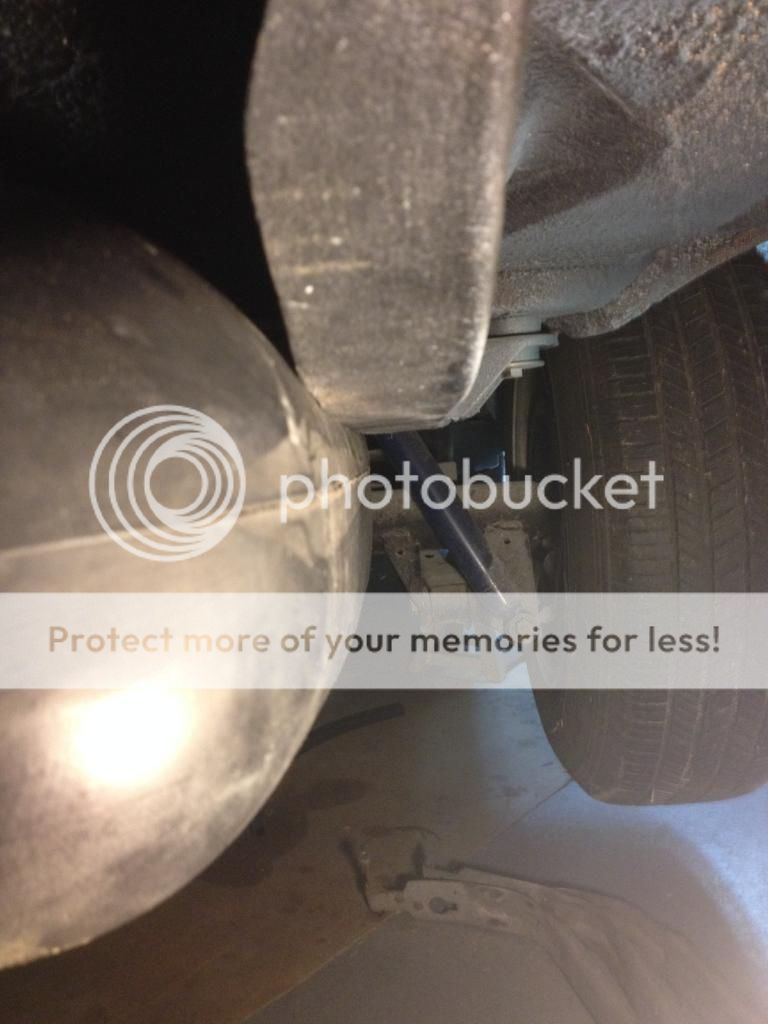
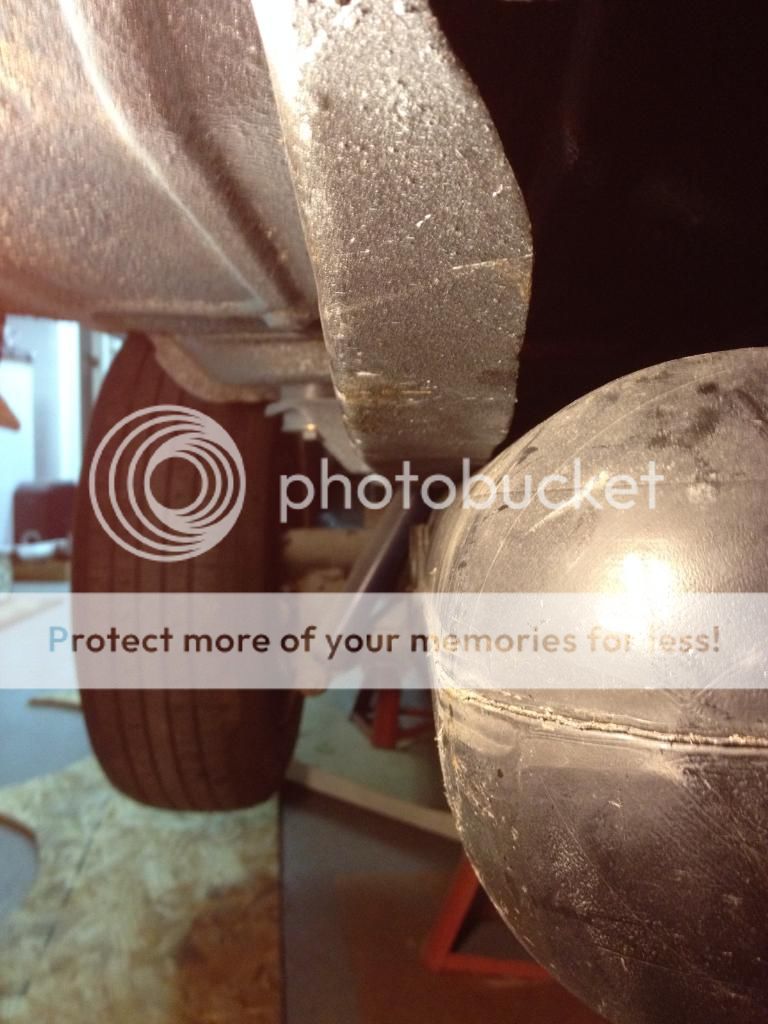
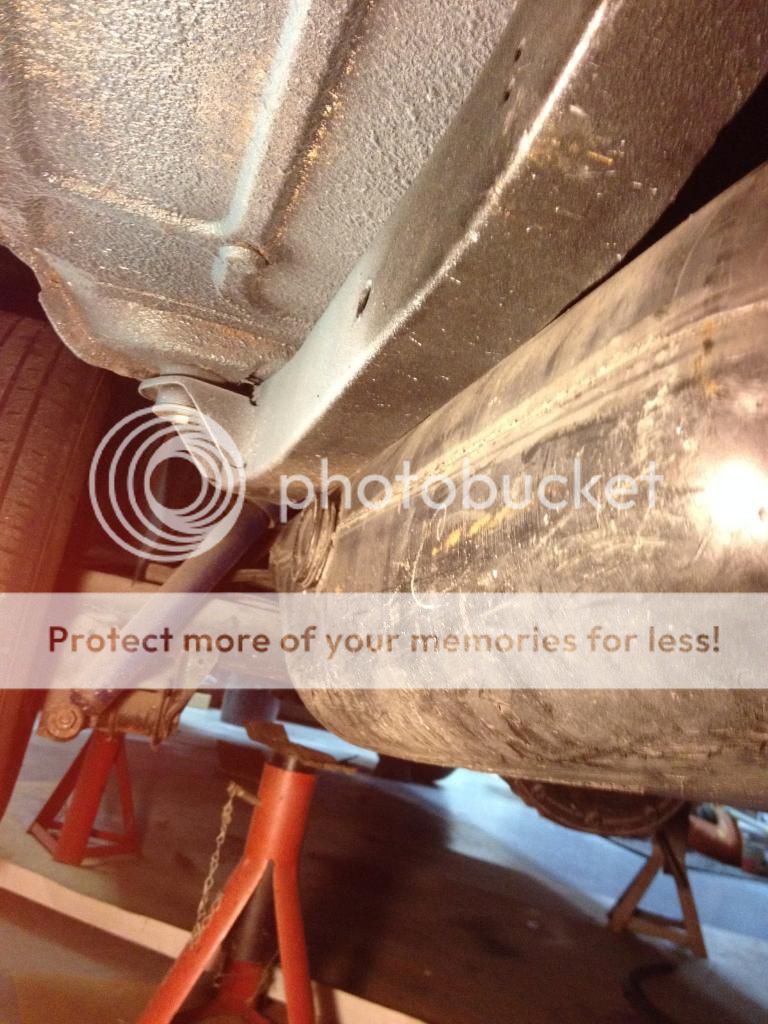


Here are a couple of links that might help, assuming you have a HDPE gas tank (my best guess).
You probably can mold it to what you want. Doing it without creating a hole will probably be tricky. Here is a site that talks about and sells repair kits for plastic.
Fixing thermoplastic plastics
Find what kind of plastic you have
This is a fun DIY for several plastic projects.
Make your own HDPE items
Fix random things around the house
I think you need a good, even heat source, one that you could control to a set temperature, and a mold/frame of what you need (from where you are starting). You also need some insulation or secondary heat source to allow it to cool slowly to prevent shrinkage. I would think you need an outside and inside molding form to shape the tank. If not, you could push too hard and get something really weird looking.
HDPE can/will shrink when cooling off, so you will need to look out for that. Also, prevent sharp corners, as that is a point of failure. With the heating, you need to make sure it is not too hot. I wouldn't think there are a lot of conditioners in the tank, but getting the plastic too hot could damage non-HDPE chemicals in there and impact the resilience of the material (impact resistance, ductility, etc.) Heating it too hot could cause embrittlement.
I would think it would be the easiest if you could heat the whole tank at once and form/shape into what you need, if you are wanting to 'squeeze' the tank down and elongate it. But I doubt that fits in a normal oven. If you heat a local area and then start to compress/form, you could get localized stress in the non-heated areas, which would need to be relieved (similar to welding metals).
Another idea, to practice, would be to get milk jugs (FIFY protected) and practice deforming/reforming them. Same plastic, but thinner.
Hope this helps. Part of me would want to do it/try it because it seems like fun and a new technique to learn. The other part just says 'f it' and buy a 'correct' fuel tank, due to time/money/wife (which is boils down to wife since time=money and wife= time and money or money^2). ;-)
~egon
Droppin' knowledge on them boys
My boy Egon is wicked smart
Thanks for the good input....I've been reading some similar suggestions and have seen a few forum thread where people have reshaped tanks, but not to the degree that mine would need. That plastics identification page is pretty cool...
I think my original idea of finding a practice tank is still the best option for now.
Now if one of you can start on that "post-melt heat treat" procedure, we should be fine!
I think my original idea of finding a practice tank is still the best option for now.
Now if one of you can start on that "post-melt heat treat" procedure, we should be fine!
Or I could just pony up the $300 and buy the "new and improved" Spectra tank. Try to recoup some costs by selling the b-body tank/pump
Spectra FI Tank direct fit for 64-67 Chevelle
Spectra FI Tank direct fit for 64-67 Chevelle
 Early Christmas today! Pulled the trigger on the new spectra EFI tank, and all the hardware and straps. Should go right in.
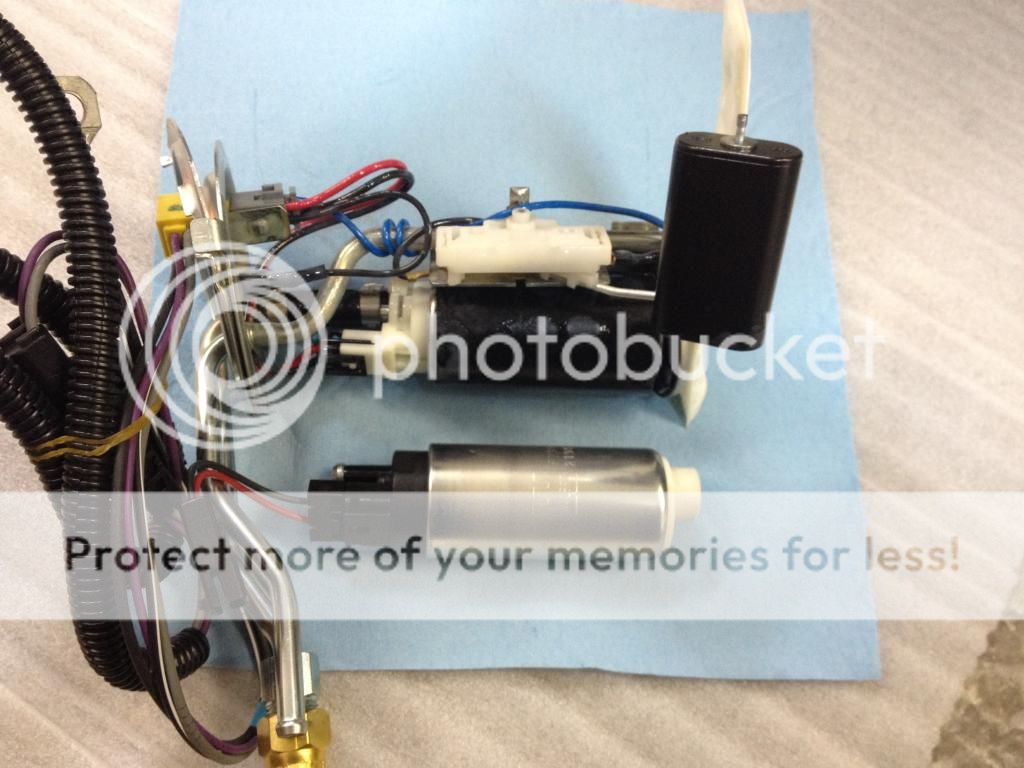
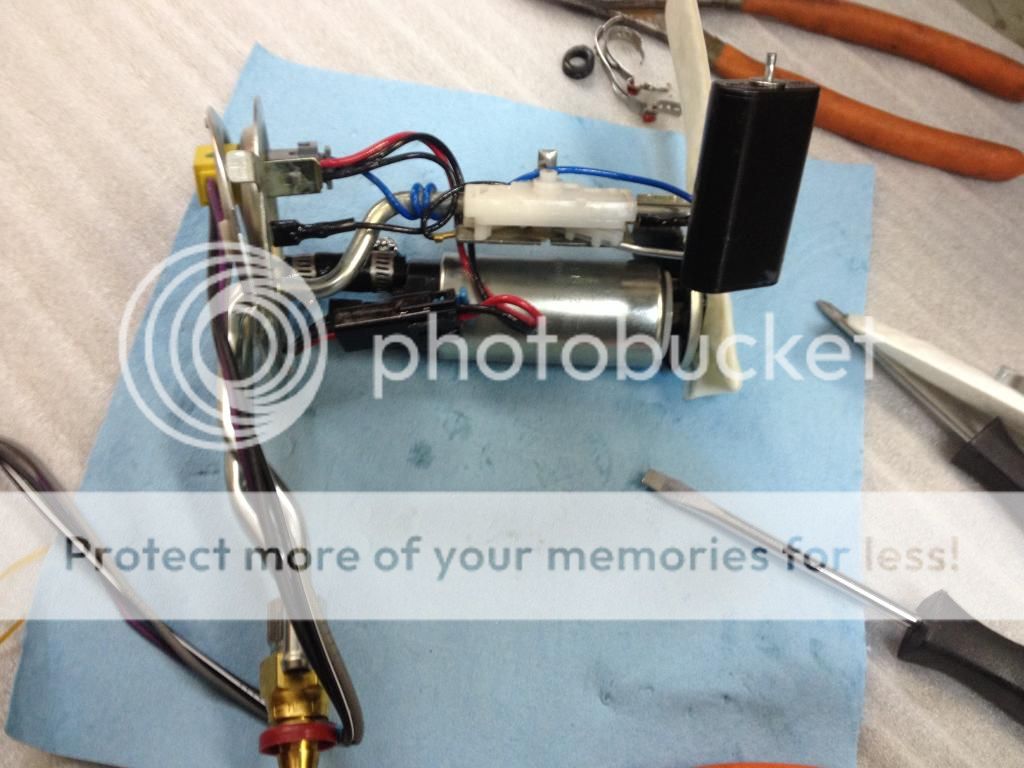
I took a chance and pulled the pump and its almost exactly the same as my racetronics 255 lph pump. Connector is the same and everything!
New pump in place:
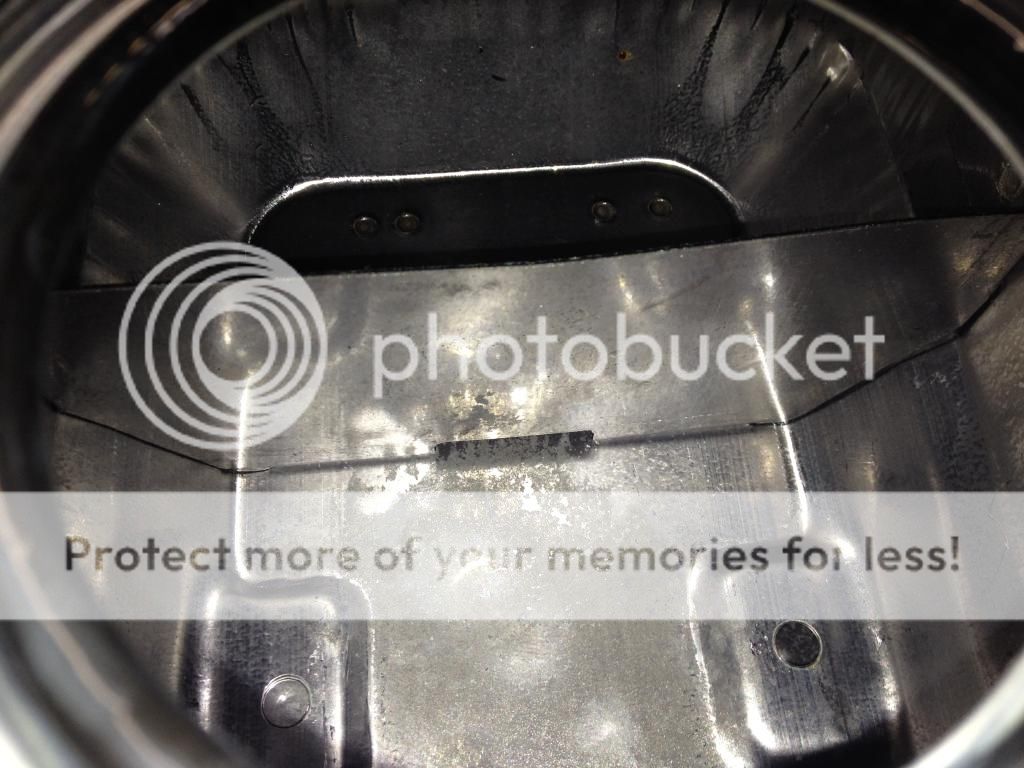
Here is a shot of the tank interior....cant really tell what the baffling looks like....
I also ordered some braided wire loom to try to get a handle on my wiring situation. The whole car kit is nice but its a bit demoralizing. Its hard to know what i can start without having to undo it later.

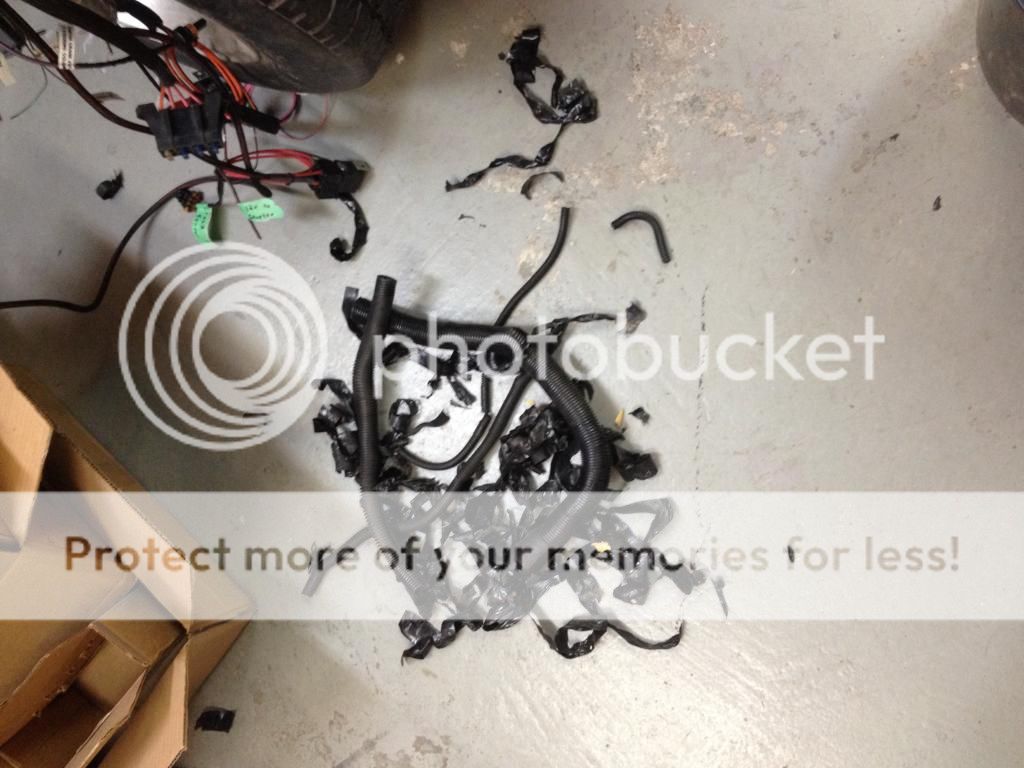
I stripped the entire split plastic loom off the ECU harness mainly because it looked like crap. I also removed several wires not being used.
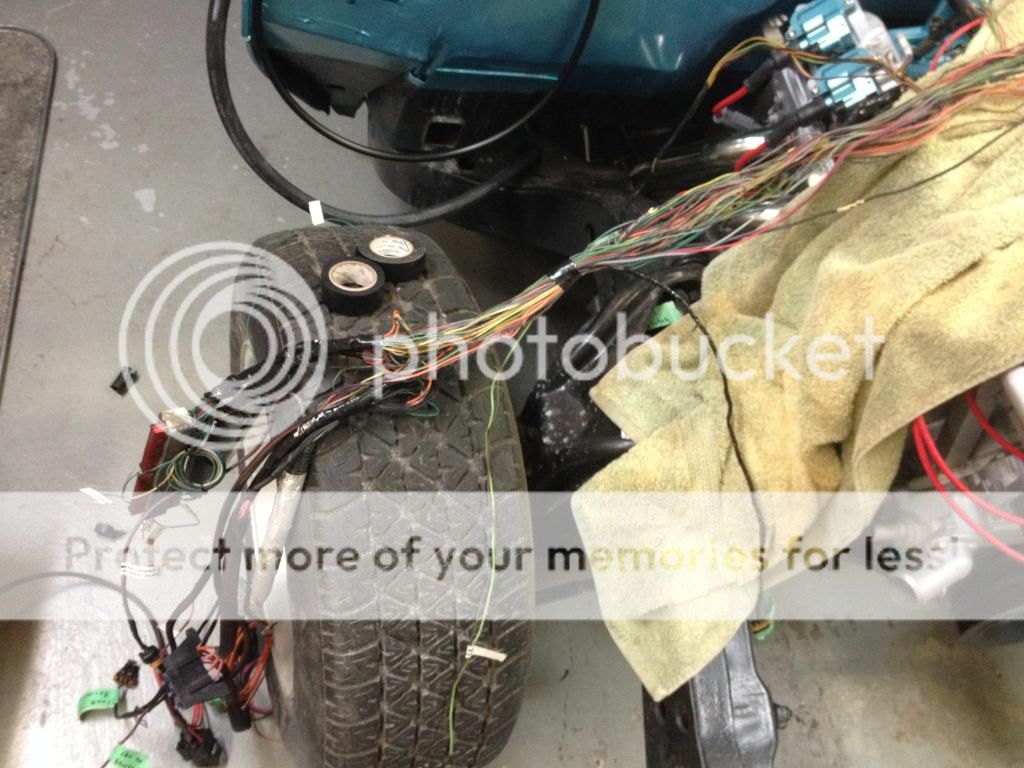
The aftermath:
Im hoping to make some progress this weekend, havent had much free time lately.
working the 2nd job to pay for it all?
Looks good. Now that you have the 2nd gas tank, you can play with your old one. If it works, sell the metal one. If not, you had fun.
~egon
Looks good. Now that you have the 2nd gas tank, you can play with your old one. If it works, sell the metal one. If not, you had fun.
~egon
No second job, but if I sold half the extra parts I have in my garage, it would pay for this project!
I think I will just put the factory pump that came in the Spectra tank in the poly tank and sell as is.
There are probably plenty of guys trying to do the LS swap in a Chevelle that could use it.
I'm still curious if it would've worked though....
I think I will just put the factory pump that came in the Spectra tank in the poly tank and sell as is.
There are probably plenty of guys trying to do the LS swap in a Chevelle that could use it.
I'm still curious if it would've worked though....
something something....
old college try...
something...
old college try...
something...
Any updates?
Yeah I have a few.....wiring is still in the works, but I have a better grip on how I'm going to route things after mocking up the ECU mount on the passenger fender well area. That was a big hurdle, as I wan't sure if I was going to put ECU in the cab or not.
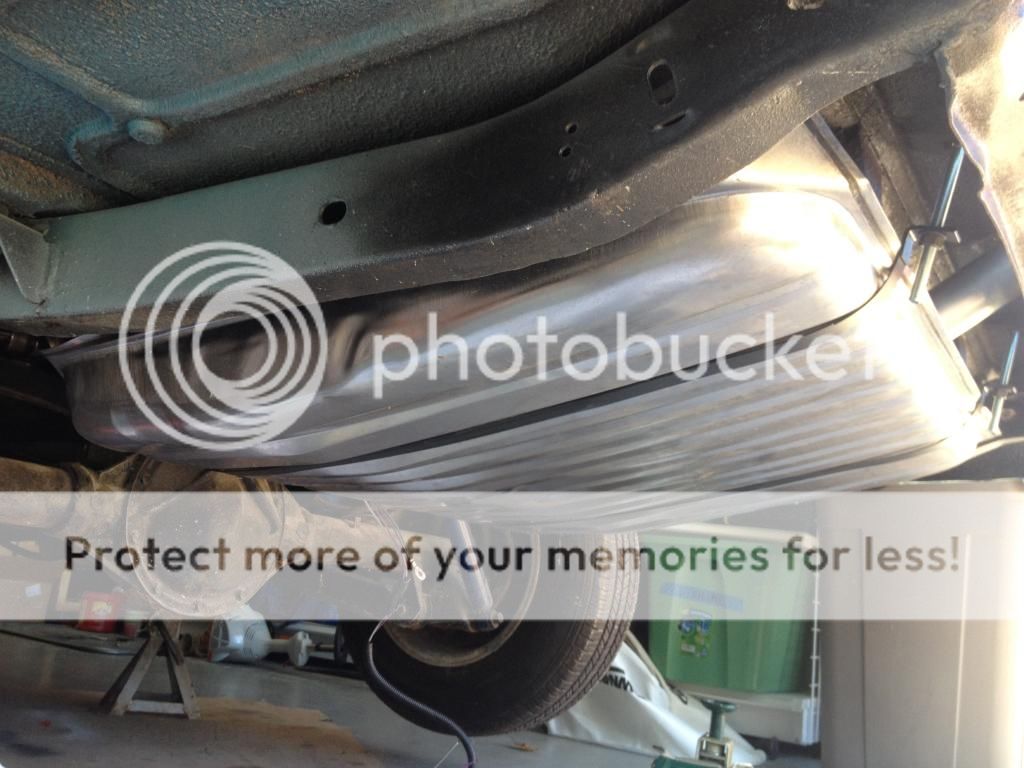
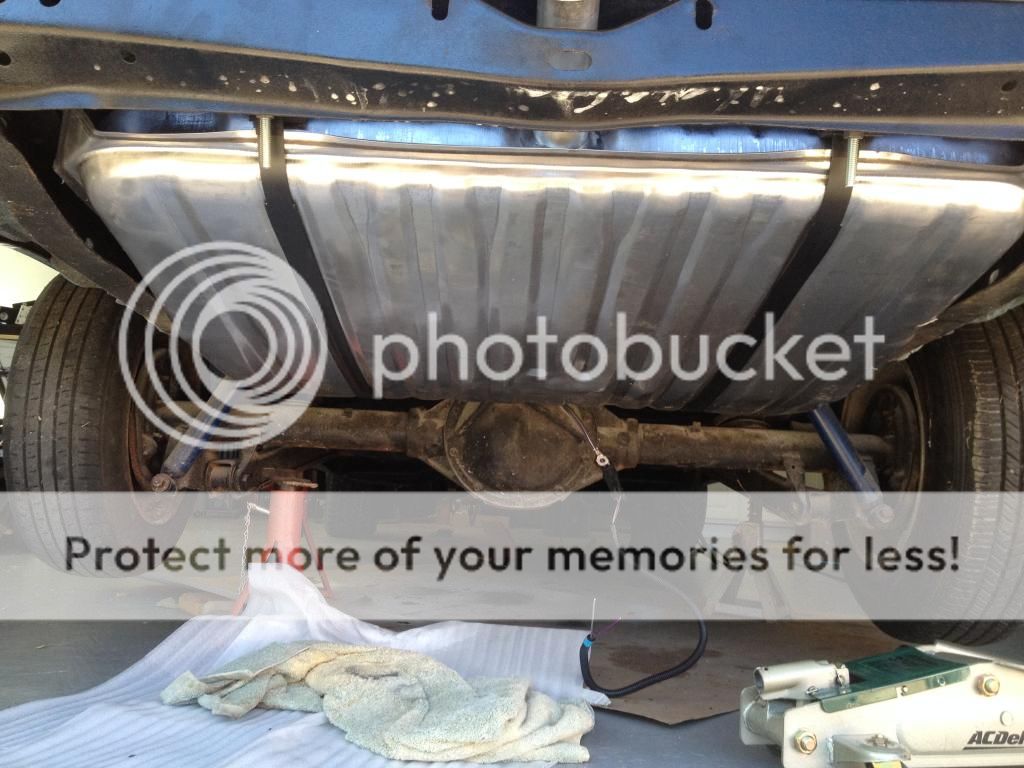
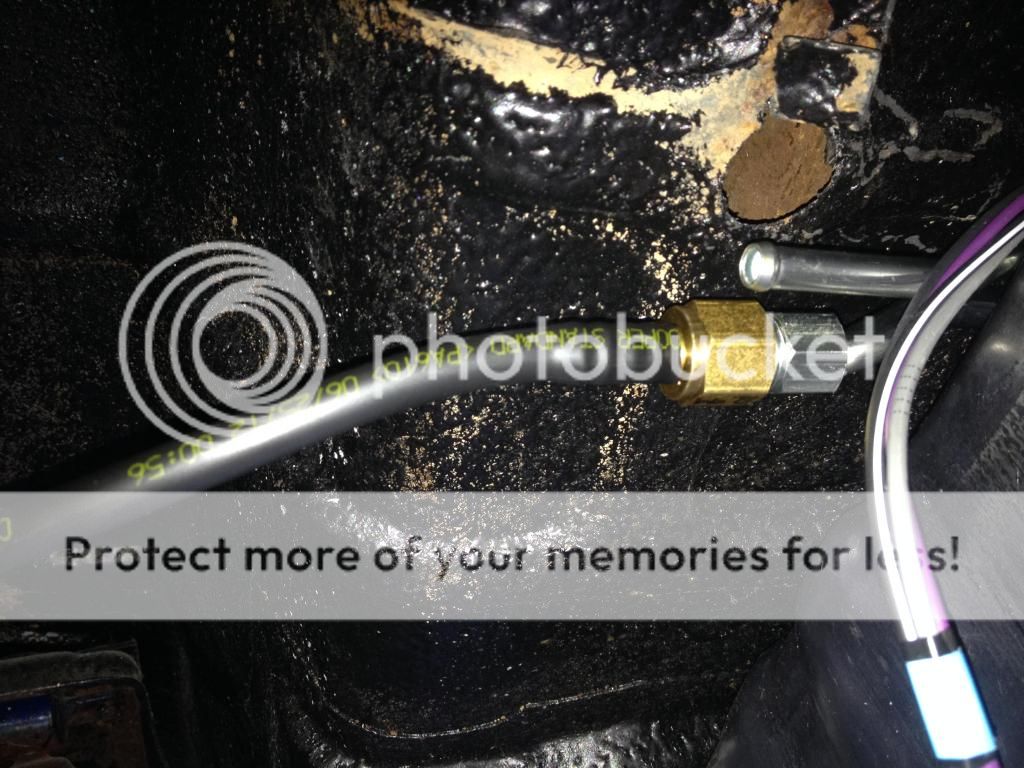
Got the fuel tank mounted up and the supply lines plumed. I still need to hook up the return line from the regulator.
My radiator arrived late last week! It is a real nice unit from Champion. All aluminum design, almost a direct fit, but I had to open up one of the mounting hole just a bit.
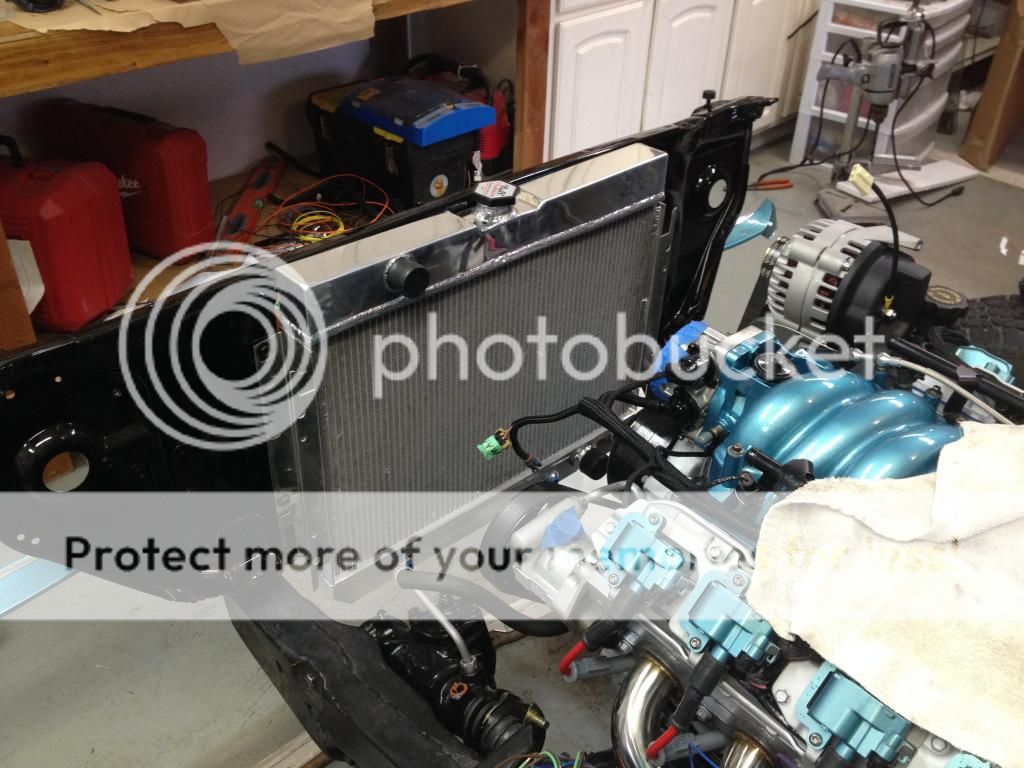
You can also see in the picture above some of my engine harness wrapped with the Braided Split loom I'm using as my "theme." It is easy to install and looks pretty sharp, I think.
Radiator view from front:

I hope to make some progress the next few days on the wiring, but I don't want to terminate wires until I know things are final.
Got the fuel tank mounted up and the supply lines plumed. I still need to hook up the return line from the regulator.


My radiator arrived late last week! It is a real nice unit from Champion. All aluminum design, almost a direct fit, but I had to open up one of the mounting hole just a bit.

You can also see in the picture above some of my engine harness wrapped with the Braided Split loom I'm using as my "theme." It is easy to install and looks pretty sharp, I think.
Radiator view from front:

I hope to make some progress the next few days on the wiring, but I don't want to terminate wires until I know things are final.
Looks great!
Are you going to do any undercarriage detailing?
Are you going to do any undercarriage detailing?
quote:The whole frame was coated with POR-15, which doesn't look very good after aging.
Looks great!
Are you going to do any undercarriage detailing?
Back before the body went on, the frame was allegedly painted black again (by the metal work guy that screwed me over).
However, the paint shop got a lot of over spray on the frame, which is obvious in these pics. The rear end is noticeably bad also. I'm trying to focus on getting it running for now, but I imagine I will try to clean things up a bit, especially anything overtly visible....
You can also see the underside of the body with the lizard skin, so not much to do there. Maybe rattle can the spots where it is a bit thin....
For example:
Oh and something else that was a major accomplishment (although it shouldn't have been)....I found a serpentine belt that fits! I ended up trying no less than 5 belts I think, until I found one that works.
It's a 6 rib, and something like 71 & 5/8ths. You can see part of the belt in the radiator pics above....
It's a 6 rib, and something like 71 & 5/8ths. You can see part of the belt in the radiator pics above....
I had the same issue finding a belt that fit, I think I tried 5 sizes also
Got a few updates for the end of 2014!
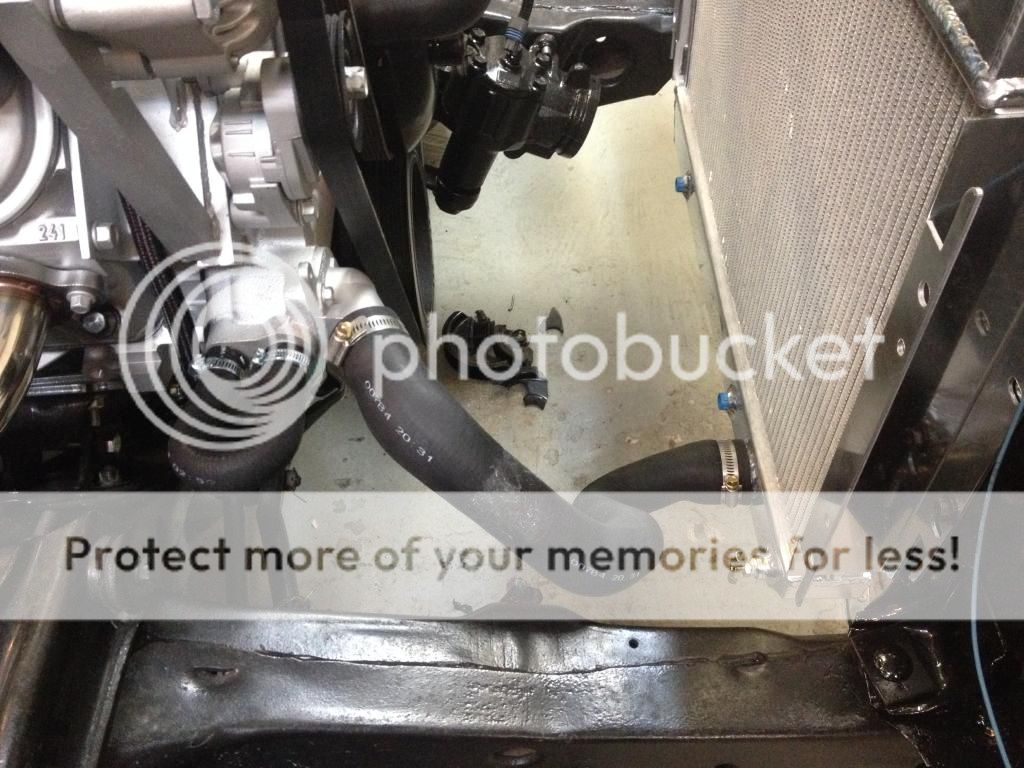
I finally got some coolant hoses finalized. No idea what these actually go to. I mocked up the bends with bailing wire, then matched them in the back of O'reilly, autozone and Advance.
You can also see the heater hose loop here, temporary until I get a vintage air setup.
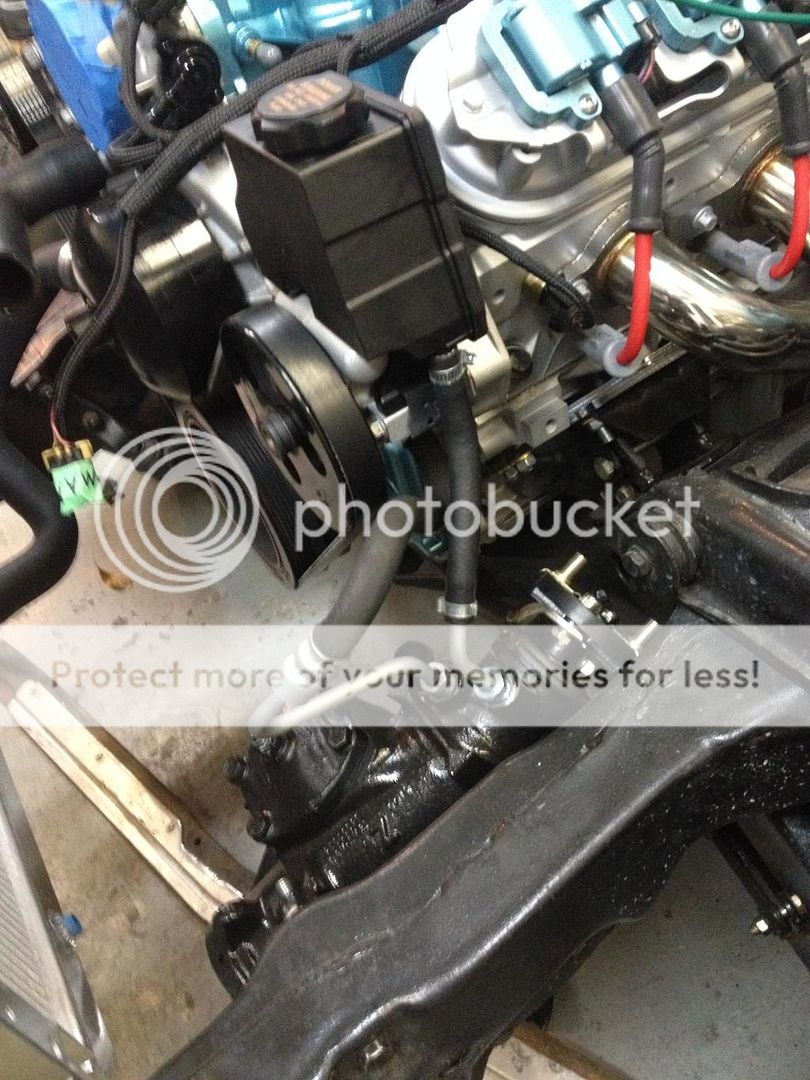
Found a low pressure hose for the power steering set up and installed the reservoir, I even filled it will fluid.
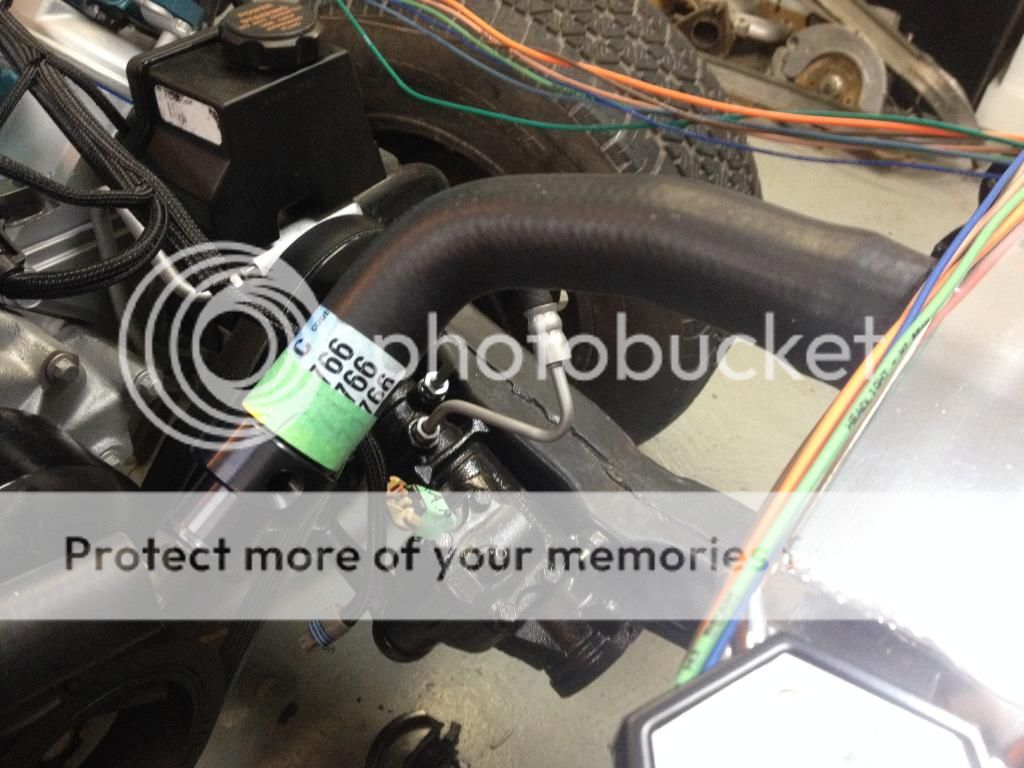 Here you can see my solution for both the upper radiator hose and the steam vent system. The coupler I bought from Jegs had a drain valve, which I removed and will replace with a barbed hose fitting for the steam line. My upper hose is still a bit short, so I may have to find something a bit longer for the radiator side.

Picked up this 5 wire MAF sensor from a buddy of mine! FREE! It's off a C5 Z06. The 5 wire MAFs combine the IAT within the MAF, so one sensor to buy.

Here is completed pedal assembly with my adjustable clutch stop installed. This stop will prevent from over stroking the master cylinder and blowing the slave. In theory, at least.

Close up detail of the adjustable stop.
I have a good lead on a e-fan solution that should bolt right up to the radiator. It's out of a 90's Ford Contour/Mercury Mystique. Still need a trunk mount battery solution. Any budget-minded suggestions?

I finally got some coolant hoses finalized. No idea what these actually go to. I mocked up the bends with bailing wire, then matched them in the back of O'reilly, autozone and Advance.
You can also see the heater hose loop here, temporary until I get a vintage air setup.

Found a low pressure hose for the power steering set up and installed the reservoir, I even filled it will fluid.
 Here you can see my solution for both the upper radiator hose and the steam vent system. The coupler I bought from Jegs had a drain valve, which I removed and will replace with a barbed hose fitting for the steam line. My upper hose is still a bit short, so I may have to find something a bit longer for the radiator side.

Picked up this 5 wire MAF sensor from a buddy of mine! FREE! It's off a C5 Z06. The 5 wire MAFs combine the IAT within the MAF, so one sensor to buy.

Here is completed pedal assembly with my adjustable clutch stop installed. This stop will prevent from over stroking the master cylinder and blowing the slave. In theory, at least.

Close up detail of the adjustable stop.
I have a good lead on a e-fan solution that should bolt right up to the radiator. It's out of a 90's Ford Contour/Mercury Mystique. Still need a trunk mount battery solution. Any budget-minded suggestions?
Battery cables from a BMW E30 junker and a cheap battery box from the parts store (or you can get one of the bling aluminum boxes). Or if you have access to free/cheap welding cable, that's what I used with my 4runner.
quote:Although you do need a rather large crimping tool for heavy gauge cable if you go the welding cable route. I've got one in Austin if you go down that road and want to borrow it.
Battery cables from a BMW E30 junker and a cheap battery box from the parts store (or you can get one of the bling aluminum boxes). Or if you have access to free/cheap welding cable, that's what I used with my 4runner.
Actually now that I think about it, I have what I think is some 1/0 wire that I bought a while back when I had to re-wire from house weather head to breaker box.
It's the hard PVC coating and not easy to work with, but I may try it.
That's all I need is another crimping requirement to try to find a tool for.....
It's the hard PVC coating and not easy to work with, but I may try it.
That's all I need is another crimping requirement to try to find a tool for.....
Such a pathetic update, considering how long it has been. This engine should be running by now, but I've just had other things keeping me busy.
Here is where I am:
I got a battery trunk mount kit and a battery, so that wasn't too much of a task. Still need to finalize the positive cable routing and terminate it at starter. Here is an in progress pic. I still need to take one of it mounted where it is. I mounted it right up against the wheel well on that little shelf.
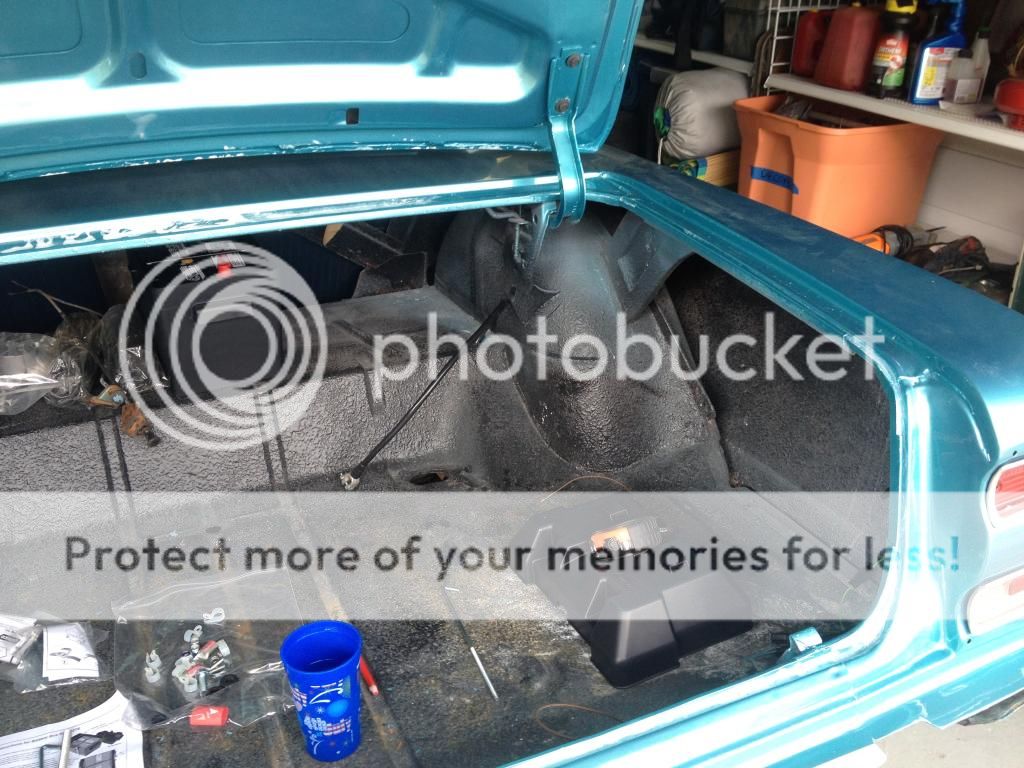
Here is where the ground attaches to frame. Should be a solid ground.

My main focus now is to finish the wiring necessary to start the engine, so ECU and fans mainly.
In order to mount ECU and fan relays, I needed to install the passenger fender:
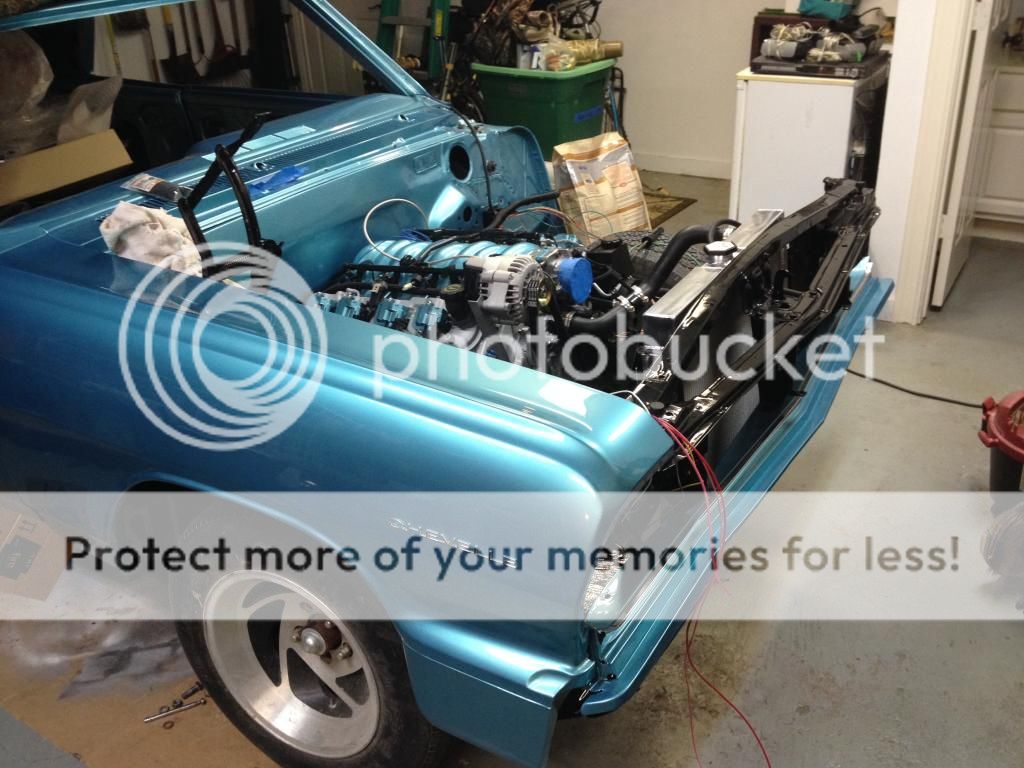
ECU will be mounted where inner fender well meets the fender/firewall area. It will be tucked away out of sight and should be protected from elements/engine heat. You can see some of the ECU related relays and a maxi fuse at the bottom of this pic. They will likely end up mounted to the inner fender well too.
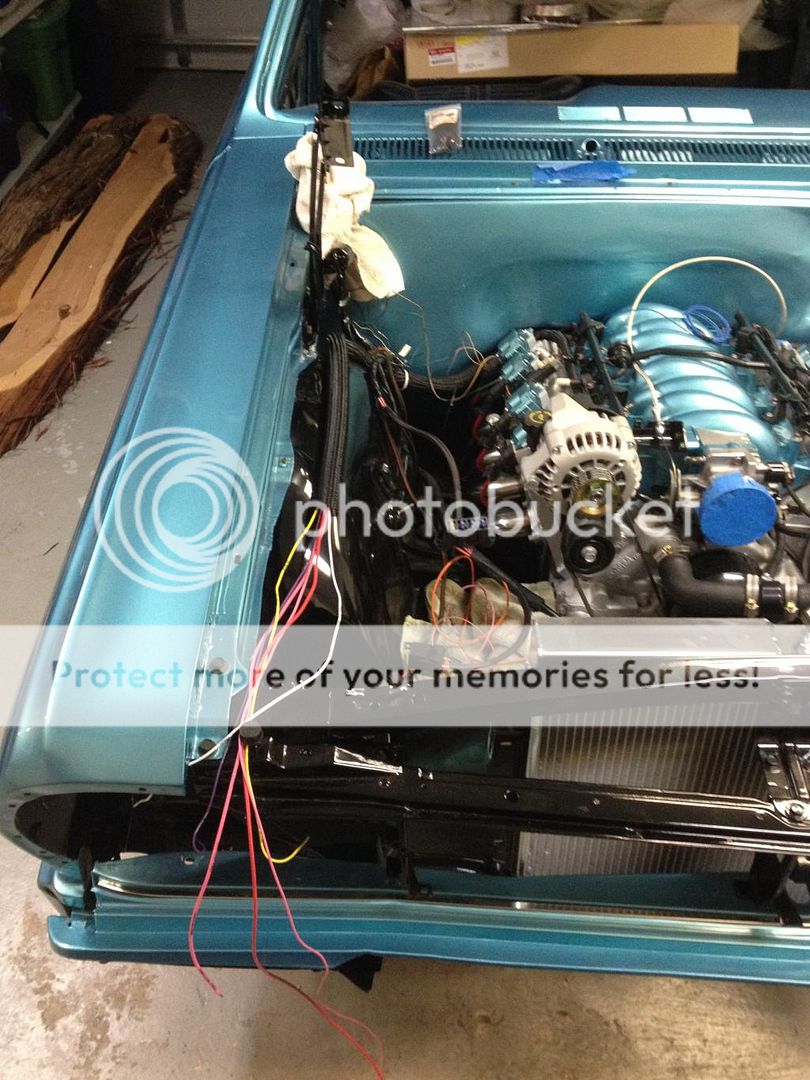
You can also see the upper radiator hose is clamped together. I install my steam line too, so all engine cooling hoses are done, only need to mount coolant reservoir and trim the hose.
Also completed is the return fuel line from the pressure regulator back to tank. Only remaining fuel items is to run power supply to pump and terminate fuel line at engine.
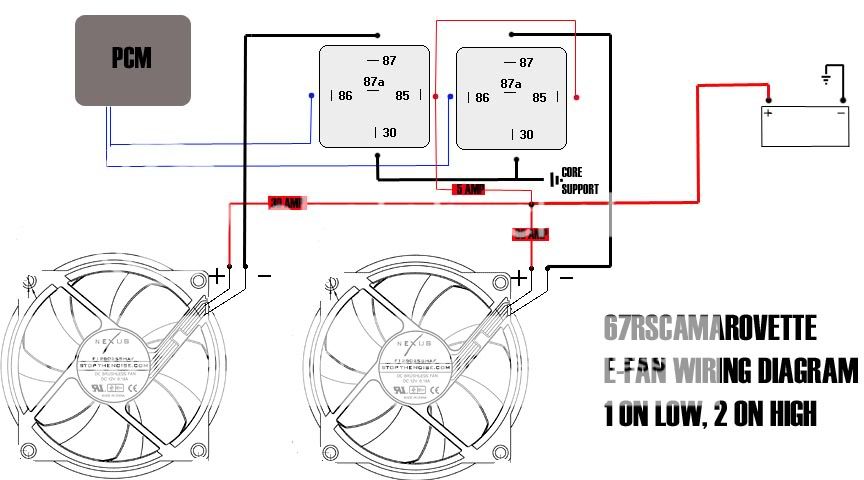
The list is getting shorter! Here is my schematic I'm planning on using for my electric fan relays. This way the ECU will control both fans. I already have the relays.
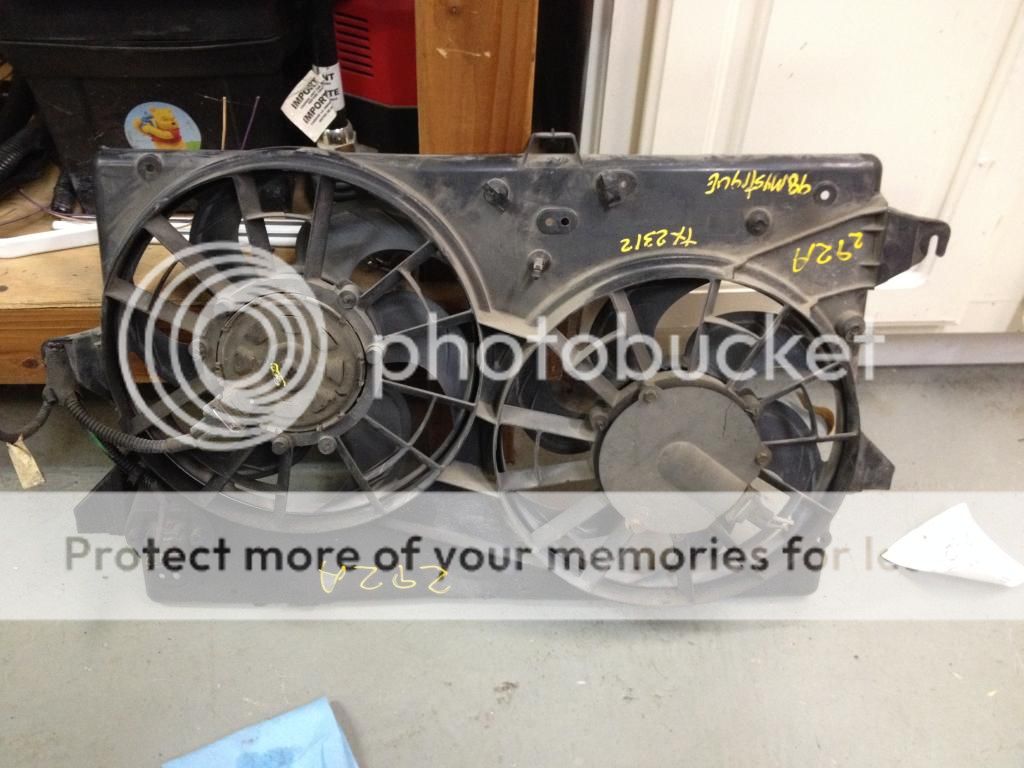
Oh and here is the fan assembly I picked up from a yard for $50. It's from a Ford Contour and fits the radiator almost perfectly! I've since cleaned it up...
Here is where I am:
I got a battery trunk mount kit and a battery, so that wasn't too much of a task. Still need to finalize the positive cable routing and terminate it at starter. Here is an in progress pic. I still need to take one of it mounted where it is. I mounted it right up against the wheel well on that little shelf.

Here is where the ground attaches to frame. Should be a solid ground.

My main focus now is to finish the wiring necessary to start the engine, so ECU and fans mainly.
In order to mount ECU and fan relays, I needed to install the passenger fender:

ECU will be mounted where inner fender well meets the fender/firewall area. It will be tucked away out of sight and should be protected from elements/engine heat. You can see some of the ECU related relays and a maxi fuse at the bottom of this pic. They will likely end up mounted to the inner fender well too.

You can also see the upper radiator hose is clamped together. I install my steam line too, so all engine cooling hoses are done, only need to mount coolant reservoir and trim the hose.
Also completed is the return fuel line from the pressure regulator back to tank. Only remaining fuel items is to run power supply to pump and terminate fuel line at engine.
The list is getting shorter! Here is my schematic I'm planning on using for my electric fan relays. This way the ECU will control both fans. I already have the relays.

Oh and here is the fan assembly I picked up from a yard for $50. It's from a Ford Contour and fits the radiator almost perfectly! I've since cleaned it up...

About time.
Full speed ahead!
I'm getting pretty serious about getting the motor started this month, so with the help of a fellow muscle car enthusiast, I'm jumping right in.
First off, here is the coolest thing that's happened since last update. These showed up:
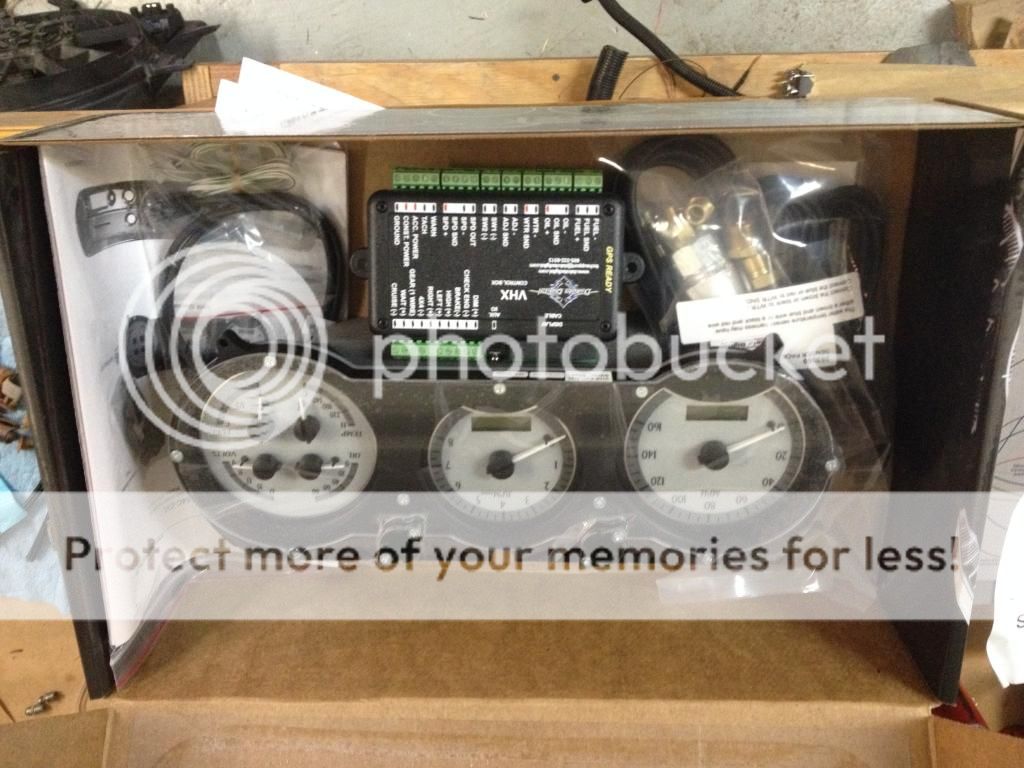 ,
,
It didn't take much time at all to get them wired up, especially with the American Auto wiring kit and schematics. I did end up drilling out the oil filter housing because it was the easiest option.
Note all the harnesses and fittings it comes with:

Here is the brain, easy set up with all terminals labeled:
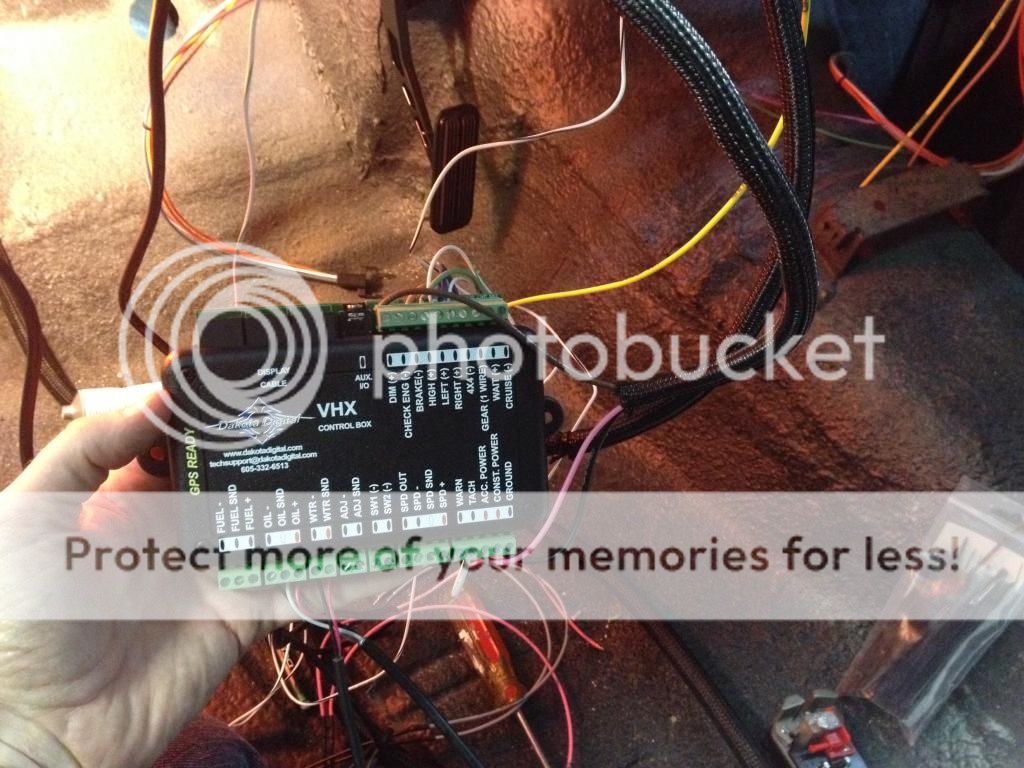
Once the brain is installed, it connects to the gauge assembly with a CAT 5 cable and that's it. Super clean.
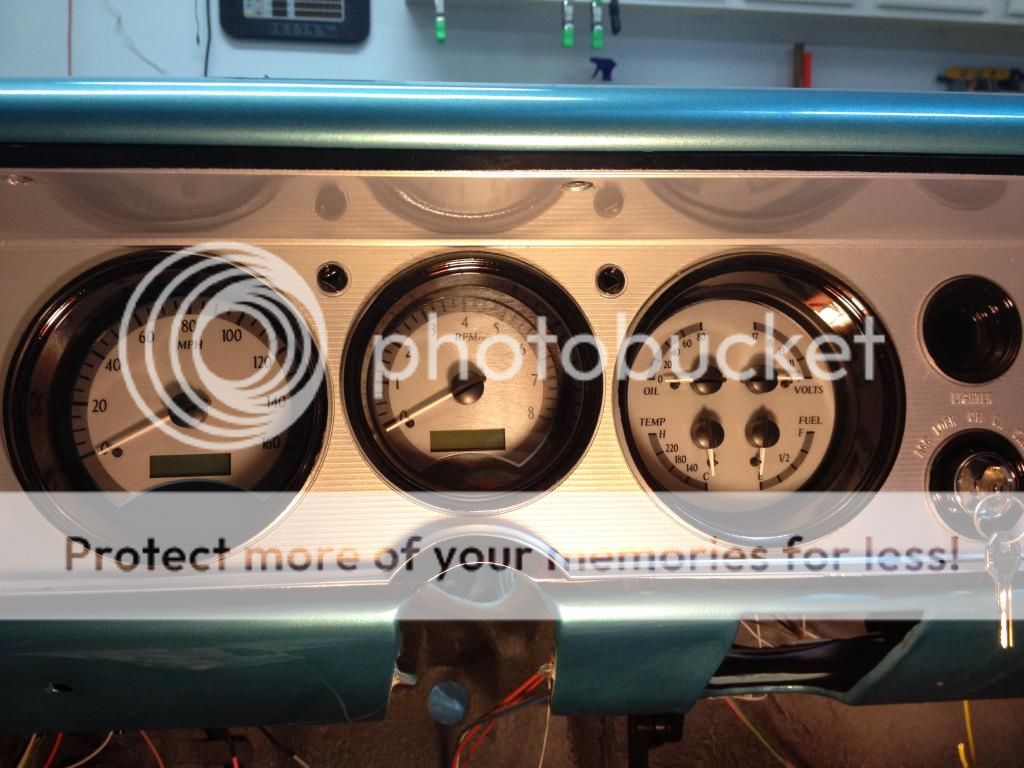
I'm way excited about these, and hope to get power to then ASAP so I can see them in action.
Other items accomplished. Wired and soldered up the fuel pump connection at pump. Routed the pump wire and positive battery cable up to engine bay. Soldered Tach and Speedo connections to main wire harness. Wired extensions on the ECU high and low fan controls, so that they reach the relays near radiator.
Lengthened the maxifuse leads on the ECU harness to get it inside the cab. Kinda a step backwards, but this turned out to be the cleanest install while still be protected from elements:
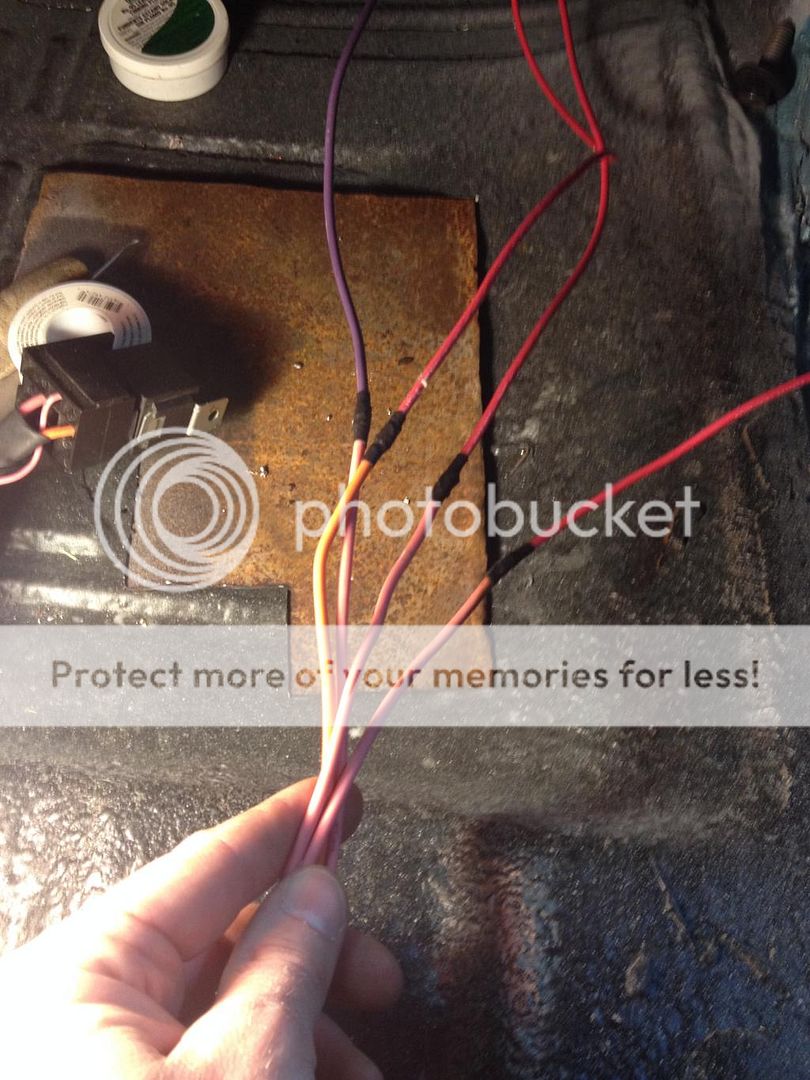
Started working on the fan setup. Chose location for relays and planned the routing of all the associated wires (as seen in Fan schematic in previous post.)
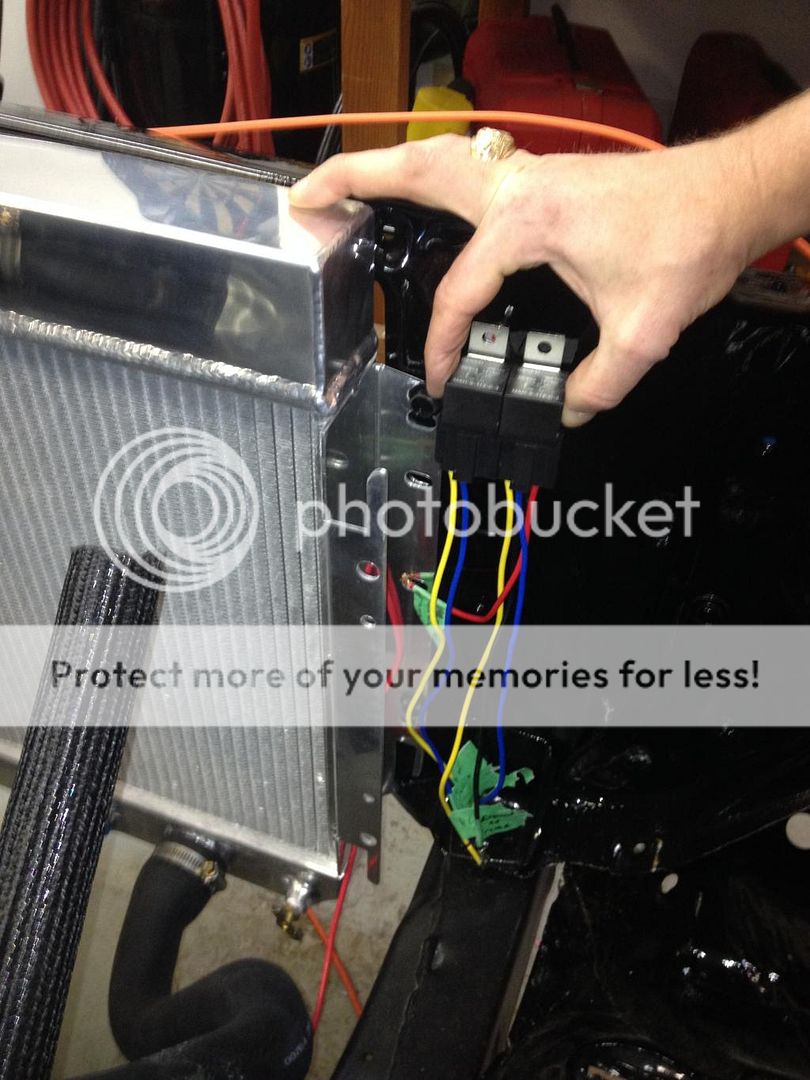
Tonight I spent some time making the original fan connectors usable. I soldered on my wire runs to relays and shrink wrapped them up.
Before: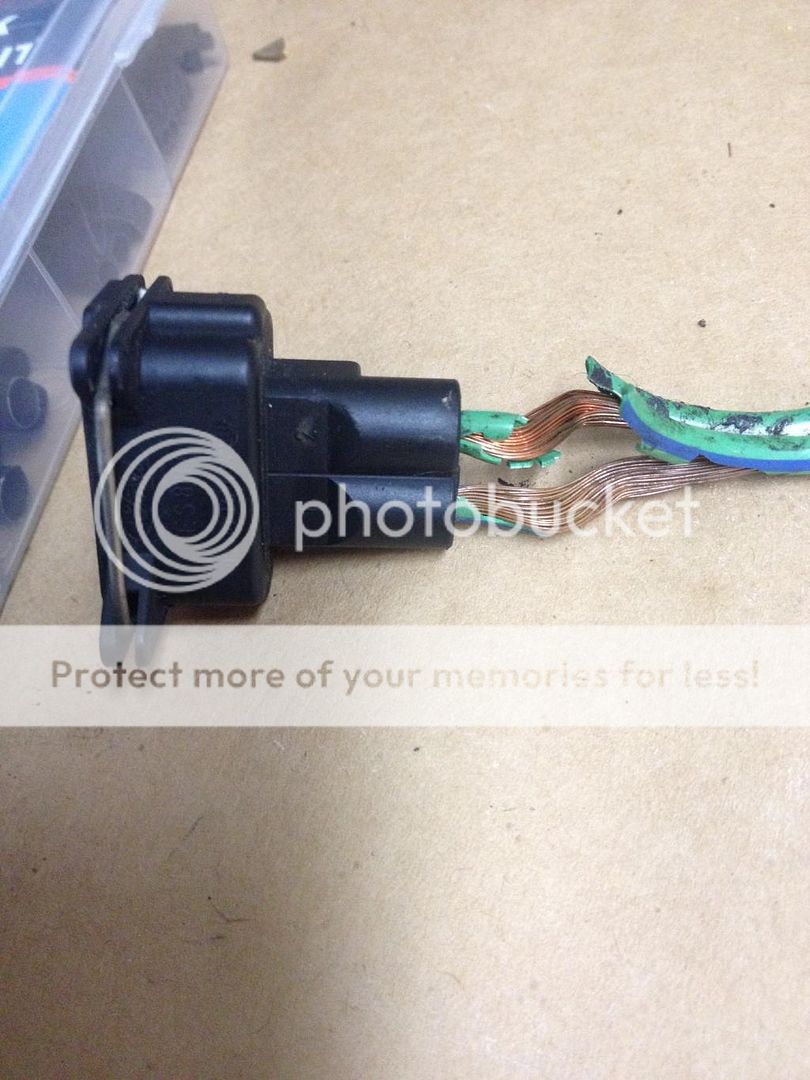
After:

Also I seem to have decided on a mounting solution for the ECU. I found this guy's setup and it looks near perfect for where I've already planned on putting mine. Obviously mine will be on passenger side, but you get the idea.

Here is his write up:
So I ordered the H2 bracket from GM and I will try to find the threaded bar this weekend....
Hopefully more updates soon!
I'm getting pretty serious about getting the motor started this month, so with the help of a fellow muscle car enthusiast, I'm jumping right in.
First off, here is the coolest thing that's happened since last update. These showed up:
 ,
,
It didn't take much time at all to get them wired up, especially with the American Auto wiring kit and schematics. I did end up drilling out the oil filter housing because it was the easiest option.
Note all the harnesses and fittings it comes with:

Here is the brain, easy set up with all terminals labeled:

Once the brain is installed, it connects to the gauge assembly with a CAT 5 cable and that's it. Super clean.

I'm way excited about these, and hope to get power to then ASAP so I can see them in action.
Other items accomplished. Wired and soldered up the fuel pump connection at pump. Routed the pump wire and positive battery cable up to engine bay. Soldered Tach and Speedo connections to main wire harness. Wired extensions on the ECU high and low fan controls, so that they reach the relays near radiator.
Lengthened the maxifuse leads on the ECU harness to get it inside the cab. Kinda a step backwards, but this turned out to be the cleanest install while still be protected from elements:

Started working on the fan setup. Chose location for relays and planned the routing of all the associated wires (as seen in Fan schematic in previous post.)

Tonight I spent some time making the original fan connectors usable. I soldered on my wire runs to relays and shrink wrapped them up.
Before:

After:

Also I seem to have decided on a mounting solution for the ECU. I found this guy's setup and it looks near perfect for where I've already planned on putting mine. Obviously mine will be on passenger side, but you get the idea.

Here is his write up:
quote:
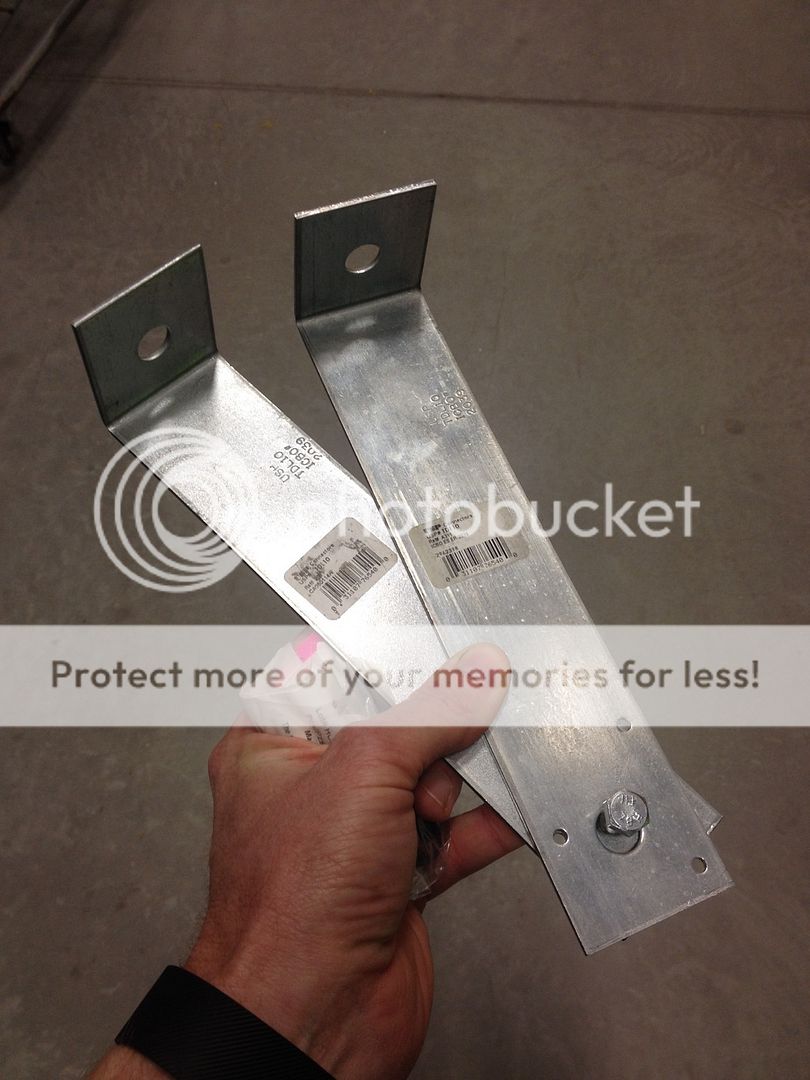
Here's where I mounted my ECU. I worked with the truck harness and didn't add any wiring to lengthen it. This was a fairly logical place to put it out of the way of water etc. I used the Humer H2 ECU mounting bracket which was about $25 from GM. I trimmed it and mounted it to 2 L-brackets I purchaed from Home Depot. Using some threaded bar stock I made made hood hinge studs by cutting a 3" piece and jam nutting it to the existing fender nuts. This allowed me to bolt the ECU bracket on the backside of the fender while using a nut to fasten the hood hinge. I can adjust the hood hinge without tampering with the ECU mount and vice versa.
So I ordered the H2 bracket from GM and I will try to find the threaded bar this weekend....
Hopefully more updates soon!
Looking forward to first startup vid
quote:You and me both, brother.
Looking forward to first startup vid
My punchlist as of now:
- Terminate positive battery cable, fuel pump wire and fuel line in engine bay
- Finalize routing of above, including loom and clamps
- Mount ECU.
- Run power wire from starter solenoid to fans. Finish relay wiring.
- Wire remaining ECU items-fuel pump relay, ECU battery power and ignition power
- Filter and fluids. (Bleed clutch?)
- ????
- Profit.
I'd go ahead and bleed it...especially if everything is accessible.
quote:Hopefully everything is, if not, too late!
I'd go ahead and bleed it...especially if everything is accessible.
My only concern is interference with the steering column going back in, since it is out right now. That and I don't have the steering column to firewall pass-through gasket, which I'm assuming will have to be modified for the clutch master cylinder.
quote:+1
Looking forward to first startup vid
UPDATE:
Last night I mounted my radiator overflow tank up, took longer than it should.
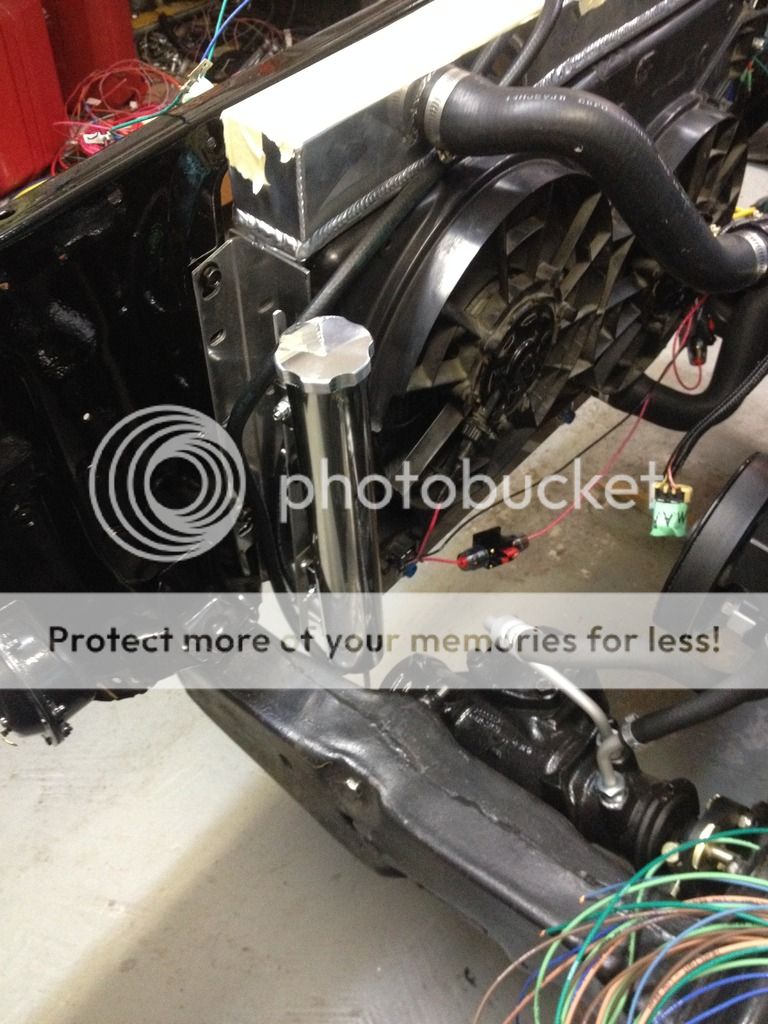
(Excuse the poor fan breaker appearance, I'm waiting to see if all that works before I button it down)
I thought I had all my hardware to mount the ECU, but I need some more jam nuts. I'll stop by after work today for that.
I also started on my PCV system. Mounted my oil separator in a somewhat inconspicuous area. I need an in-line PCV valve and some more vacuum line and that will be done. Here is my schematic, more or less:
 Here is where the separator ended up:

12v Power cable from battery to starter!
I picked up some split plastic loom, which should hold up better on the undercarriage than my braided split loom. Sucks to work with though

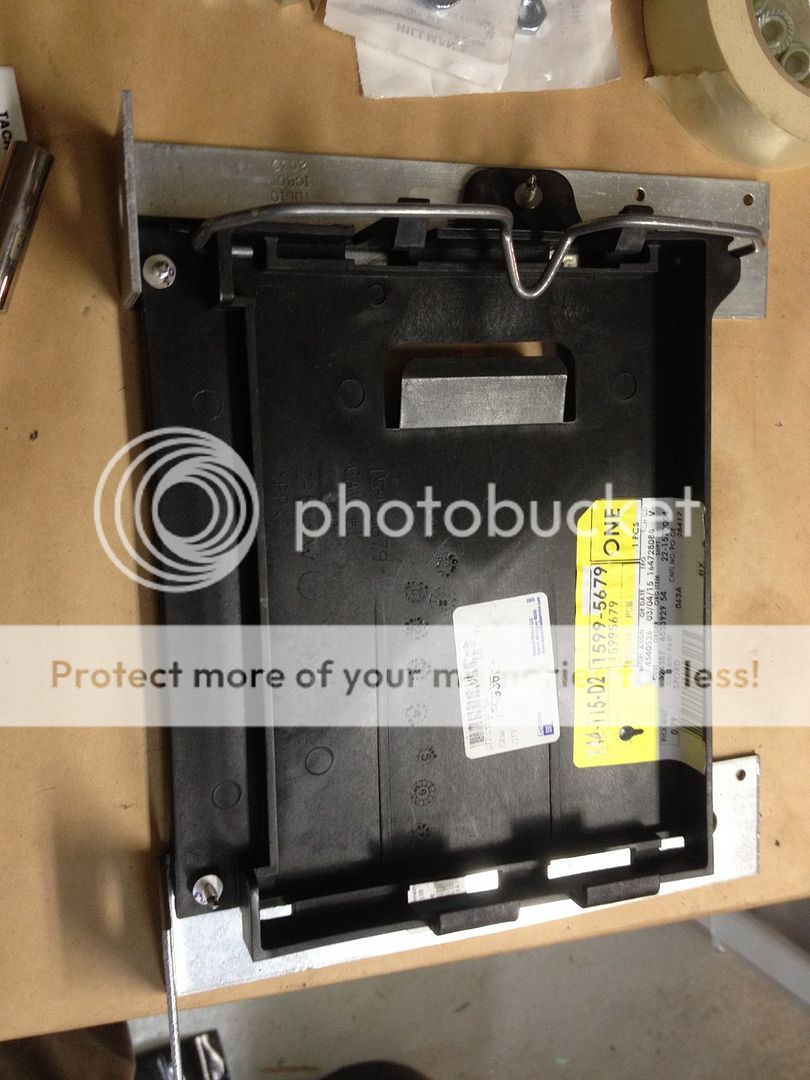
ECU mounting brackets and tray. I think this is going to work very nicely actually.
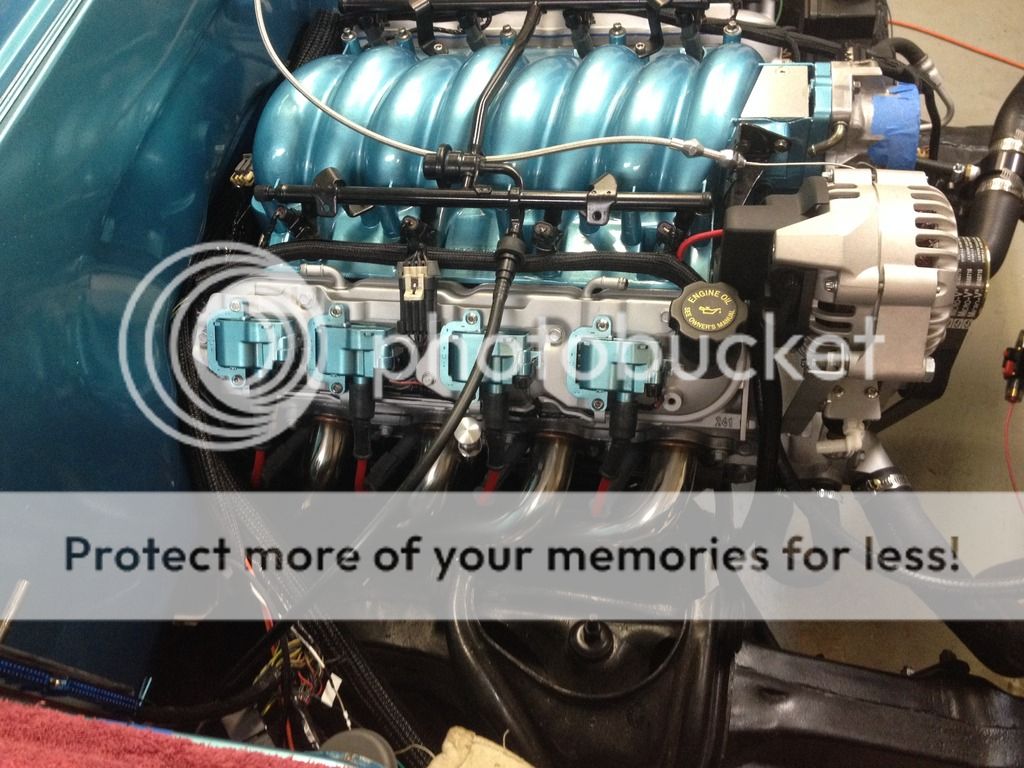
Last thing I did last night was terminate the fuel line and connect to rail!
I'm not completely happy with the way this looks, but one the fenders go back on, it may look different. I may wrap the nylon with something to protect it better from heat, etc. Thoughts?
This thing is scary close to being ready to start. I may leave the ECU unmounted for test start since I may have to tinker if it doesn't kick right off. My fan relays still need completion, but it will definitely start without those....
Oh and I ordered my intake set up. Combination of silicon bends and couplers and a 4" straight aluminum pipe run with a conical filter at the end of that. Hoping it goes together OK.
Last night I mounted my radiator overflow tank up, took longer than it should.

(Excuse the poor fan breaker appearance, I'm waiting to see if all that works before I button it down)
I thought I had all my hardware to mount the ECU, but I need some more jam nuts. I'll stop by after work today for that.
I also started on my PCV system. Mounted my oil separator in a somewhat inconspicuous area. I need an in-line PCV valve and some more vacuum line and that will be done. Here is my schematic, more or less:
 Here is where the separator ended up:

12v Power cable from battery to starter!
I picked up some split plastic loom, which should hold up better on the undercarriage than my braided split loom. Sucks to work with though

ECU mounting brackets and tray. I think this is going to work very nicely actually.


Last thing I did last night was terminate the fuel line and connect to rail!
I'm not completely happy with the way this looks, but one the fenders go back on, it may look different. I may wrap the nylon with something to protect it better from heat, etc. Thoughts?

This thing is scary close to being ready to start. I may leave the ECU unmounted for test start since I may have to tinker if it doesn't kick right off. My fan relays still need completion, but it will definitely start without those....
Oh and I ordered my intake set up. Combination of silicon bends and couplers and a 4" straight aluminum pipe run with a conical filter at the end of that. Hoping it goes together OK.
Terminate positive battery cable, fuel pump wire and fuel line in engine bayFinalize routing of above, including loom and clamps- Mount ECU.
Run power wire from starter solenoid to fans. Finish relay wiring.Wire remaining ECU items-fuel pump relay, ECU battery power and ignition power- Filter and fluids. (Bleed clutch?)
- ????
- Profit.
MIGHT AS WELL FINISH IT AND GET US OUR OPEN HEADER VID
Or hell wait for me, I'd come watch first start up and giggle like Ron Swanson
Or hell wait for me, I'd come watch first start up and giggle like Ron Swanson

So close. Looking great.
Featured Stories
See All
A&M's growing 2026 class features pledges from across the country
by Ryan Brauninger
21:35
1d ago
5.5k
6:21
5h ago
785
Buzz Williams' Ags are proving why experience, continuity still matter
by Luke Evangelist


