Outdoors
Sponsored by

1994 Bayliner Capri Rebuild

24,468 Views | 55 Replies | Last: 11 yr ago by BurrOak
CrossTimbersW
How long do you want to ignore this user?
AG
Where the hell is the end of the story and the final pictures?!

I know she made her maiden voyage this weekend and I want pictures!


BurrOak
How long do you want to ignore this user?
AG
Yeah, I splashed the boat for the first time this weekend. Took her out to Lake Somerville on Saturday, then Gibbons Creek on Sunday. I even managed to bring home a few catfish too. Its been almost 2 years since I had the boat on the water last.

The boat is pretty much done, shy of installing the trolling motor & batteries, stereo, and a few other misc wiring jobs.

I will try to update this thread as the week goes on.
MouthBQ98
How long do you want to ignore this user?
AG
Quick question to save you lots of trouble, potentially. When you finished out the new plywood sole, did you just coat it with resin or did you apply a later of glass and resin? I ask because most pine and other wood, as it slowly dries and is subjected to stresses, will do something called "Checking", or develop long thin cracks along the grain. IF there's no fiberglass coating to seal and cover the grain and the resin on top cracks though, water will rapidly soak the plywood and deteriorate it again in a few years.

I learned this the hard way on the first boat I built.

Glad to hear it is back out on the water. It's pretty cool to know you're riding on something you built or rebuilt yourself, huh?

[This message has been edited by MouthBQ98 (edited 4/29/2013 12:21p).]
BurrOak
How long do you want to ignore this user?
AG
Mouth,

Yes both sides of those boards got fiberglass and resin. The top side got 2 layers and the bottom just got one.

I used 2.5oz chopped strand mat for the glass on both sides.

[This message has been edited by BurrOak (edited 4/29/2013 12:28p).]
MouthBQ98
How long do you want to ignore this user?
AG
Sounds like you got it covered. We had an old boston whaler when I was a kid and the guy we bought it from did what you did, but he went back in with just a lot of paint, and before long, all the new plywood was water saturated and the boat weighed way more than it should have. I bet that boat moves with that i/o setup.
RogueAg
How long do you want to ignore this user?
AG
Ah the joys of fiberglass work... I know it well. I have a project of a similar nature... only landbased instead. An old '79 Corvette on which I've replace a rear fender, fiberglassed in both bumpers and have some repair work around the edge of the engine compartment. I don't envy all that work you're doing... it's not difficult, but time consuming work. And yeah... that dust gets everywhere and leaves you itchy no matter what you wear.
coop-aero-06
How long do you want to ignore this user?
AG
I just started working on my Bayliner this week. I basically have the same exact job ahead of me. Thanks again for sharing. Any finished pictures?
BurrOak
How long do you want to ignore this user?
AG
Well, I have been saying for awhile that I was going to post updates. So here goes...

Upon reading through everything, I realized that I havent even posted an outside shot of the boat. This was what the boat looked like the day I bought it.


And from that angle, not much has changed.

Well, once I finally got the plywood down for the new deck and got all the seams filleted, it was now time to put the fiberglass & resin matrix down on top. The first thing I did was cut the fiberglass mat to fit the new deck. Once that is done, I rolled out a layer of the poly resin to coat the new wood, which means I am just painting it on with the same paint roller I mentioned before. As soon as that's applied, I immediately lay the cut-to-fit fiberglass mat down, and then add more resin to on top to coat it completely. I put enough resin down so that the fiberglass mat was clear, then I'd add just a little bit more.

Here are a few pics of what that looked like. Again, I wished I would have gotten more pics of this process.


Those are just blue shop towels I have covering the fuel tank so that I don't get resin on it.


[This message has been edited by BurrOak (edited 5/16/2013 9:51p).]
BurrOak
How long do you want to ignore this user?
AG
I added 3 layers of fiberglass to the this section, as it is a very high stress area of my boat. I wanted to make it as stout as I could.


Next, I added a 6" fiberglass tabbing strip on the seams. For these, I used the same 2.5oz chopped strand mat.


[This message has been edited by BurrOak (edited 5/16/2013 10:32p).]
BurrOak
How long do you want to ignore this user?
AG
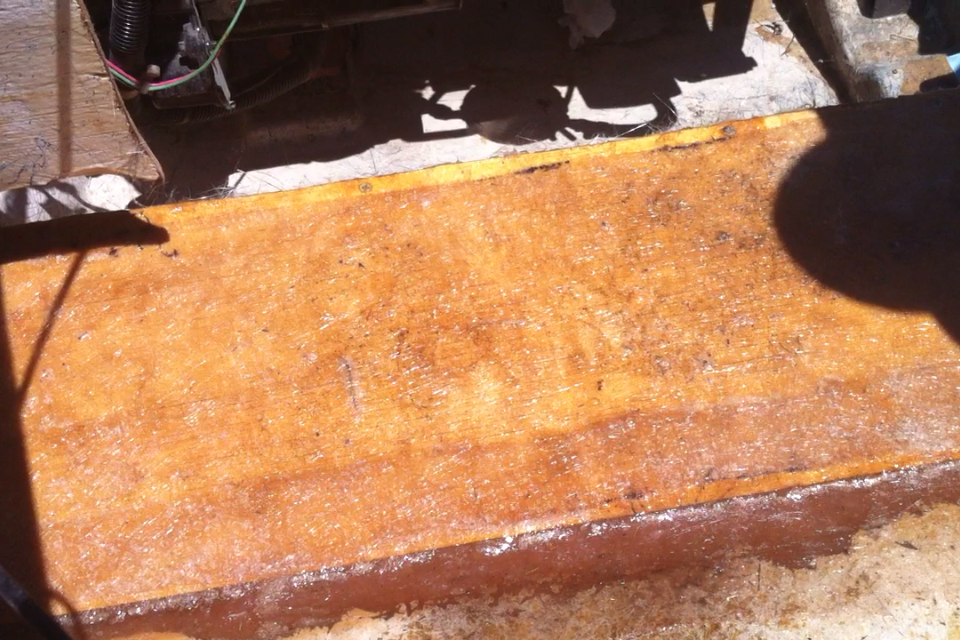
And here is the cured product.


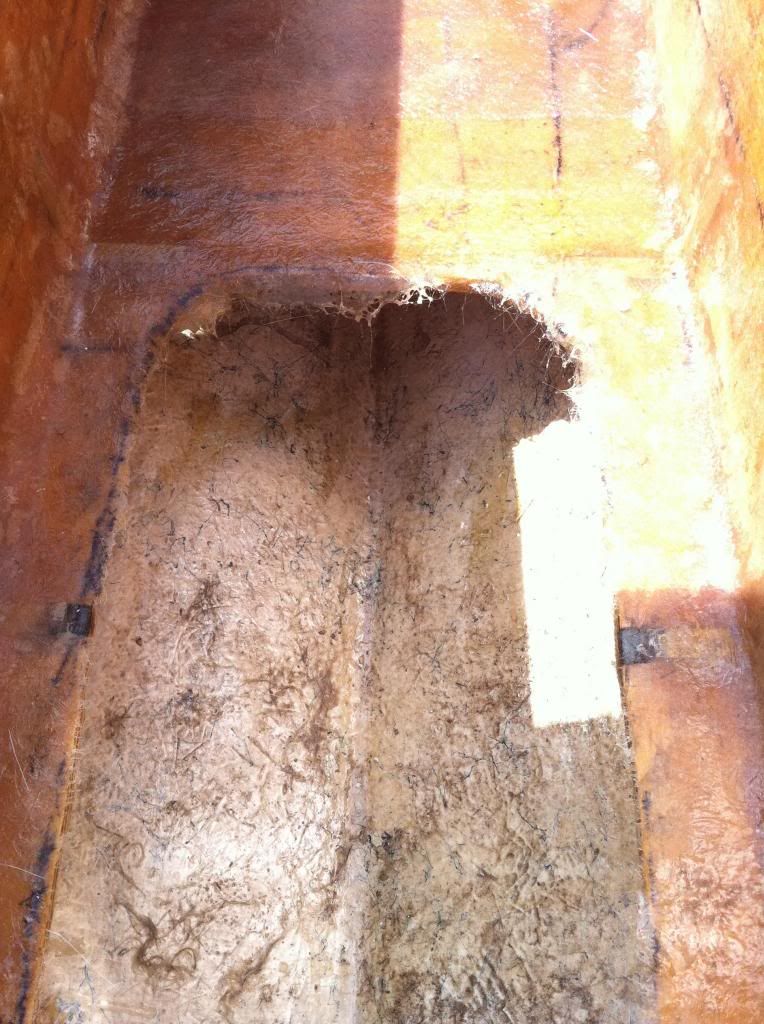
Above, you can see the air pockets that would form as the fiberglass cured. No matter how hard I tried, I could not stop this from happening. I had a metal roller tool I used that was supposed to keep this from happening, and to an extent, it did. But there were several place where this occurred. In all these spots, I'd sand down the air bubble and add a fiberglass patch.

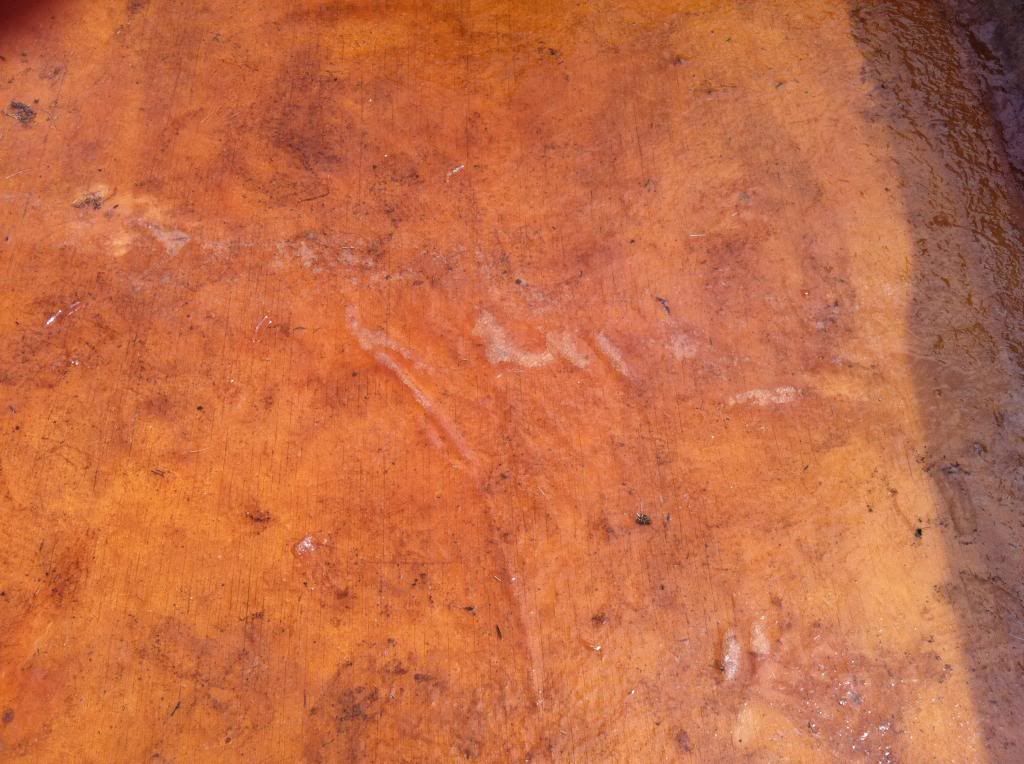
After all this was complete, I then put in A LOT of hours of sanding the entire surface down smooth.

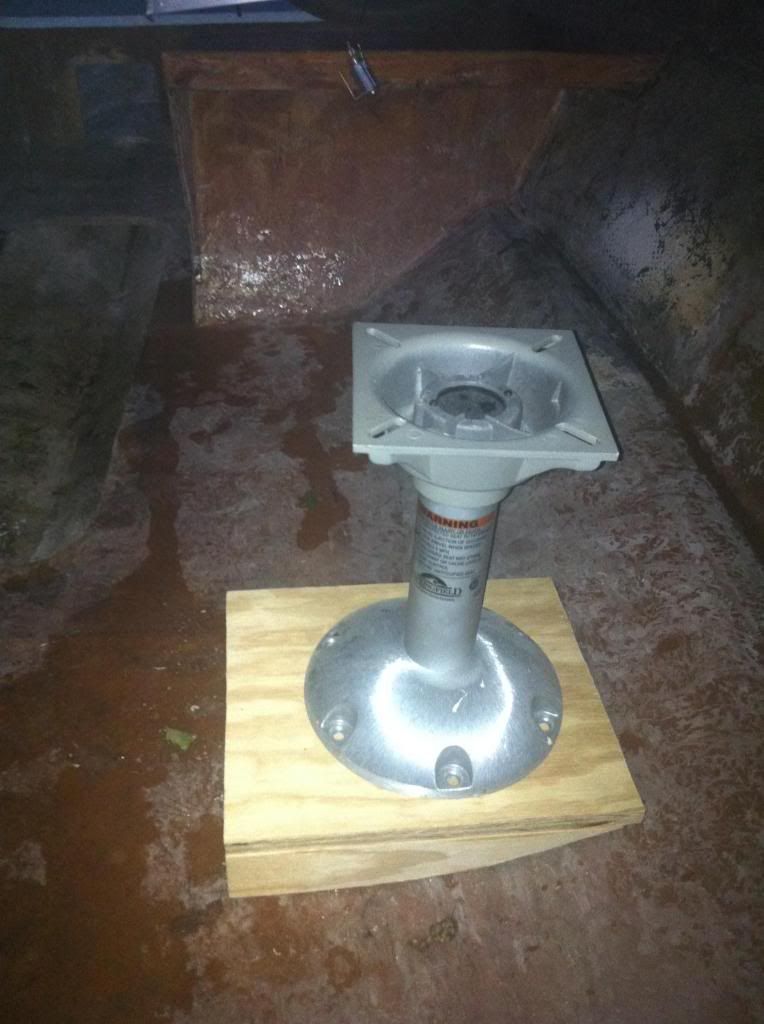
Switching gears a little bit, I mentioned how I cut out the back-to-back seating on each side and was going to replace with 2 captains chairs. Here are the new seat pedestals that I ended up using.


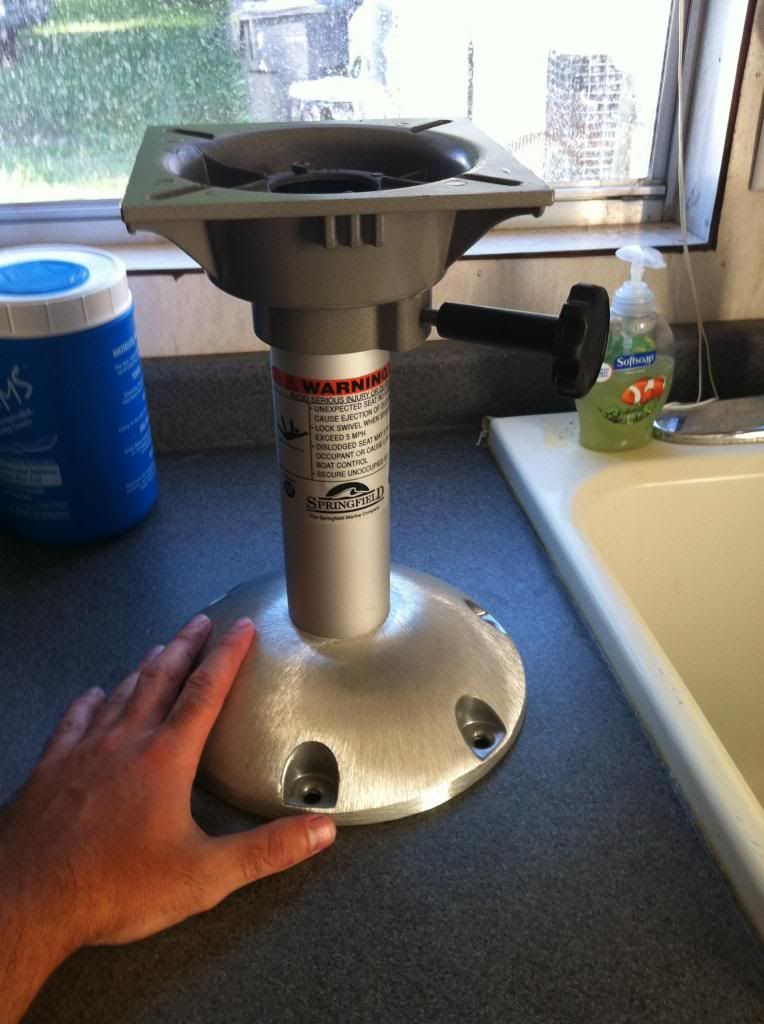
Also in that pic, notice that blue container. That stuff worked miracles when cleaning curing fiberlass off your skin. Once that resin starts to cure and gets on your skin, that s**t burns bad. Anyone whose ever done this sort of work can attest. But the hand cleaning sheets in that blue container cleaned the resin off instantly and effortlessly.

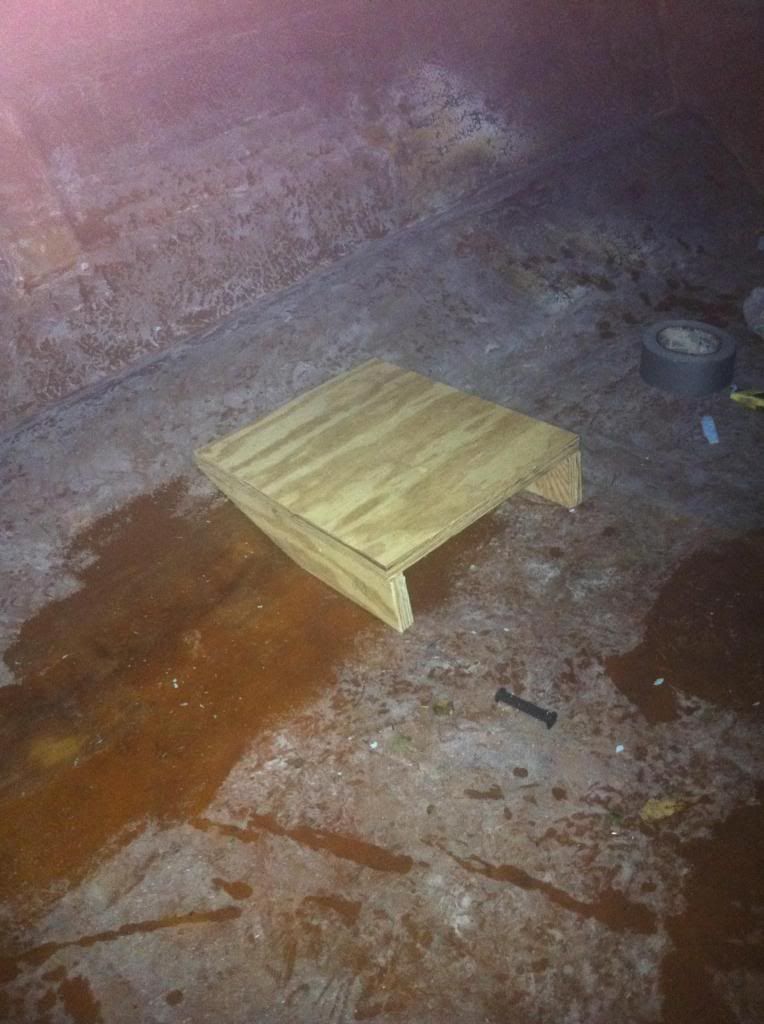
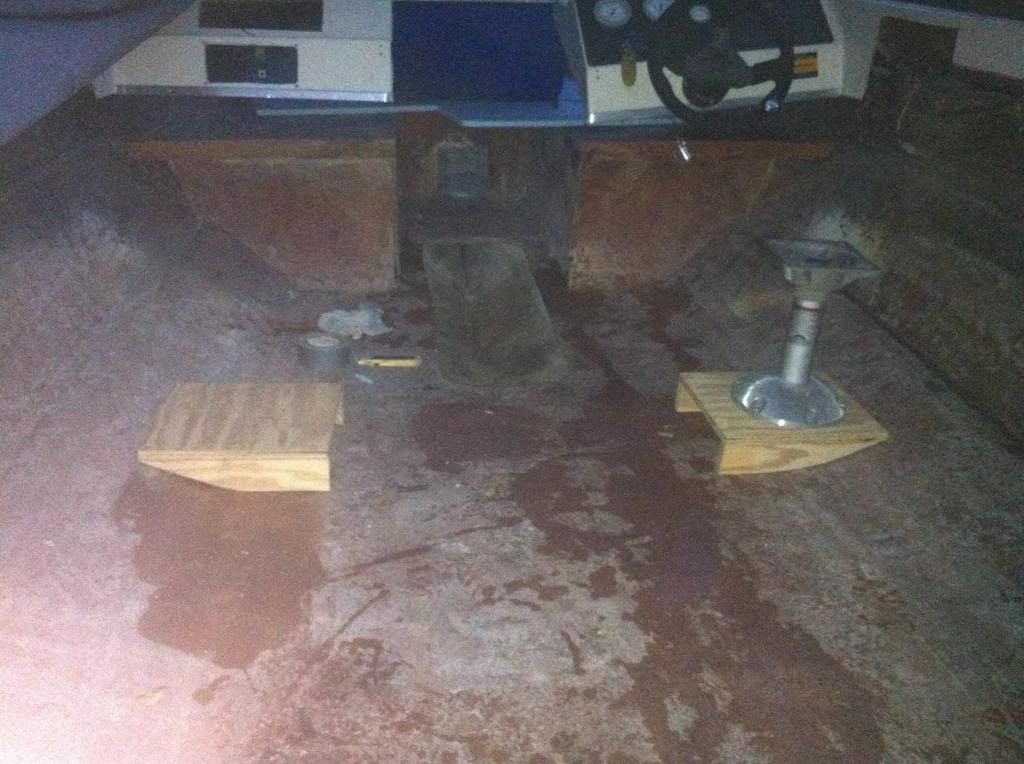
In order to mount those pedestals down, I was going to have to make some sort of wooden platform elevated from the bottom of the new deck to screw them down to. The centerline of each side console falls right on a grade break along the bottom of the hull.

Here is the seat platforms I made to screw the aluminum pedestals to.


You can see in that pic what I mean about the grade break on the hull. To make that platform, I used cut out pieces of the same 1/2" foam board to make a template for each piece. I'd cut just a little bit off at a time until I got it to fit the contour of the hull correctly. Also seen in that pic is the cleaned up and sanded surface of the new deck after multiple layers of fiberglass and resin.

Here is a couple more.


[This message has been edited by BurrOak (edited 5/16/2013 10:04p).]

[This message has been edited by BurrOak (edited 5/16/2013 10:34p).]
SpicewoodAg
How long do you want to ignore this user?
AG
Mightily impressed!
Gone
How long do you want to ignore this user?
Great job so far!
BurrOak
How long do you want to ignore this user?
AG
To mount these new platforms down, I used the same PB mix and applied fillets along all the edges. It took a very large fillet to fill in the back side of each pedestal.


I would end up adding a lot more PB than what you see in the above pictures. Once that was down, I then added a layer of the 2.5oz csm fiberglass and resin to it.


And then after sanding and cleaning them up, this was how they turned out.


BurrOak
How long do you want to ignore this user?
AG
While I was forming up these new seat platforms, I also had to make something similar to replace the where the battery sat.

This was what it looked like right after I cut out the original...


And here is the new...


The pictures above also show how I reattached my engine box. As I said earlier in the thread, I just took a sawzall and cut it out as close to the bottom as I could. And I did that without really knowing how I was going to re-attach it at the time. I ended up setting small wooden shims on the bottom to get the engine box level and set exactly where it was when I ripped it out, then I used the PB and made a fillet along the entire bottom edge. The hole you see is for drainage.
BurrOak
How long do you want to ignore this user?
AG
quote:
I just started working on my Bayliner this week. I basically have the same exact job ahead of me. Thanks again for sharing. Any finished pictures?


Good luck man. If you ever need any advice or have some questions, I'd love to help.
BurrOak
How long do you want to ignore this user?
AG
And here is the opposite side. The large hole is where the blower vent runs through. The small hole is for drainage.

BurrOak
How long do you want to ignore this user?
AG
On that last pic, you can see the saw cut line above and on the right side of the larger hole. When I was cutting it with the sawzall, I just started at the hole and went up with it. So all the wood above the large hole stayed attached to the transom during the entire rebuild. When I put the engine box back on, I just added a 6" strip of fiberglass where the cut edges meet.

It all fit together very well. And it's more stout now than what it was before.
coop-aero-06
How long do you want to ignore this user?
AG
quote:
Good luck man. If you ever need any advice or have some questions, I'd love to help.

Thanks. I'll be stopping by Bryan Marine today to pick up the fiberglass supplies. I've never done it before either, but I like learning and I'm willing to take it slow and do it right.

I don't mean to hijack your thread, but here's a sample of the work I've got ahead of me. The deck towards the bow needs to be completely replaced, but towards the stern it's very solid except for one soft spot behind the passenger seat. Now I'm trying to decide if I should replace the whole thing or just the part towards the bow and then patch the soft spot.

BurrOak
How long do you want to ignore this user?
AG
Coop, since you're willing to take it slow and do it right, I would recommend replacing it all. That looks like some pretty bad rot there up front. If you have that up front, and a soft spot near the stern, I would bet there is more rot underneath that you cannot see or feel. And it will only spread with time.
BurrOak
How long do you want to ignore this user?
AG
Now it's time to put down the new Durabak liner.

http://www.nonslipcoating.com/

After scrubbing every inch of surface with a brush and Simple Green, letting air dry, then rubbing xylol over the entire surface (per Durabak's recommendations), I'm now ready to roll on the liner.


coop-aero-06
How long do you want to ignore this user?
AG
BurrOak, can you give an estimate of the material quantities you used? Yards of fiberglass mat? Gallons of resin? Etc...

Great work.
BurrOak
How long do you want to ignore this user?
AG
I used 8 gallons of poly resin.

Whatever size the largest package of the 2.5oz CSM from Bryan Marine was, I used 2 of those. But I also bought a several more smaller sheets from other places.

3 gallons of Durabak. I initially bought 2, but didnt plan everything out like I should have, so I ended up having to buy another gallon. I didn't really even need the entire last gallon, but that's the smallest size you can buy. 2 gallons should suffice.

Refresh
Page 2 of 2
 
×
subscribe Verify your student status
See Subscription Benefits
Trial only available to users who have never subscribed or participated in a previous trial.