1970 Master bathroom remodel

43,477 Views | 244 Replies | Last: 11 yr ago by dubi
AgDrumma07
How long do you want to ignore this user?
Let me just begin by saying this thread may move slower than other full remodel threads, but enjoy...

My house was built in 1970 and I bought it as an FHA foreclosure around Thanksgiving of 2009. The master bathroom has been 100% functional since I bought it, aside from the shower. The grout and drywall had rotted out and water had leaked behind the wall, so I have not used it since I purchased the home.

The time has come to plan and remodel this hideous bathroom. The light blue tile is just horrendous, paired with yellowing grout (where there is grout left). The flooring is some kind of stick-on laminate that is buckling around the shower. The toilet works but is very slow (I've already replaced the guts). The cabinets appear to be original and have been painted several times over the years.

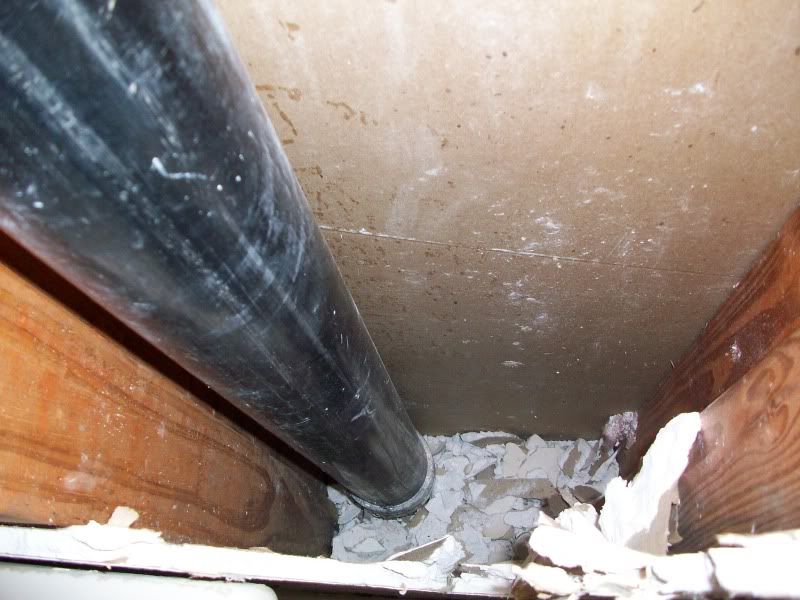
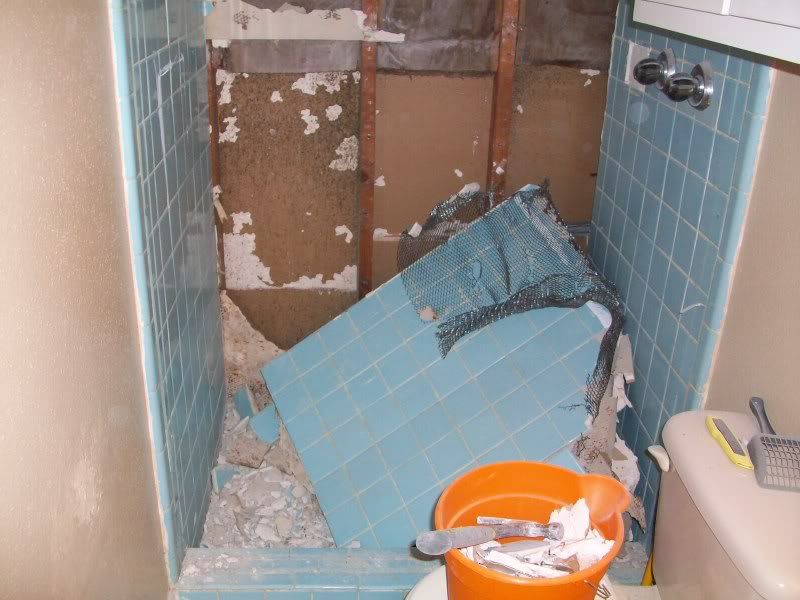
Basically, it all needs to go. But how can you do it all cheaply? I started with doing the shower demo myself. I'm not done yet, as I stopped smashing things near the plumbing on the right side until I can be more careful. I also need to do the floor and step barrier.

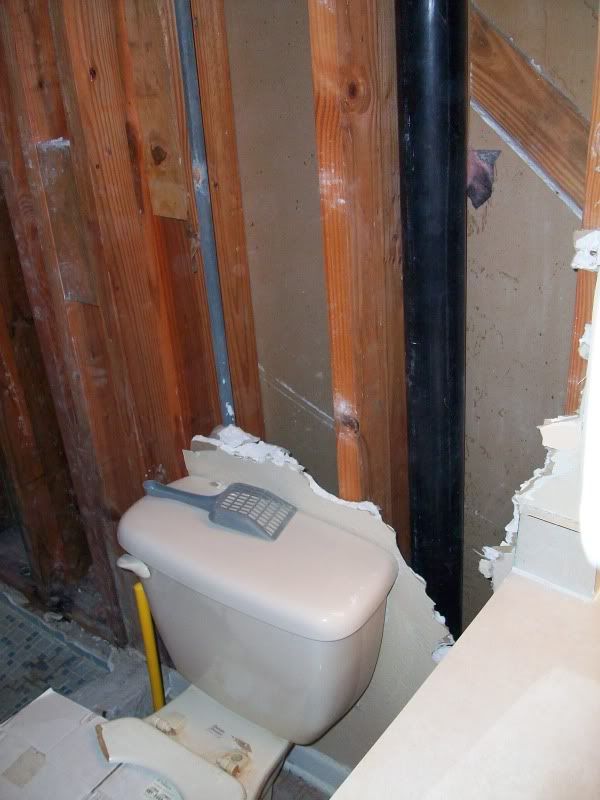
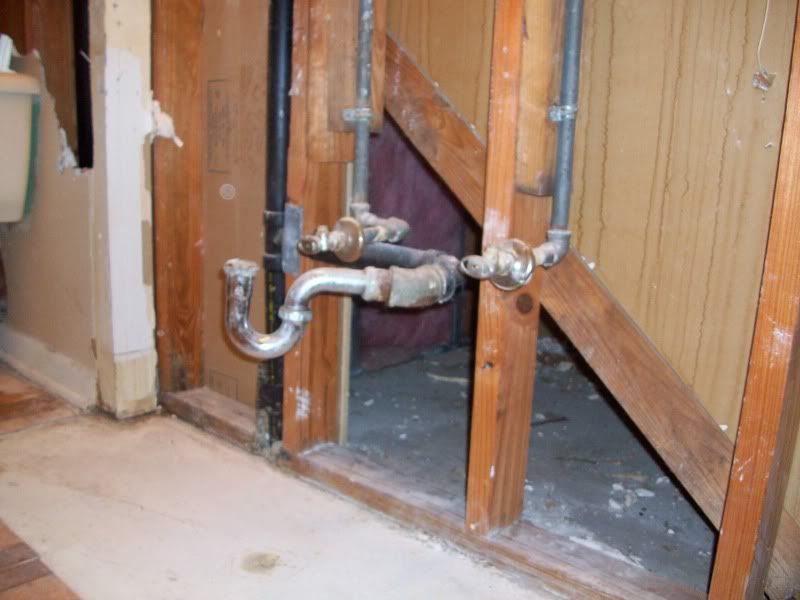
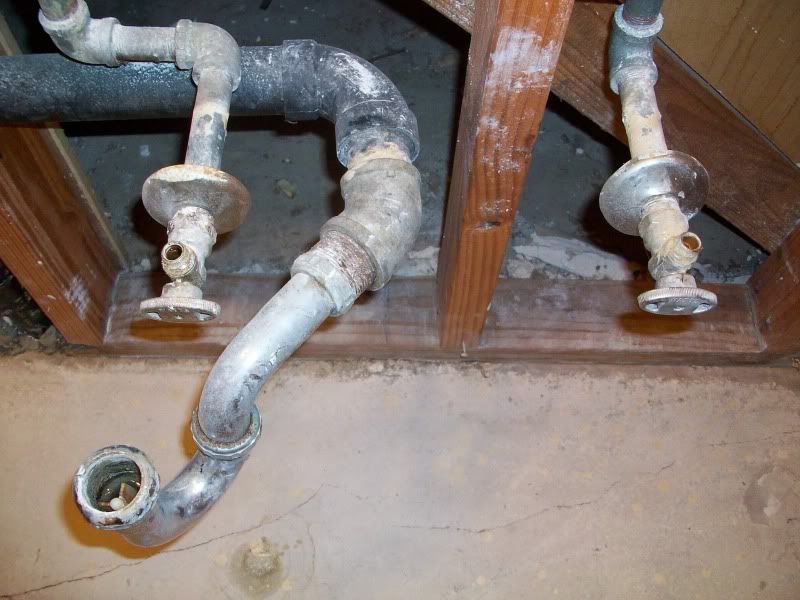
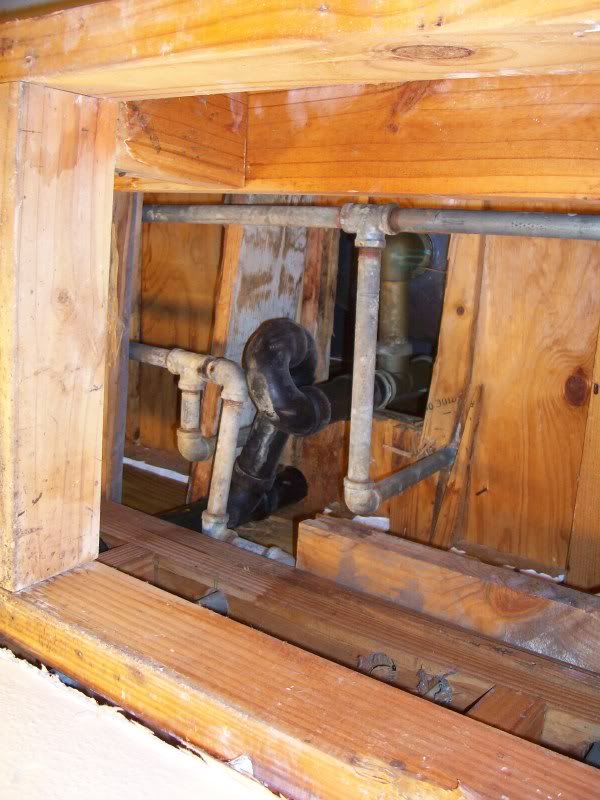
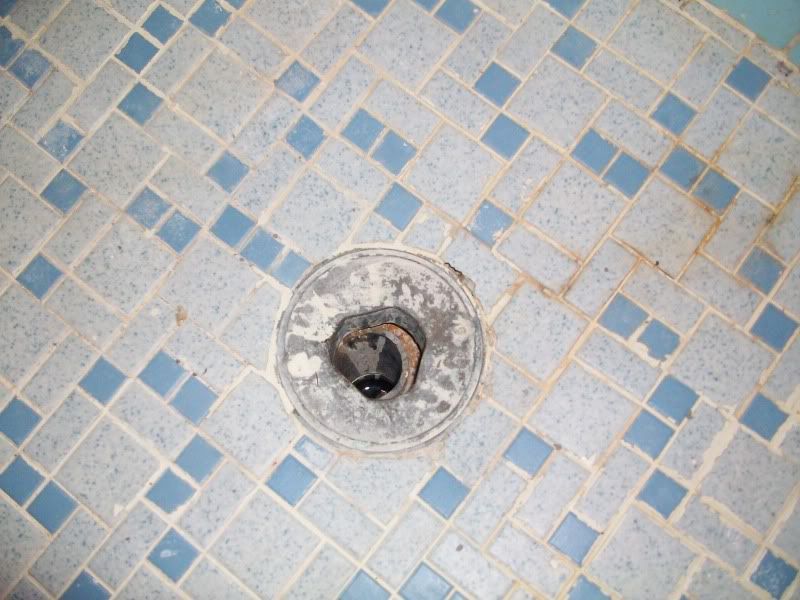
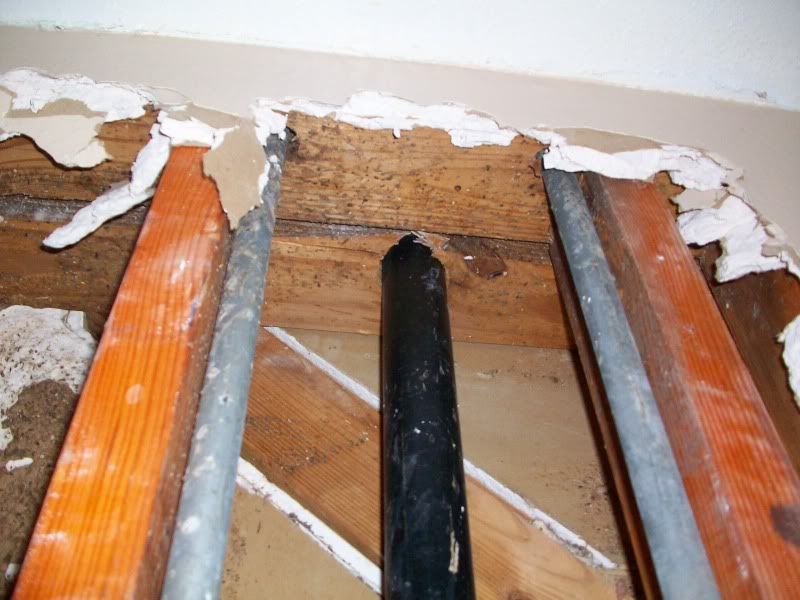
Here's a few before pics. As you can see, the U-pipe doesn't line up with the drain hole because the house has shifted over 41 years. I've included a few pics of the missing grout too.

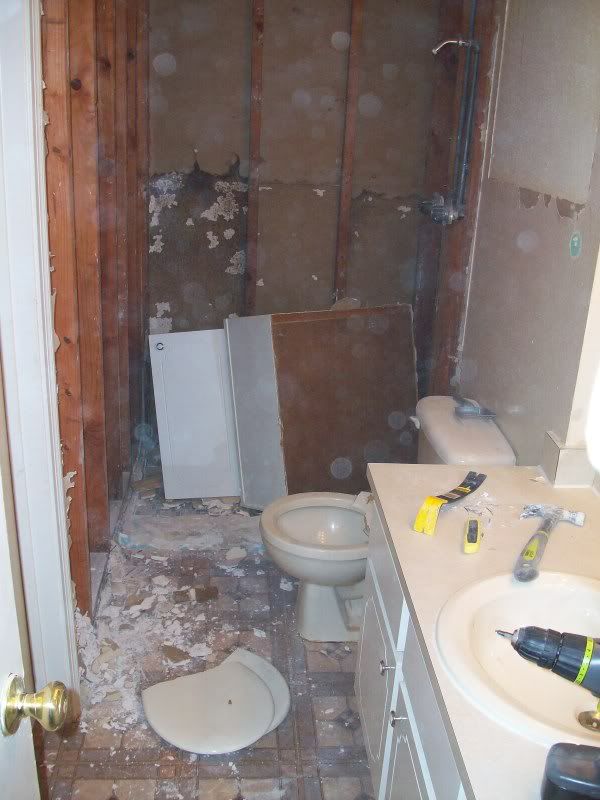
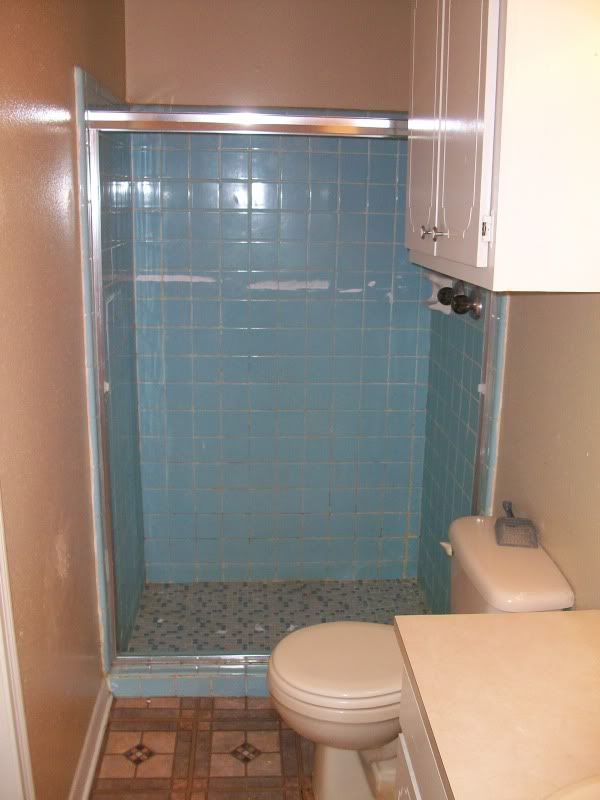
View from the door leading in from the main hall downstairs:


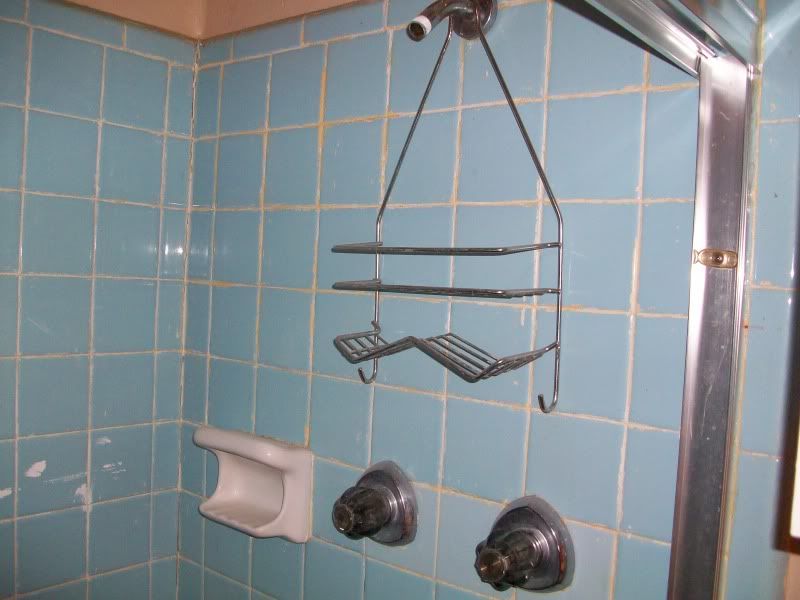
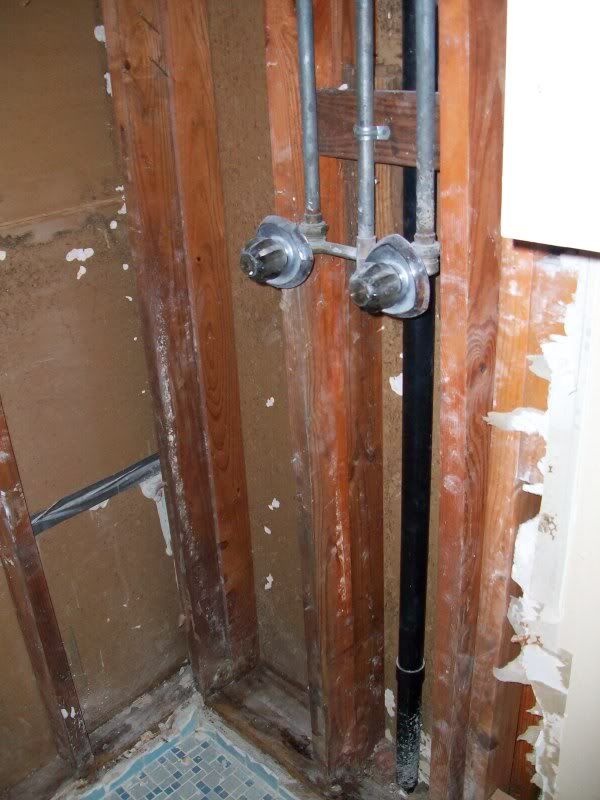
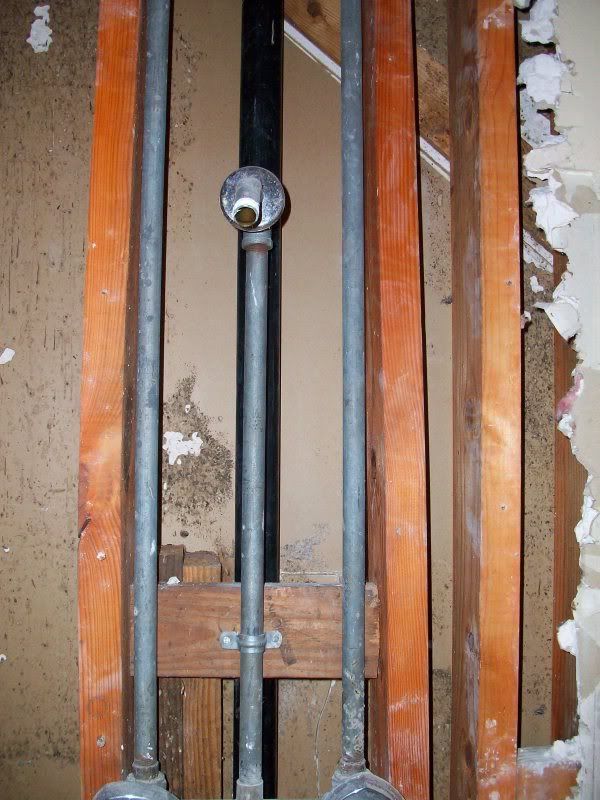
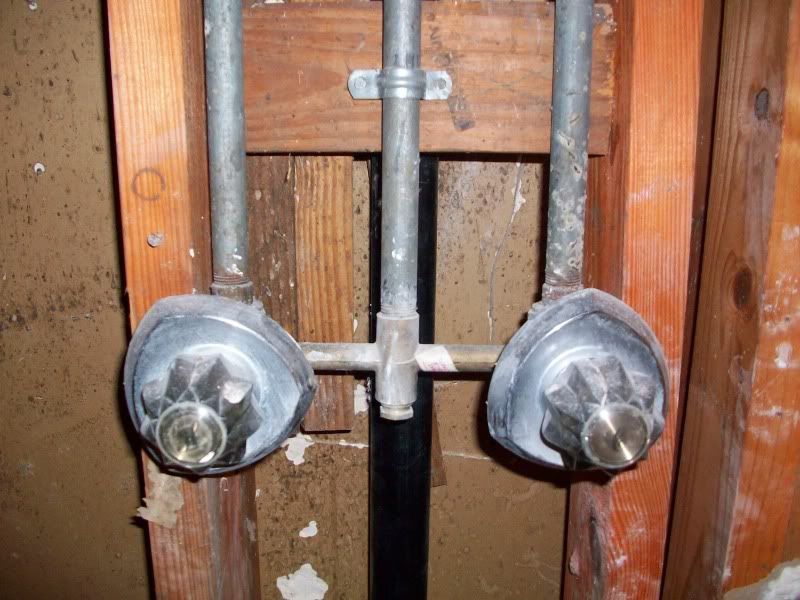
Faucets, soap holder, shower head and sliding door casing:


Mis-aligned drain:


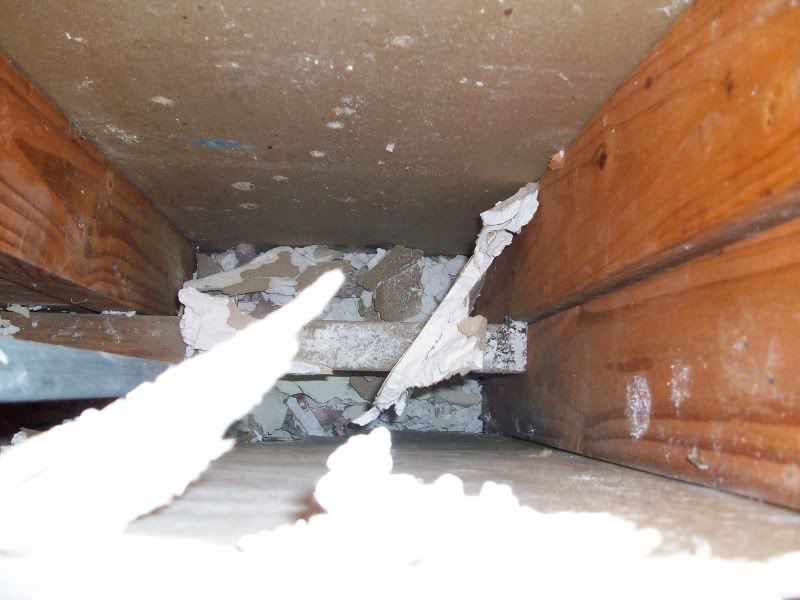
Missing grout in upper right corner:


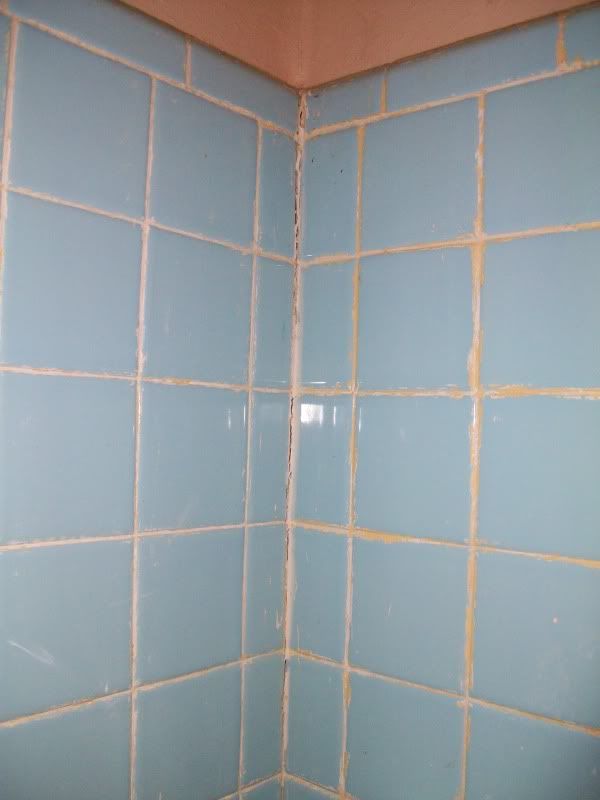
More awesome tile/grout:


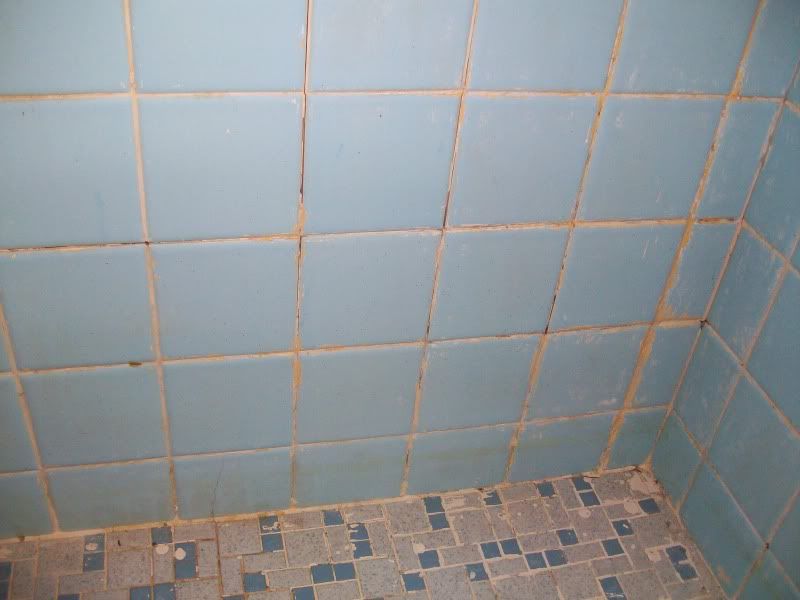
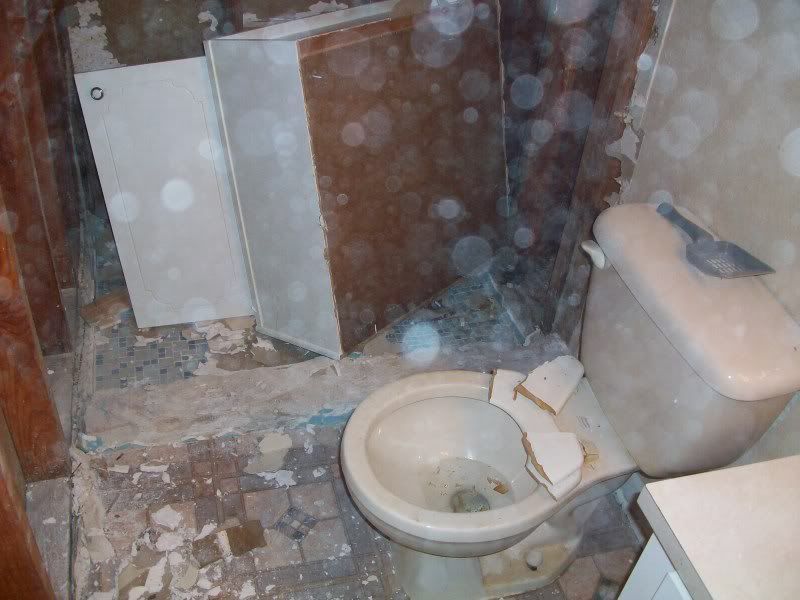
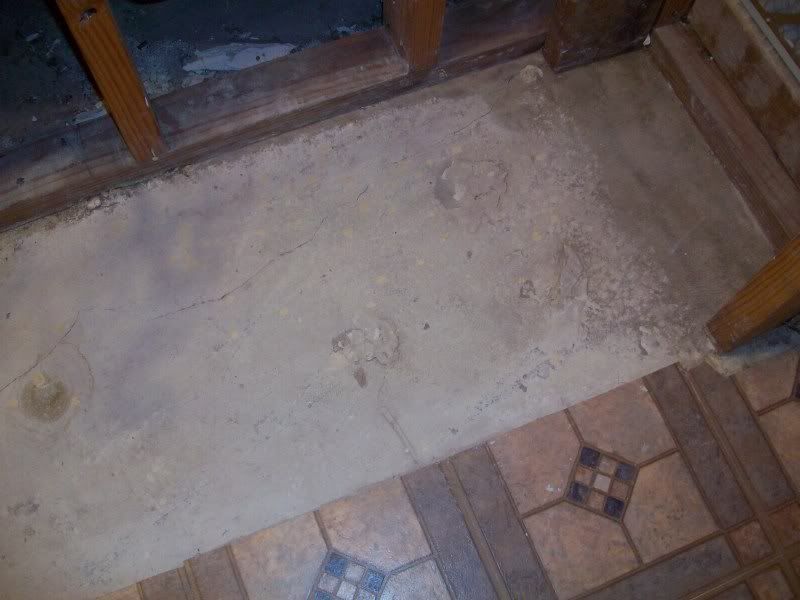
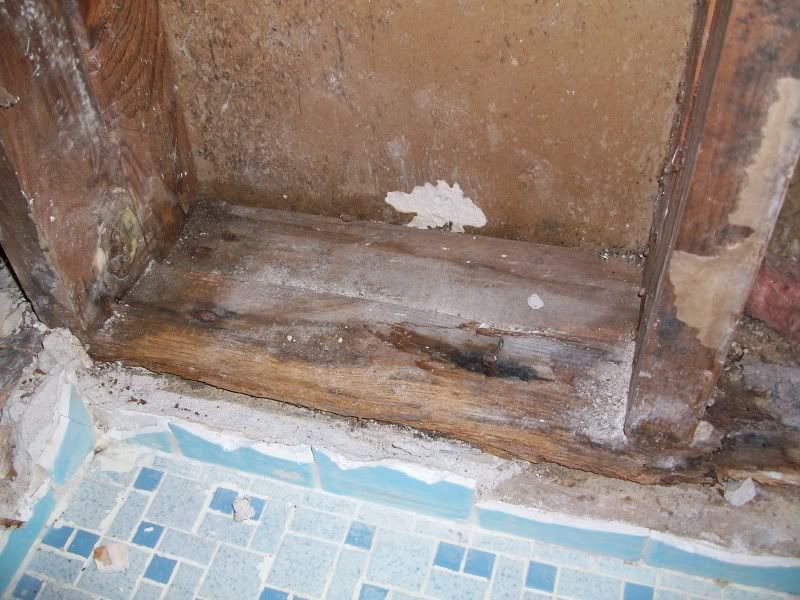
Floor with sliding door casing and step barrier:


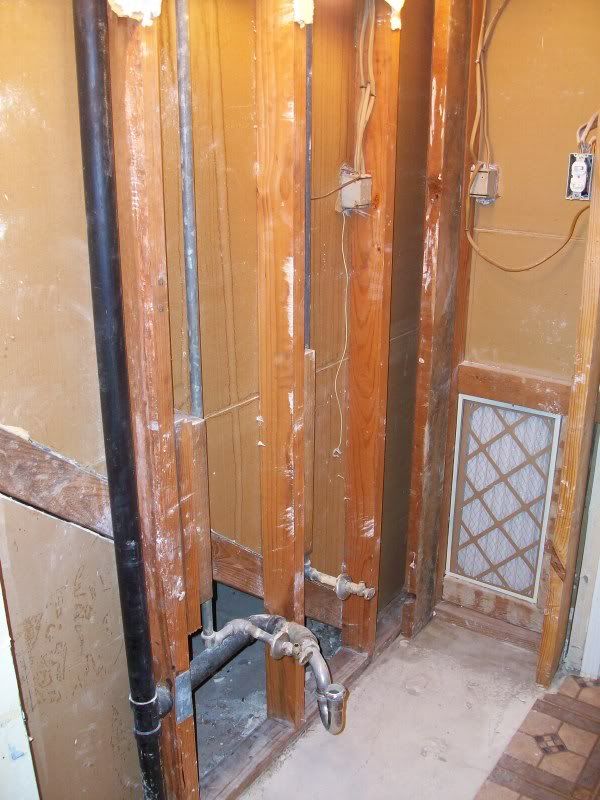
Halfway done with demo. The bottom section of this wall came out in one piece:


The shower shares a wall with the garage and this is the other side of the wall which has been (very) "amateurly" repaired in the garage. Duct tape...classy...:


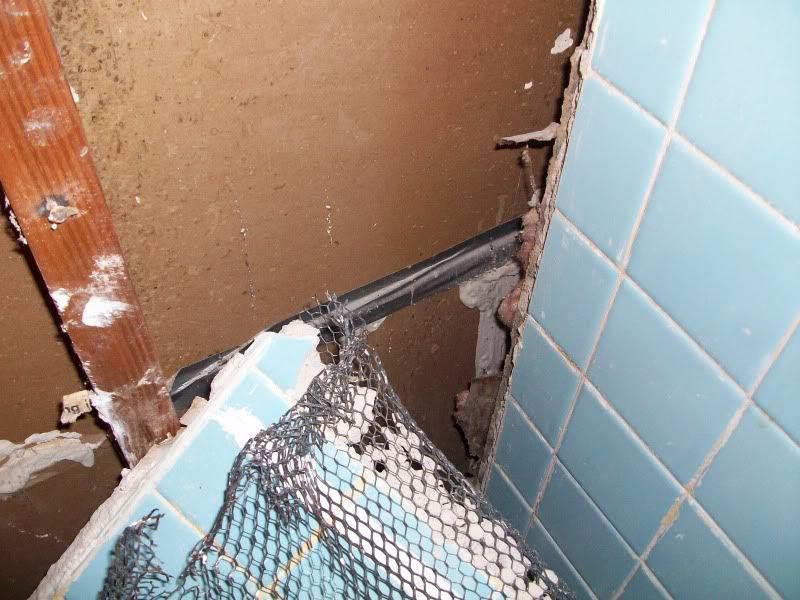
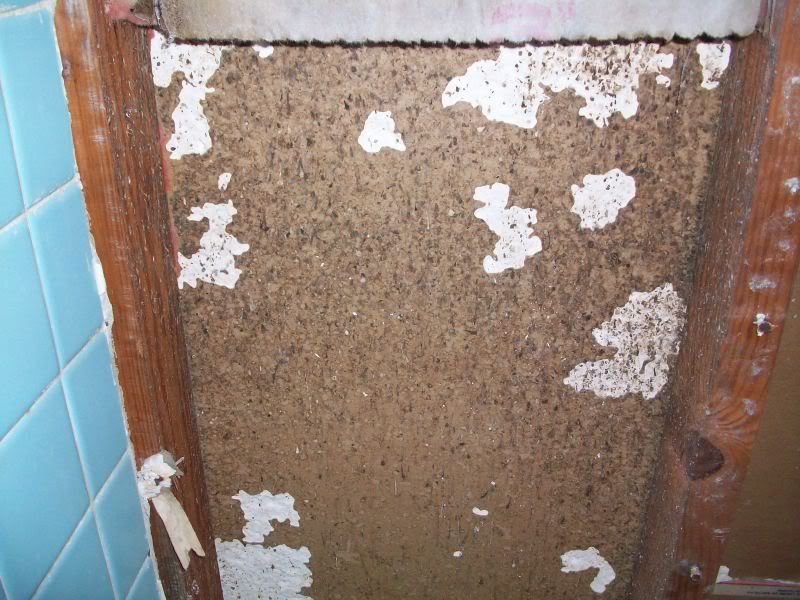
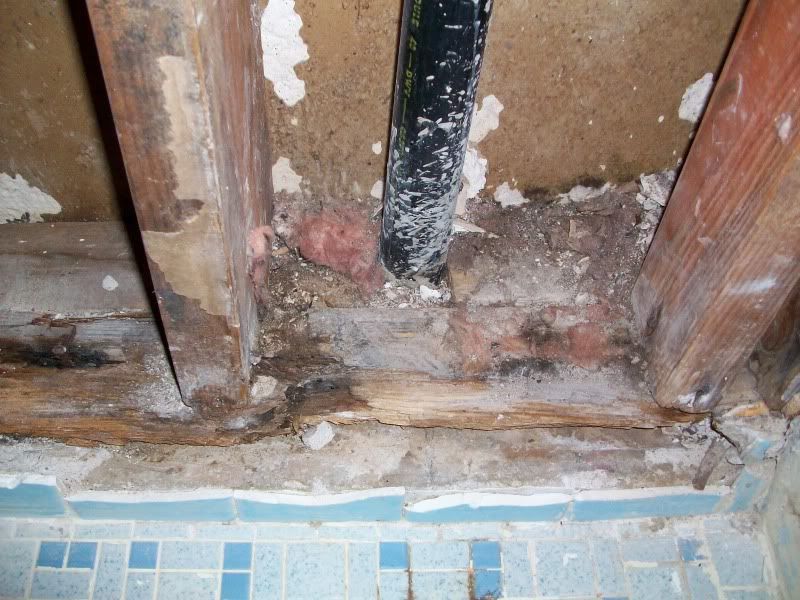
Not sure if this is mold or roach poop or both, but I killed it with 409 nonetheless. That wall is also shared with the garage and is going to get replaced when the cement backer goes up:


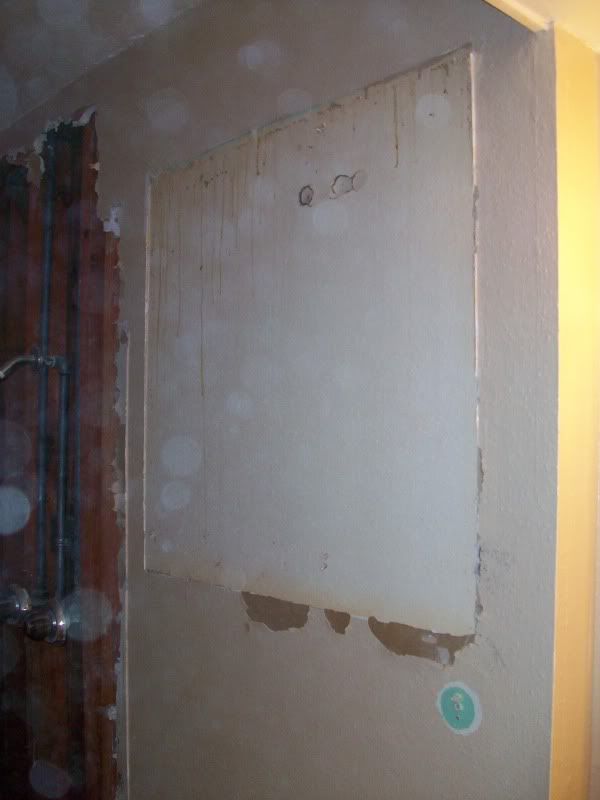
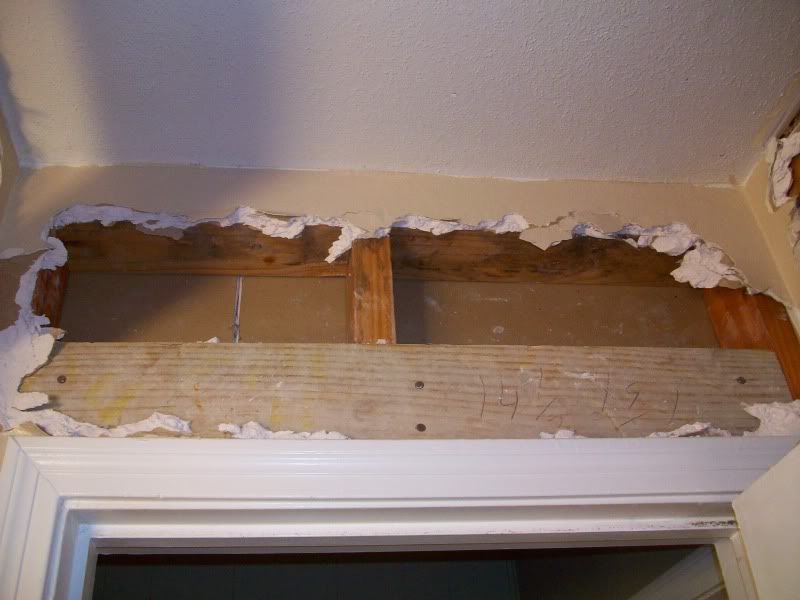
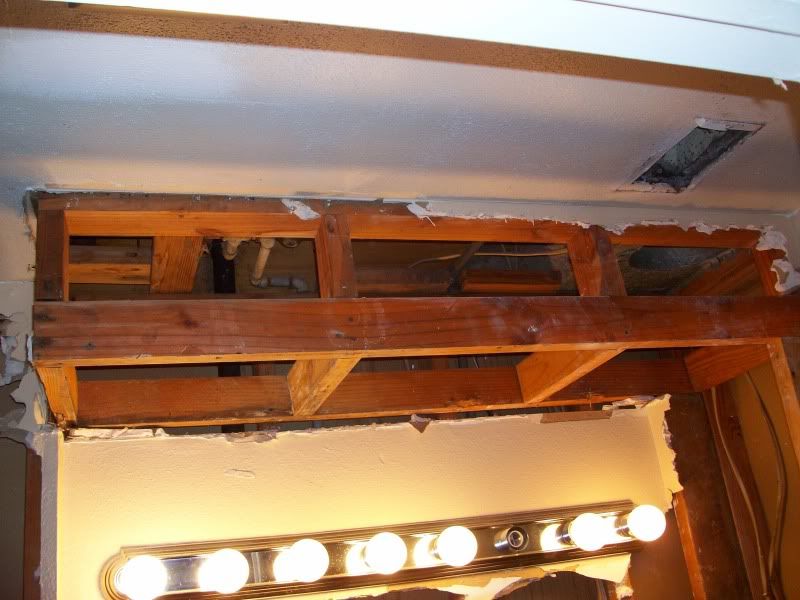
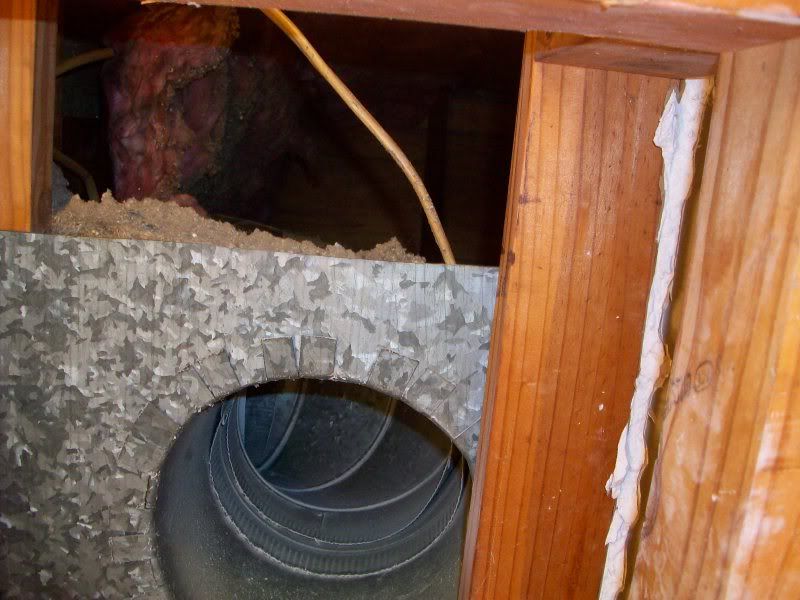
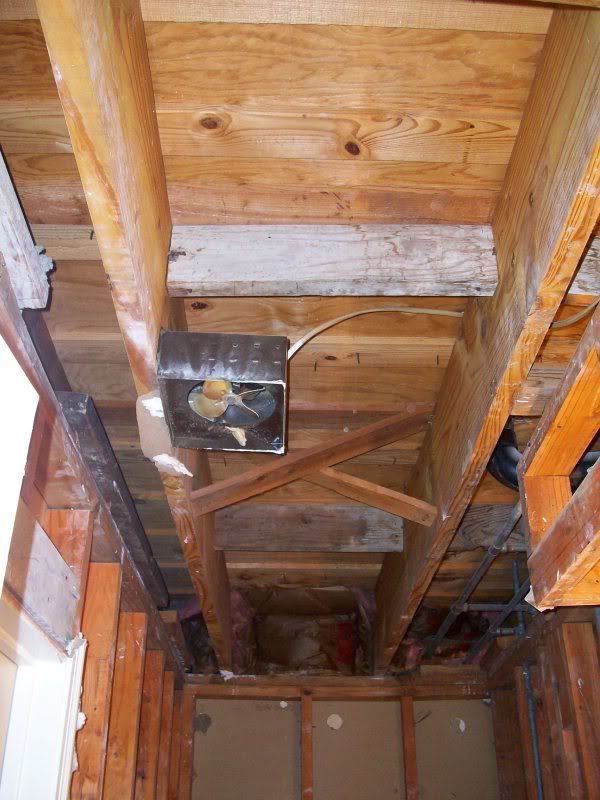
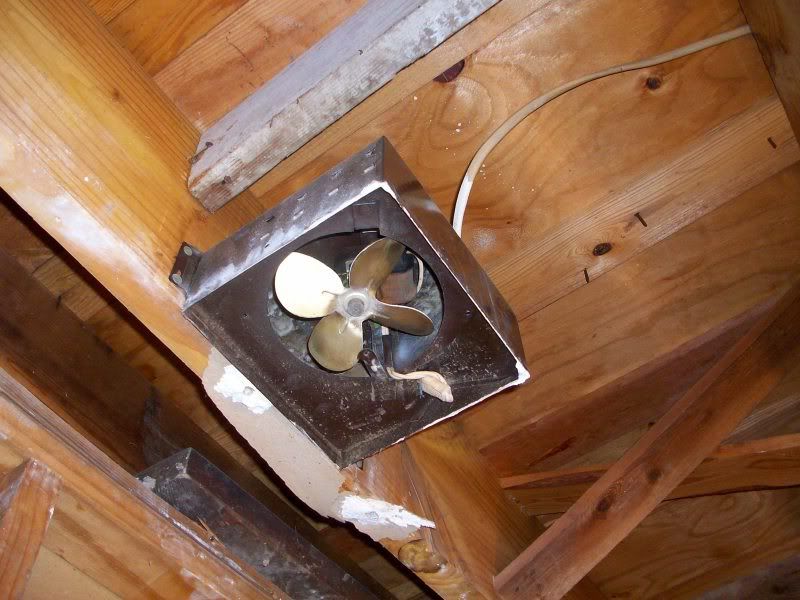
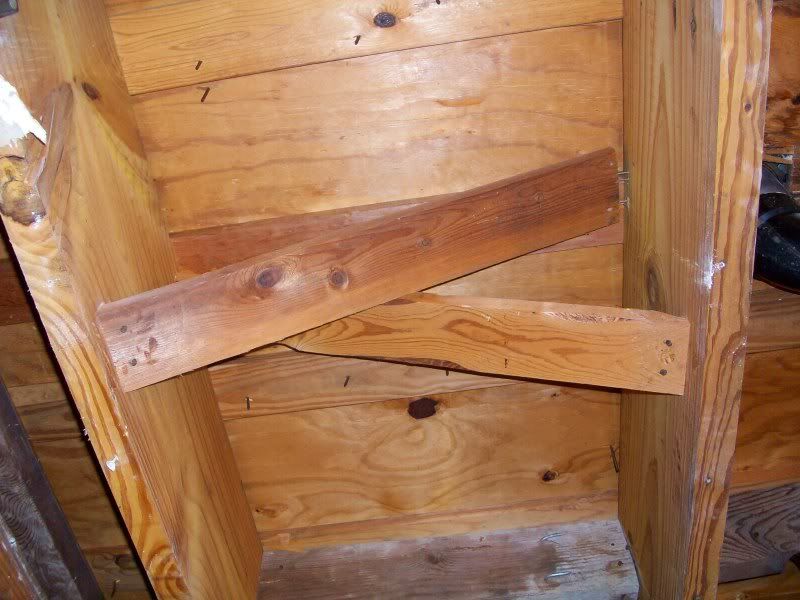
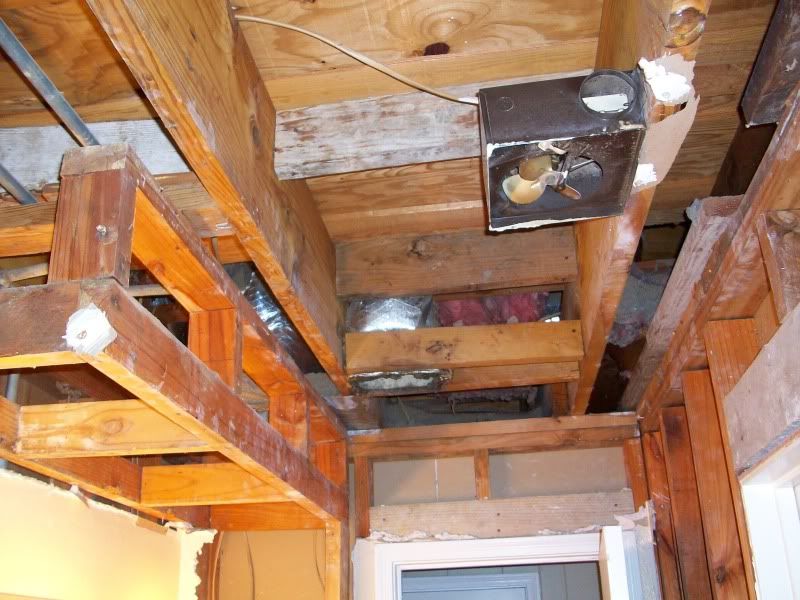
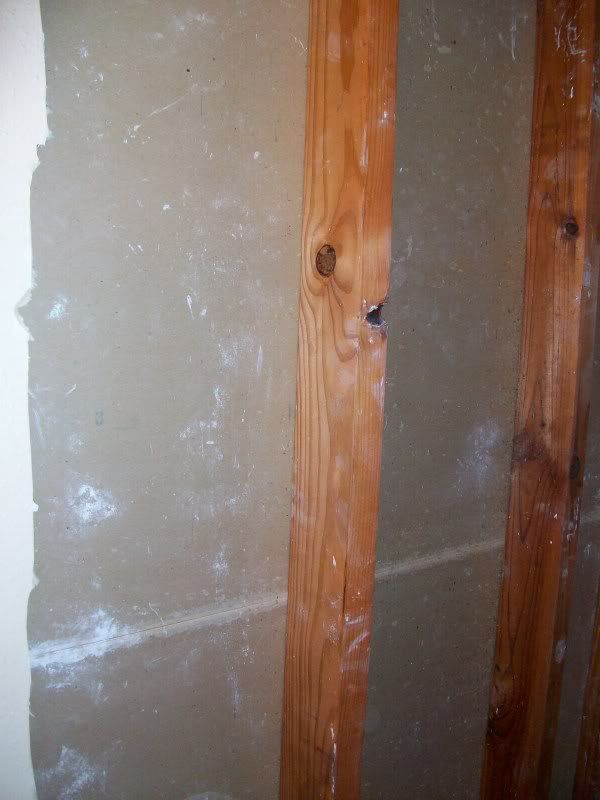
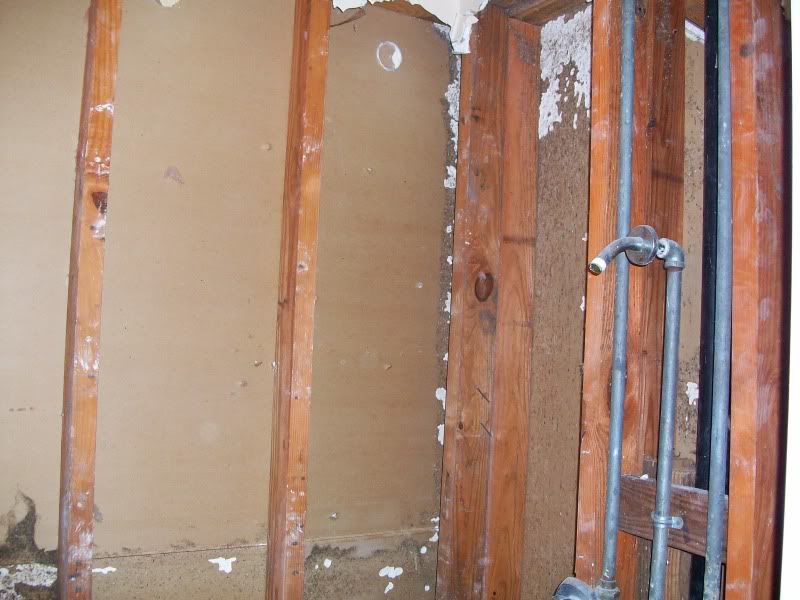
Removed drywall up to the ceiling brace:


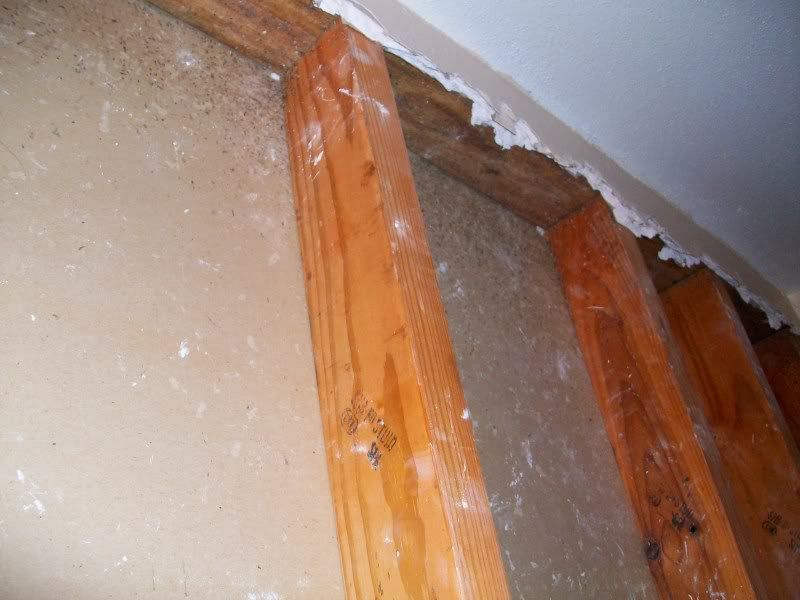
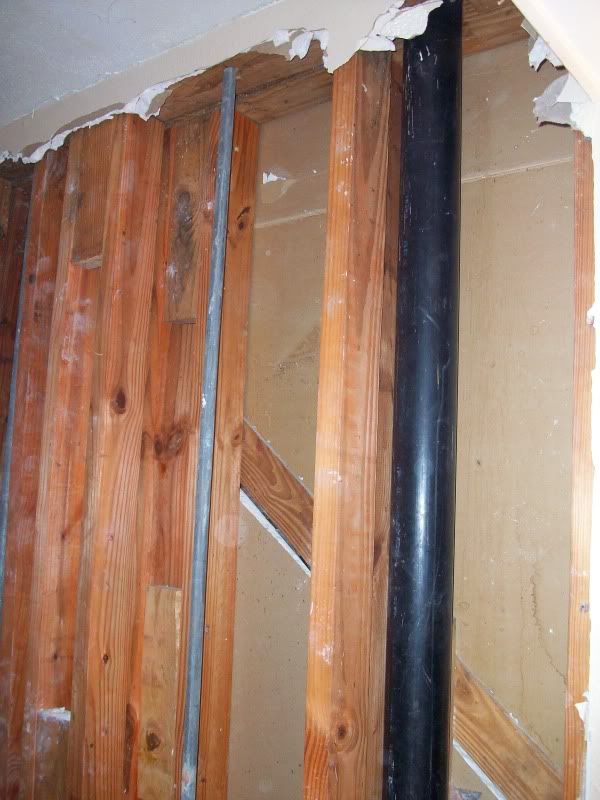
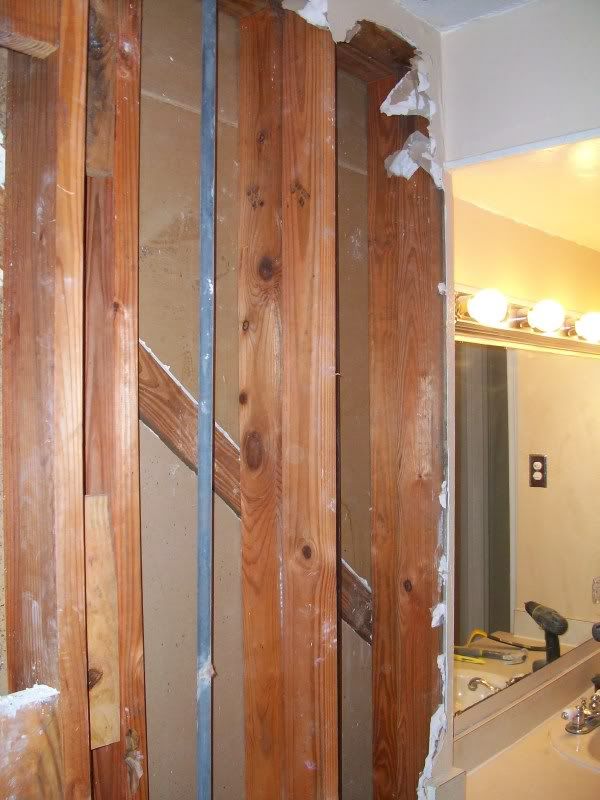
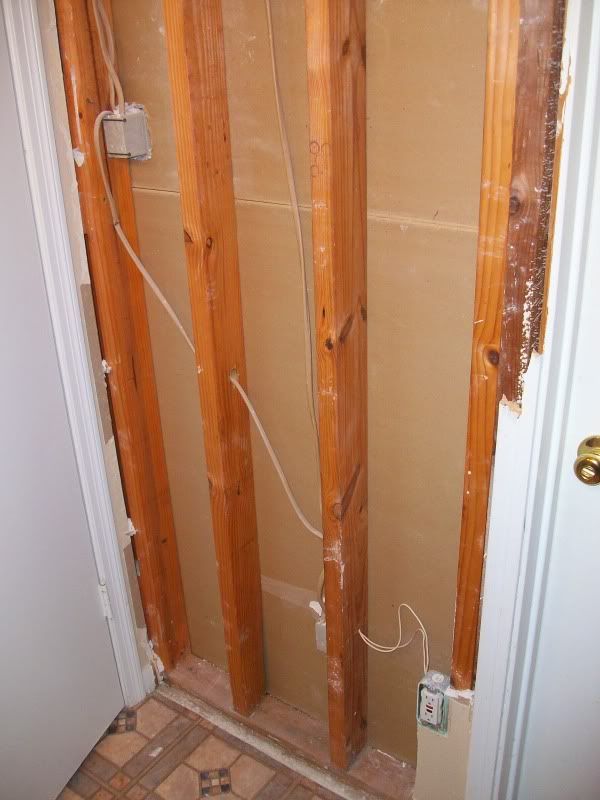
The studs looked fine from what I could tell:


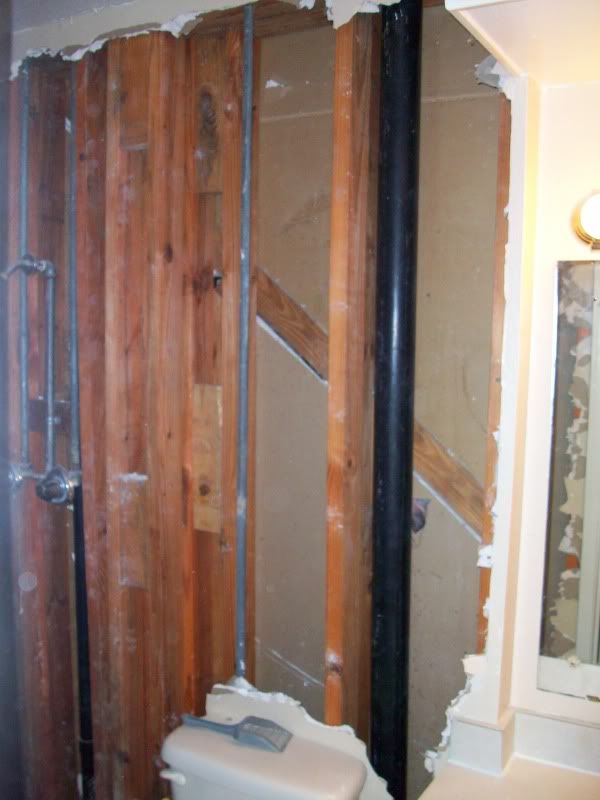
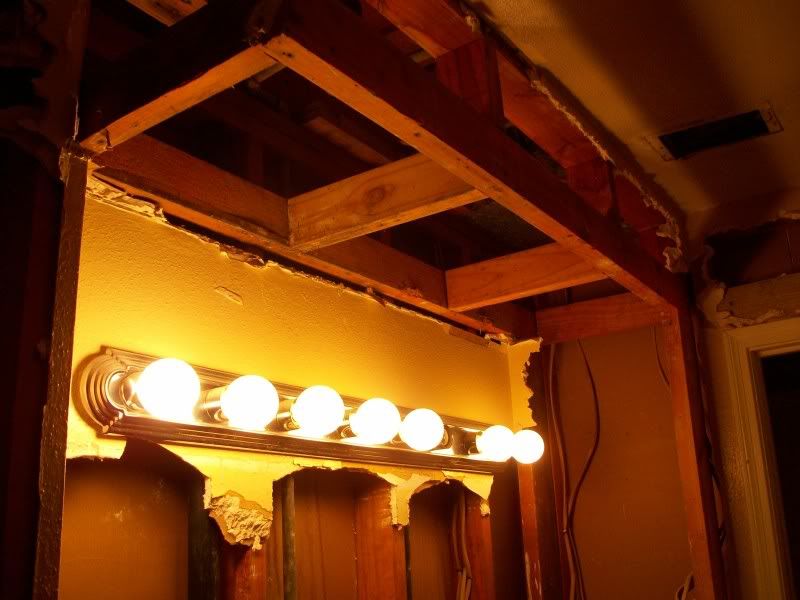
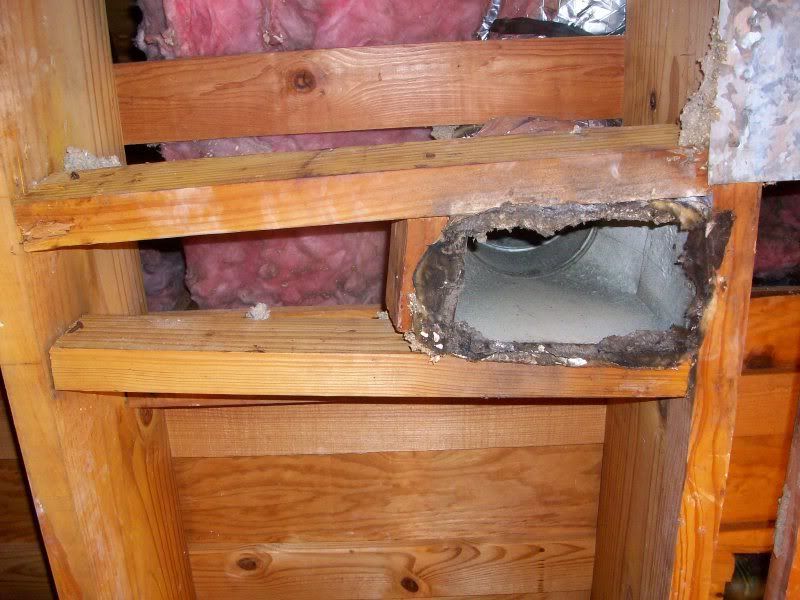
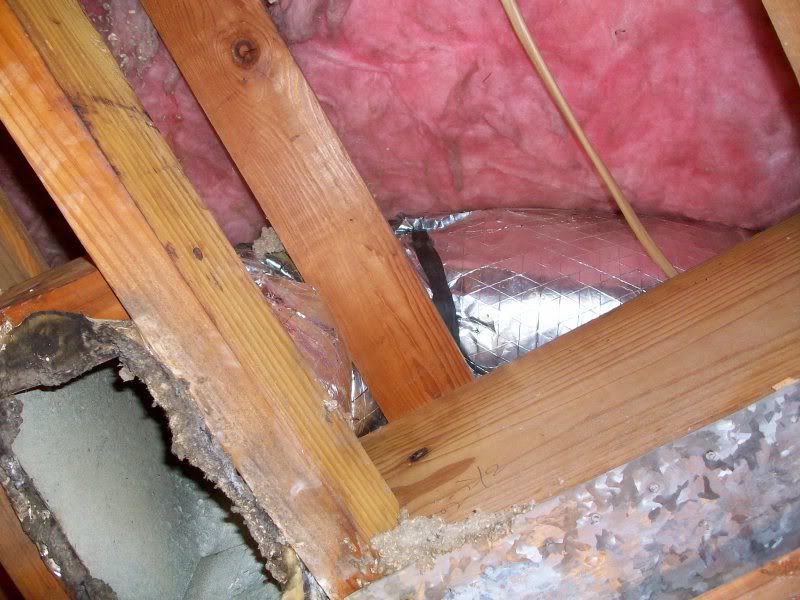
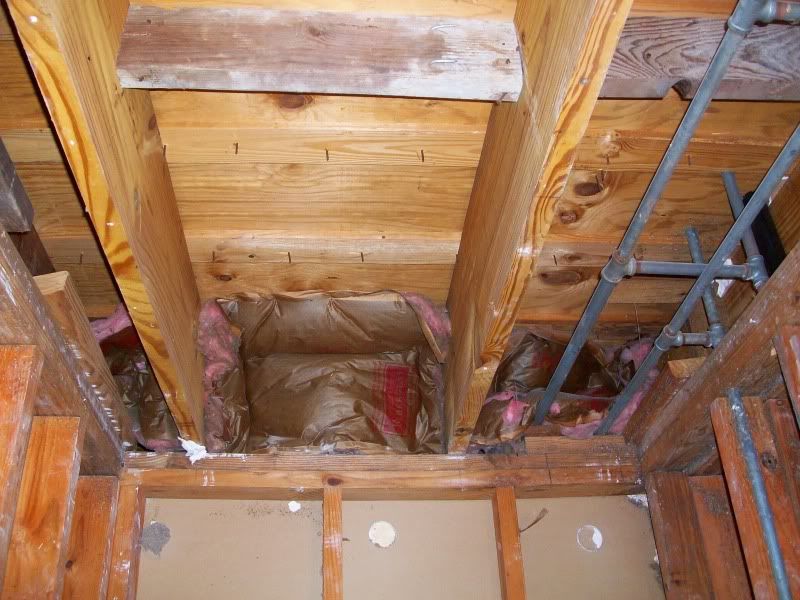
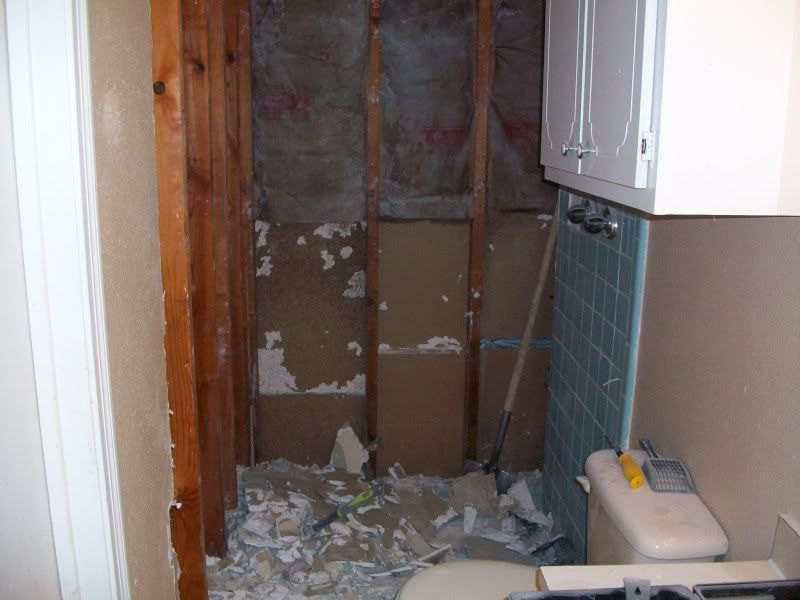
And this is where I stand right now, aside from the mess. I got a little carried away with destroying walls, so I will have to replace a little more drywall than planned:


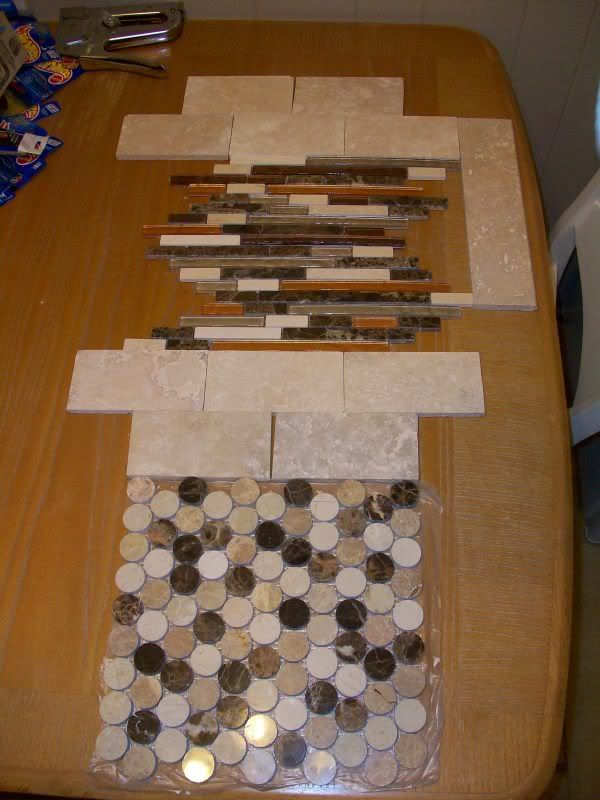
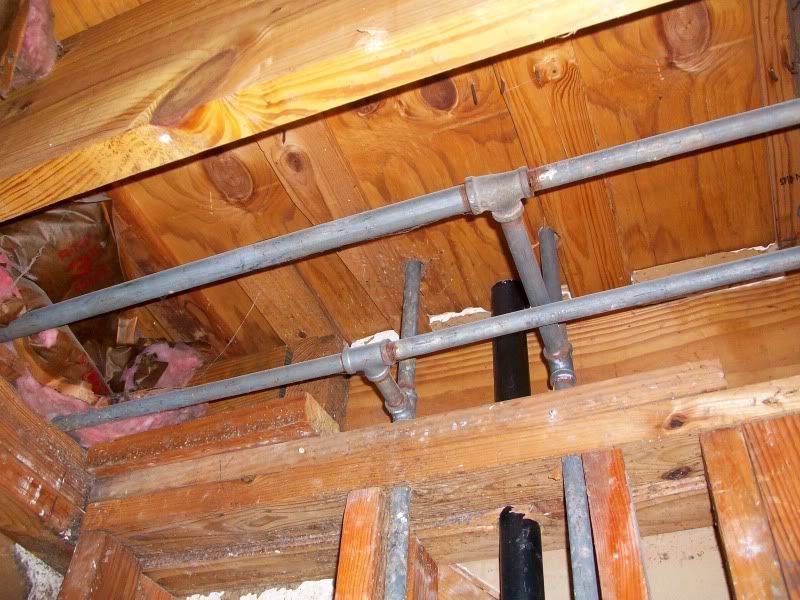
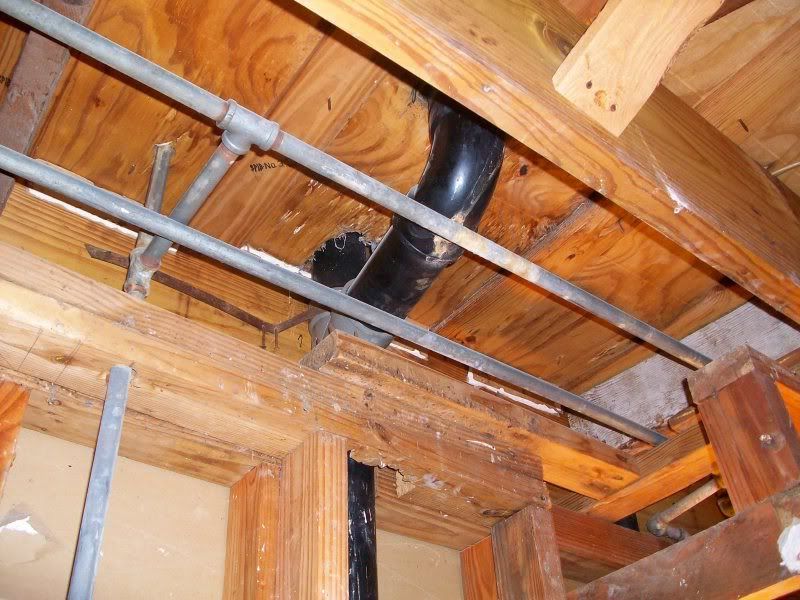
More pics and updates to come this week. Plumber is coming soon, then cement backer, then tile.

EDIT: Typo

[This message has been edited by AgDrumma07 (edited 5/30/2011 11:55p).]
DwightSchrute
How long do you want to ignore this user?
Good start and your studs are fine. put some insulation and then a moisture barrier over that while you are in there since it's connected to the garage. (see here: http://i40.photobucket.com/albums/e249/krakerjako/BathroomRENO020.jpg )

If it were my house, I'd put a Kerdi system in...never used it, but it appears to be the Cadillac of water barriers. What makes it great, is you can put it over sheetrock if you want (though i'd still use hardibacker) and can then put the tiles directly to the Kerdi. Don't confuse this with a moisture barrier, b/c they are not the same thing.

If you do everything right and it all works properly, this would be overkill, but peace of mind is only a few bucks more.
Ryan the Temp
How long do you want to ignore this user?
edit: I'll start a new thread - no need to hijack.

The shower stalls at my high school looked very similar to that.

[This message has been edited by Ryan the Temp (edited 5/31/2011 9:14a).]
Bottlerocket
How long do you want to ignore this user?
Ugh, I demoed my bathroom that was constructed like yours: lathe, mud, then tile. That stuff is a beetch to break up. I too damaged a few walls from swinging the sledgehammer. And there was dust EVERYWHERE

Good work!
Mr. Dubi
How long do you want to ignore this user?
Looks very familiar. I had a shower like that in the master of my old house. Unfortunately, some of the studs behind the shower were rotten, so I had to replace them too. I replaced with a prefab unit, but that was before I knew about the Kerdi system.
I too like the Kerdi system, and have used it for a shower, very easy to use. But as I recall, they say not to use backerboard, just greenboard and apply their product directly to it.
AgDrumma07
How long do you want to ignore this user?
More pics:

I tore down the wall containing all the plumbing, as well as beat up the step divider. A few problems exist regarding the framing. The upstairs bathroom is directly above this bathroom and the floor squeaks horribly, so hopefully fixing some of these frame problems downstairs can help:


The base board under the studs is rotten directly around the main drain pipe from upstairs:


The stud on the right side of the plumbing is severely warped. It will have to get replaced:


I want to combine these faucet handles into one:


There is some splitting around the top of the main drain pipe. This will have to be investigated, not sure if it needs fixed though:
Ryan the Temp
How long do you want to ignore this user?
quote:
Not sure if this is mold or roach poop
It's roach urine, actually.
dubi
How long do you want to ignore this user?
quote:
It's roach urine, actually.


RTT, It's scary that you knew that!
superspeck
How long do you want to ignore this user?
The warped stud doesn't look like much of a problem to me. Most studs are warped, that one's more of plumbing support than anything else.

That drain from upstairs might also be your soil stack, not necessarily a drain.

If it were me, I'd take down all the drywall. It's easy to replace drywall. It's an epic beech to tie old drywall into new and match textures.

quote:
Don't confuse this with a moisture barrier, b/c they are not the same thing.

Incorrect. Kerdiboard and Kerdi Membrane ARE moisture barriers. If you apply a moisture barrier, then Kerdi, you will have created a dual moisture barrier situation, aka "mold sandwich". Kerdi is water-impermeable, which means that it also blocks moisture.
DwightSchrute
How long do you want to ignore this user?
for the shower valve, you can certainly get a mixing valve to retrofit at Lowes/HD. The bear of it will be figuring out what will fit though!

I went through this with 1937 plumbing I replaced in my house...i learned it's funny how somethings have changed drastically in 80 years while others haven't changed at all!

It might be worth your while to get rid of that galv plumbing while you are in there. If you have access to where it goes horizontal (not sure the layout of your house if this is first/second floor/etc) and replace what you can with PEX. You can do it yourself for probably $75-200 bucks and PEX is VERY easy and there are transitions from threaded galv to Pex that are a cinch. Galv plumbing can last a long time, but generally, i've been told to only expect 30-40 years out of it before it will start to corrode and you'll get a nasty smell/taste in the water. It's not harmful, but not can be unpleasant.
Ryan the Temp
How long do you want to ignore this user?
Galvanized pipe also gathers corrosion inside like clogged arteries, and your water pressure will reduce over time. I know because I have that problem at my house with my 75 year-old plumbing. You should see the inside of the pipes I have removed/replaced.
DwightSchrute
How long do you want to ignore this user?
superspeck,

do you extend the kerdi to the top plate of the wall? I figured the kerdi only extended approx to the extent of the tile, then sheetrock above that (dependent on the particulars of the design)? I considered the kerdi to be the water barrier for direct contact of water to funnel down to the drain, but the moisture barrier to keep evaporation/condensation from reaching structure and insulation. Kind of like a rain jacket keeps the rain off you, but your not going to avoid the humidity b/c of it.

The "mold sandwhich" makes sense if it traps moisture, but wouldn't the cement backerboard not sustain mold growth? Then again, Dubi said Kerdi suggests greenboard. Also, if the kerdi fails and water gets through, aren't you FUBAR'd anyway now that water is behind the Kerdi?

[This message has been edited by DwightSchrute (edited 6/1/2011 9:31a).]
DwightSchrute
How long do you want to ignore this user?
Ryan, how much were you able to replace? I'm wanting to do more of this at my house, but holy crap, it seems like it is going to be a MASSIVE undertaking.

Most of the horizontals are in the crawl space under the house, so access wouldn't be too terrible...i'm just not sure how much this would accomplish to replace 50-75% of the galv plumbing. To get the rest, we're goign through walls and ceilings.
Ryan the Temp
How long do you want to ignore this user?
I've replaced smaller pieces as they required replacement through various projects. I have not done any wholesale replacement throughout the house. Eventually I may do it, but not any time soon.
AgDrumma07
How long do you want to ignore this user?
quote:
The warped stud doesn't look like much of a problem to me. Most studs are warped, that one's more of plumbing support than anything else.

That drain from upstairs might also be your soil stack, not necessarily a drain.

If it were me, I'd take down all the drywall. It's easy to replace drywall. It's an epic beech to tie old drywall into new and match textures.


You're right, it's probably not a huge deal but I might as well replace it since it should be pretty easy. The rotting baseboard would be a different story. I have no idea how to do that.

I don't know what a soil stack is, but so far I haven't found any other pipes that come down from upstairs and the upstairs bathroom has to drain from somewhere.

As I keep tearing drywall down, I'm finding more and more damaged walls and I have to keep tearing stuff down. The wall behind the toilet is going to be horrific, based on what I found last night, so that's another couple of feet to demolish.
DwightSchrute
How long do you want to ignore this user?
soil stack = vent for sanitary sewer. You probably already know, but just in case, the vent allows air in as waste flows out, otherwise you're creating a vacuum of sorts and the waste will take forever and a day to drain.

As for finding more stuff to rip out, it's just part of retrofits. You eventually get to where you replace damn near everything and realize it would have been faster to bulldoze that side of the house and have spend that time building it back!

EDIT TO ADD: but it is very rewarding and can be a fun process, especially when it finally comes together and you get to see the final product!

[This message has been edited by DwightSchrute (edited 6/1/2011 10:27a).]
superspeck
How long do you want to ignore this user?
Our family rule of thumb is that for every thing you open up and look behind, you find two or three things that you need to fix. We generally just end up planning to gut down to structure and are thankful that we don't run into TOO many problems putting it back together. It also doesn't require as much art to just make a new room as it does to try to tie new walls into an existing textured ceiling or something like that.

---

RE: the sill plate (which you're calling "baseboard", it depends on whether or not that wall is load bearing. If it's not load bearing, feel free to sawzall it out, and pound a new piece in. If it's load bearing, you have two choices. You can coat it in Minwax Wood Hardener and then epoxy wood filler (Bondo), which will not support additional structure weight.

Given the reported "squeaky as hell" condition of the floor above this bathroom, I'm going to go ahead and bet that this wall IS load bearing, and that it's sagged a bit due to the rotten sill plate. In that case, what I'd do is use a jack post (which can be rented from RSC or Redtail or similar) to get the ceiling (and floor above) level and not squeaky again, frame a support wall (video: http://www.youtube.com/watch?v=H8Vah5tyYQM) and then remove the sill and any studs that need to be removed and replace them.

You'll want to do this PRIOR to putting a new shower pan in place.

---

Dwight, how many walls have you looked inside that have just had wall in them? You end up getting cockroach piss, dead cockroaches, etc. in there over the lifetime of the wall.

Your rain slicker analogy is slightly flawed in that the wall can still breathe from the inside out; but humidity won't penetrate the wall except by going around the corner, where you should hope there is no movement, or you have problems.

The two main things to remember about waterproofing a shower is that tile, stone, and mortar are NEVER waterproof no matter how much sealant you put on them, and membranes ARE waterproof UNLESS installed by a total idiot or a brown southern cousin day laborer type.

I would go floor to ceiling with the Kerdi and anything I put over the Kerdi, mostly because I'm taller than most 80's-era shower enclosures, the rest of my family and friends are as tall or taller, and I splish splash when I'm taking a bath. The cost of an extra five or ten square feet of tile and membrane is NOTHING compared to the effort that went into making a bathroom, so why not just finish it to the gorram ceiling and save someone else the effort of taking it out in a few years?

--

Drumma, one or two other things while I'm thinking clearly. Is there a ventilation fan that vents to the outside of the structure in that bathroom? If not, plan on figuring out a way to put one in. It's not just law because it's code, it's code because it's a good idea and will keep mold down in there.

And again thinking more clearly about the soil stack... Nevermind what I said about needing a separate soil stack, but I would make sure I opened up the wall behind the sink/vanity to see how it ties into the sewer. It may do all of it in the slab. I think this is allowable based on the size of the pipe, but you might want to check with the plumber since that's not how *I* would've done it. I've been known to overbuild things or spend a few extra dollars to design something so that it can be maintained, though. :-P I just get nervous when working with showers and bathrooms that haven't been used a lot because there's sometimes a reason -- aka drainage problems -- that rear their ugly head only when the room is in full use and you have all the walls closed.

[This message has been edited by superspeck (edited 6/1/2011 3:18p).]
AgDrumma07
How long do you want to ignore this user?
quote:
Drumma, one or two other things while I'm thinking clearly. Is there a ventilation fan that vents to the outside of the structure in that bathroom? If not, plan on figuring out a way to put one in. It's not just law because it's code, it's code because it's a good idea and will keep mold down in there.

And again thinking more clearly about the soil stack... Nevermind what I said about needing a separate soil stack, but I would make sure I opened up the wall behind the sink/vanity to see how it ties into the sewer. It may do all of it in the slab. I think this is allowable based on the size of the pipe, but you might want to check with the plumber since that's not how *I* would've done it. I've been known to overbuild things or spend a few extra dollars to design something so that it can be maintained, though. :-P I just get nervous when working with showers and bathrooms that haven't been used a lot because there's sometimes a reason -- aka drainage problems -- that rear their ugly head only when the room is in full use and you have all the walls closed.


Yes, there is a fan (not pictured) and it works pretty well, though I'm not sure of its age. I'll probably have to pop the cover just to see what's going on and probably replace the cover too.

As I'm going through the walls, I'm finding more and more rotted sheetrock so I may end up having to rip it all out to the vanity (which is also getting replaced) so I can check the plumbing there as well.
superspeck
How long do you want to ignore this user?
Don't just pop the cover, snake it to make sure it vents to the outside and not somewhere into the structure. In aggiemike96's bathroom remodel we found that his fan just vented into an attic crawlspace ... if he'd not been able to see that and tied into that line for the shower ventilation fan, then he'd have severely damaged that part of his attic by pumping moisture into it. The fan not venting to the outside or being blocked might be partial cause of the rotten drywall you're seeing.
Aggiemike96
How long do you want to ignore this user?
I'm posting some updated pics tonight in my thread and can show the vent situation.
AgDrumma07
How long do you want to ignore this user?
Tore down the cabinet above the toilet (smashed the toilet) and removed some more drywall and insulation. No real problems found today.

Post-cabinet demolition. Turns out you really should use two people when removing such things:


This is where it hung via one screw and four nails:


Found more pipes. The metal pipe goes to the toilet. The black, plastic pipe might be the main drain from upstairs:


Down along the plastic pipe:


Down along the metal pipe behind the toilet:


Here's where I stand now:


EDIT: Posted wrong pic

[This message has been edited by AgDrumma07 (edited 6/1/2011 11:52p).]
superspeck
How long do you want to ignore this user?
That's what I wanted to see.

BTW, get the toilet out of there before you bust it. Um, more than you already have. They're much easier to take out when they're in one piece (or two pieces if you separate the tank from the throne.)

I usually pull the breakable/harmful things first -- toilet, mirror, sink, then tile, then the rest of the drywall.
AgDrumma07
How long do you want to ignore this user?
The toilet is getting replaced anyways, so I'm not really worried about it. It did help catch the cabinet last night though.
superspeck
How long do you want to ignore this user?
Yeah, but shattered porcelain is sharp as sheet.

ASK ME HOW I KNOW (tm)
AgDrumma07
How long do you want to ignore this user?
No, I know what you're saying. I'm saying that if the cabinet had destroyed the whole toilet (not just the seat), I wouldn't have cried over it.
Caliber
How long do you want to ignore this user?
quote:
I wouldn't have cried over it.

Until you discovered how sharp broken porcelain is...
superspeck
How long do you want to ignore this user?
Nah, Brad, I think what he's saying is that he'd be bleeding over it, not crying over it. Oh, and flooding over it, since it looks like it's still on/full of water.
AgDrumma07
How long do you want to ignore this user?
I got pretty far this weekend. I tore out most of the remaining drywall, the vanity and sink, and some of the door frames. I have to leave the actual doors up, for now, to keep the cats out of the bedroom. I also made it to Floor and Decor and picked out shower tile (need to go back for floor tile).

You can see the air filter for the downstairs return air vent. The air travels up this wall and into the main vent in the ceiling (shown below):


Main door:


This is where the vanity was. I need to repair the crack and sand down the bumps in the foundation so I can lay tile over it all:


Here's the sink plumbing. The U-pipe and water shutoff valves are going to get replaced:


This is the only electrical outlet in the whole bathroom and it's across from the vanity and down near the floor! This is definitely getting moved by the sink:


The soffit above the sink is pretty interesting. I was hoping it would be empty, which is what was, though at least part of it seems to help with the A/C return vent on that wall. Any ideas on how I can eliminate or reduce this soffit?

I'm thinking about cutting down the 2x4 pcs to half of their length which would bring it up closer to the ceiling. I don't think I can eliminate it completely because it helps with the return air system but otherwise it seems pointless. It originally had plywood on the bottom side and when I tore it down, the plywood had been put there to cover a crappy sheetrock fix and there was mold everywhere:


Plumbing from the upstairs bathroom, visible through the soffit:


Return air vent:


Here's the proposed tile for the shower. The circle mosaics are marble and will go on the floor. The majority of the wall are the travertine rectangles and I will accent the wall about 2/3 of the way up with a 12" strip of the glass/marble mosaic sticks. The edges will be finished off with the larger, matching travertine rectangles that are bull-nose cut:


EDIT: Double pic post

[This message has been edited by AgDrumma07 (edited 6/6/2011 10:30a).]
dubi
How long do you want to ignore this user?
I like the tile!
superspeck
How long do you want to ignore this user?
I was wondering why the A/C filter was down there...

Sounds like they'd built your intake plenum into that wall. You will need to have a bulkhead coming out of the wall there ... no way around that. Make sure that it's large enough to keep 'knocking' to a minimum. I'd probably have an A/C guy come out and look at it to make sure it's sized properly.

Good lord, gotta love the fancy wiring on that GFI. How does it even work? It doesn't look like there's even a ground!!!
AgDrumma07
How long do you want to ignore this user?
quote:
Good lord, gotta love the fancy wiring on that GFI. How does it even work? It doesn't look like there's even a ground!!!


It doesn't surprise me at all. There are several ungrounded outlets in the house. Those two white wires from the outlet are connected to another outlet box on the outside wall, not really sure how that works.
superspeck
How long do you want to ignore this user?
They wired it to the line side of the GFI, but I'm not sure it actually does work without a real ground... *shudder*
hatchback
How long do you want to ignore this user?
I'd recommend replacing as much of the black plastic pipe as you can. We had a leak in our kitchen a few months ago, and the culprit was the drain line. The pipe had a hairline crack in it at one of the connectors and was slowly leaking water into the basement.

Learned from our plumber that the reason why they stopped using the black pipe was because it was prone to becoming brittle and cracking as it aged. Our house was built in 1977 and I bet that all of our drain piping is of the same type.

Just a thought and a bit of advice based on what we encountered in our house of the same vintage.
AgDrumma07
How long do you want to ignore this user?
I tore down the ceiling last night. It wasn't originally in the plans but after the walls came down, parts of the ceiling did too, so it had to go. Turns out, a ceiling is easy to remove when it's really only held in place on the sides! I removed as much of the insulation as I could. Most of it had turned brown and gray and fell from the ceiling like rain. It was pretty disgusting.

Here's a few pics of what I discovered. Do I need to add more support beams between the joists?

View of the ceiling looking into the bathroom:


Nice work on the support beams for the A/C duct. That's another thing on the list to fix:


Insulation around the A/C duct:


This is the exhaust fan. It works fine, though it doesn't take the air anywhere except into the space between the floors:


Not sure what the purpose of this was:


Back of the ceiling:


Top of the pipes from the shower:


Pipes from the sink and behind the toilet:


View from the back (shower) looking out:
superspeck
How long do you want to ignore this user?
Did that fan vent to anywhere? Or... just into the insulation?
 
×
subscribe Verify your student status
See Subscription Benefits
Trial only available to users who have never subscribed or participated in a previous trial.