Guest Bathroom Remodel Thread - Complete Gut and Rebuild

21,481 Views | 164 Replies | Last: 3 yr ago by HollywoodBQ
Gary79Ag
How long do you want to ignore this user?
AG
Are you cutting the tiles individually as you're laying them or cutting them all at once and then laying them?

I pretty much cut them all, dry fit them and number them as I'm cutting them and then laying them all at the same time. Goes much faster that way.

drummer0415
How long do you want to ignore this user?
AG
Cutting as I get to the end of a row and need to cut next to a wall or whatever.

Whenever I do the row next to the tub I will probably cut and dry fit all of them first, then take them back out and lay them. That row is going to be a biatch because the front of the tub has a weird angle/curve to it.
drummer0415
How long do you want to ignore this user?
AG
Week 24 was BIG for progress, and this coming week is going to be even bigger. I made a goal of finishing all tile and grout work last week, then pushed hard and hit the goal.

Picture Notes:

-Progression of finishing all the floor tile. First the toilet room, then the vanity area.
-Quick picture tour of the whole bathroom now that all the tile is installed. Amazing how much of a difference this makes.
-Bathtub all cleaned up
-Grouting top half of shower
-Grouting bottom half of shower (Yes my wife is helping. She has actually been a huge help with all of the tile and grout.)
-Bought a sink. Wanted to have it ready to go for when countertop guy gets here later this week.
-Grouting toilet room
-Grouting sink/vanity room
-Finished pics of shower with plumbing all trimmed out and grout more dry (closer to actual color)
-Made a trip to The Depot to pick up a bunch of stuff that will be hopefully getting installed this coming week.


Week 24 (7/5 - 7/12)
https://imgur.com/a/8K9oWqF


This coming week: VERY IMPORTANT, from both a progress standpoint and for timeline. I have family coming in town the evening of Friday the 17th, so the big goal this week is to get the bathroom fully functional. I'm actually burning a week of vacation at work this week to stay home and work on it. It won't be anywhere close to done, but I just want to get the sink, toilet, and shower usable. Here's what I have lined up to make that happen:

-Tub resurface guy is coming today. I'll wait til probably Wednesday or so, then seal the grout. At that point, the shower will be complete and usable. (Will install curtain rod as some point this week also)

-Picking up material to build vanity cabinet today. Not even worrying about building the drawers or doors yet, just trying to get the body of the cabinet built and installed so it's ready to have countertop installed. I need to finish this by Wednesday because...

-Countertop fabricator guy is lined up for Thursday. I already have a quartz slab, just need him to cut it to length, cut sink and faucet holes, install the top on the cabinet base, and install the undermount sink.

-Friday after undermount sink is cured I'll install the faucet and under sink plumbing to get the sink functional. (Already bought all of this)

-Need to get Wainscot paneling done at least in the toilet room so I can install the toilet. (Already bought)


Wish me luck
drummer0415
How long do you want to ignore this user?
AG
Was having issues with pics uploading to Imgur, but they should be working now.
evan_aggie
How long do you want to ignore this user?
AG

What is the tub resurface person for? Do they just coat it again with a commercial epoxy?


Really smart doing the dark grout with the grey. Obviously it goes, but the dark won't show the dirt over the years. Our bathroom Floor were these tiles of Grey marble that are actually small 1" x 2" pieces and the grout is who knows how old and white. I Can't ever clean it enough or get it white again.

I've tried everything. I wish they made a product that you could put down to basically dissolve grout to reapply, and it would be faster to rip up and replace.
drummer0415
How long do you want to ignore this user?
AG
Just for fun, here's a quick update on where I'm at total cost wise, and the list of tools just for reference. The total is about to go up another $750 this week, and I will have to add another breakout category for labor/services. ($500 for tub resurface, $250 for countertop fabrication).


drummer0415
How long do you want to ignore this user?
AG
evan_aggie said:

What is the tub resurface person for?

If you read back in my thread, I made a boo boo when demoing the old shower walls. Accidentally dropped a sledge on the tub and chipped a big piece of the porcelain off. At a minimum, I needed to get that chip repaired, but I decided to just go ahead and get the whole thing resurfaced to make it all look brand new, because the price was right.


evan_aggie said:

Do they just coat it again with a commercial epoxy?

I'm honestly not sure what they use. I'll find out more today.

evan_aggie said:

Really smart doing the dark grout with the grey. Obviously it goes, but the dark won't show the dirt over the years. Our bathroom Floor were these tiles of Grey marble that are actually small 1" x 2" pieces and the grout is who knows how old and white. I Can't ever clean it enough or get it white again.

Thank you. That's exactly why we went dark-ish. Just a note though, it's MUCH darker when it's wet in the pics than it is when dry. In the pics it looks almost black, when dry it's just a dark grey. I'll try to get some more pics close up to show the color now that it's pretty much dry.
drummer0415
How long do you want to ignore this user?
AG
More info on tub resurface for those interested. I didn't want to watch over the dude the whole time and be annoying, but I peeked in a few times to check on the process.

He filled the chip in the porcelain with a bondo-like body filler, then sanded it smooth. Then he sprayed on the resurface material. Turns out, it just a catalyzed enamel. Aka, car paint with a hardener in it. He said it has a realistic life span of 5 or so years, and then will have to be redone. It's not ideal, but I'm ok with that. It definitely looks better than the original 48 year old finished that was all scratched up and had a huge chip in it. I'll just plan on redoing it every 5 years from now on.
Touchless
How long do you want to ignore this user?
AG
I've been stocking this thread as I plan on remodeling our master here in the near future and I've learned a few things along the way.

Quick question for laying tile. Has anyone used anti-lippage spacers when doing the flooring, and if so, would you recommend them? I happened to come across them on the home depot website and they're on sale currently. This will be my first time tiling so wasn't sure if this was something anyone would recommend or not. Seems to have good reviews online but not sure if they're worth it. For reference, we'll only have approximately 50 sq ft of tile flooring and will be using 12 x 18 tiles. TIA.
Aggietaco
How long do you want to ignore this user?
AG
Leveling spacers are nice, especially for larger tiles. You have to be careful about making sure you have full contact with your mortar bed though, or you can have hollow spots.

If you are working off of a flat slab they aren't critical.
Touchless
How long do you want to ignore this user?
AG
Thanks. Unfortunately it's not on a slab. If I place a little bit of mortar above and below the spacer, I'd think that may help reduce the hollow spots.
drummer0415
How long do you want to ignore this user?
AG
Aggietaco said:

Leveling spacers are nice, especially for larger tiles. You have to be careful about making sure you have full contact with your mortar bed though, or you can have hollow spots.

If you are working off of a flat slab they aren't critical.


Agree with all of this. I didn't see them as necessary on my project.
TMoney2007
How long do you want to ignore this user?
AG
Touchless said:

Thanks. Unfortunately it's not on a slab. If I place a little bit of mortar above and below the spacer, I'd think that may help reduce the hollow spots.
They'll pull the whole tile up to eliminate the lip, so a little around the spacer won't really help. Just be sure to back butter properly and it'll be fine.
drummer0415
How long do you want to ignore this user?
AG
Week 25 was a big week. Through no fault of my own, I didn't hit my goal of getting the bathroom 100% usable by Friday, but A LOT of work got done, so overall I'm pretty happy.

So my big goal was to get all three plumbing pieces functional by Friday evening when family arrived for the weekend. I got the toilet and shower done, but the sink was not installed because my countertop guy screwed me. Long story, and I don't feel like getting into details, but he basically went MIA on the day he was supposed to do the install. Because of that, I obviously couldn't have a sink without a countertop.

So here's pics and a recap of what got done.


Week 25 (7/12 - 7-19) Part 1
https://imgur.com/a/vnYJr8e

-Tub getting resurfaced
-Testing paint colors. First color we chose was too tan/brown, so we got two more greys to try. Liked them both, so we are going to use both.
-Building the vanity cabinet. First the carcass, then the base, test fitting the carcass in place, building the face frame, then finally the face frame installed and cabinet secured.
- Wifey painting. She paints pretty dang well.
-Using laser level to mark the walls for wainscot
-Installing waisntcot paneling and top cap. Wanted to get the two big walls done in the toilet room before installing the toilet.
-Some pics with paint on the walls. Decided on the darker grey for the toilet/shower room because it matches the grout well. Went with the lighter grey for the sink room because we also liked the color and didn't want that room too dark. You can see them both side by side in the last pic.
-Trimming out the angle stop and installing the toilet.


Week 25 (7/12 - 7/19) Part 2
https://imgur.com/a/eTt7WeQ

-Another walk through with paint on the walls and it's actually dry. Still need to cut in corners and whatnot. Shower curtain rod and TP holder installed. At this point the toilet and shower were 100% usable.
-Door trim reinstalled and doors hung
-Caulked bottom of toilet to floor.
-Installed some towel shelves above toilet.
-Final walk through of what the space looked like before family arrived and where I quit for the week. Got a lot done, but I would have really like to have the sink in.


This coming week: hopefully get the countertop installed (already talking to a new guy), install faucet and all plumbing for sink, and work on trim work (wainscot, window trim, baseboards,etc).


drummer0415
How long do you want to ignore this user?
AG
Week 26 was a little slower, but still a good week. I took it easy after busting azz the last two weeks, but another big milestone did get accomplished. The bathroom is now 100% functional! That's pretty big deal for me. Even though I still have a lot of work left to wrap this thing up, it makes all the work so far feel worth it.


Picture Notes:

- Countertop getting fabricated and installed, including undermount sink. I setup a canopy tent for him because Saturday was the only opening he had available, and I wasn't going to let a little rain stop me from getting my damn countertop installed. (It's quartz by Silestone)
- Some pics of how the sink/vanity area looks after countertop installed and cleaned up.
- Got the faucet installed and the sink all plumbed up. Sink is now functional.
- Walkthrough showing the wainscot paneling all done.
- Laying out the tile for the backsplash. This is the same tile we used for the accent band in the shower. I had some left over from the shower so started laying out with that.

Not Pictured: Went to two different HD's yesterday to buy more of that tile for the backsplash, and of course neither one had it and it looks like they don't even carry it any more because there wasn't even a spot on the shelf for it. So we gave up and went home. Luckily we found it online on the Home Depot website and it's still available for order. Ordered what I need, but it won't be here til a week from now.


Week 26 (7/19 - 7/26)
https://imgur.com/a/7vGX2W5


Plans for this coming week: In all honesty I probably won't get to do much on the bathroom this week. I haven't touched any of my woodworking for my side business in two weeks, and I'm way behind on some stuff. I need to put in some time on that and then get back to the bathroom. When I do get to work on the bathroom again, I'll be concentrating on finishing up all the trim work (window, baseboards, and mirror trim).
drummer0415
How long do you want to ignore this user?
AG
Here's an update on cost so far. I added another sub category for labor/services, and then some modified totals showing 50% of the tools cost included, and no tools.

I feel like the number with 50% of the tools cost allocated to this project is probably the fairest way to represent the cost of this project to me, because even though I definitely used them on this project, they will continue to get used on more projects in the future.

Also if using this for your own cost estimation purposes, keep in mind I got all of the pex plumbing materials for free and the countertop slab for free.


ETA:

Here are most significant expenses I have left to purchase:
Material to trim out baseboards
Material to trim out mirror
Material to finish building cabinet doors and drawers
Hardware for cabinet (going to be $100+ just in drawer slides, plus hinges and pulls)
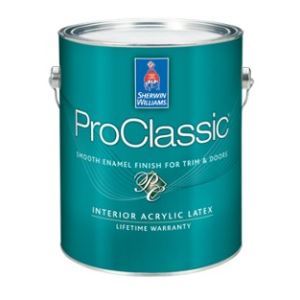
White paint for all trim that is getting sprayed ( I think we discussed this earlier in the thread, but I'm planning to use a SW product that is like $54 a gallon, and I'm pretty sure I'll need at least two gallons)

There may be a few more nickel and dime items added on, but I think those are the significant items left. From a financial standpoint, this project is coming close to an end (which is good because my wallet needs a break, lol).
drummer0415
How long do you want to ignore this user?
AG
Week 27 - Didn't get a whole lot done, but did get something done, and another milestone off the checklist.

Picture notes:

-Installed backsplash. This is the same natural stone tile we used for the accent band in the shower.

-Installed a decorative translucent film on the window and got rid of the butcher paper.

- Grouted the backsplash. Milestone achieved! I can finally say ALLLLLLL of the tile work for this bathroom is done, and I can put away all my tile associated tools. Yay! Note: I took these pics right after finishing the grout, so the stone and the grout are both still wet; they will both lighten up in color as they dry out. I'll include some dry pics next week.


Week 27 (7/26 - 8/2)
https://imgur.com/a/NLp53H2

All that's left: trim work, cabinetry work, caulk and paint. I already have the material for trimming out the window and mirror, so if I get a chance to touch the bathroom this week, that's what I'll work on,
lj801
How long do you want to ignore this user?
drummer0415 said:

- Countertop getting fabricated and installed, including undermount sink. I setup a canopy tent for him because Saturday was the only opening he had available, and I wasn't going to let a little rain stop me from getting my damn countertop installed. (It's quartz by Silestone)
Would you mind sharing the color of the quartz? Also, are you using Sherwin Williams paint on the cabinets and if so could you share color?

If in BCS area would you also share where you purchased the quartz and who you are having fabricate and install?
drummer0415
How long do you want to ignore this user?
AG
lj801 said:

Would you mind sharing the color of the quartz? Also, are you using Sherwin Williams paint on the cabinets and if so could you share color?

If in BCS area would you also share where you purchased the quartz and who you are having fabricate and install?


Unfortunately I don't have any good answers for you.

I can't tell you the color of the quartz because I don't know what it is. A friend gave me the slab and I knew it would match the color scheme of my bathroom, But I just never asked what the color was called. All I know is that it says Silestone on the bottom.

Yes I am planning on using a Sherwin Williams product to paint the cabinet, the wainscot, window trim, door trim, etc, and I can tell you it will be white, but we don't have any specific white color picked out. It will probably just be whatever the base color white is, as it comes in the can.


Not in BCS, I'm in Houston (Katy), and I didn't purchase the quartz, a friend gave it to me (He's a home builder here in the Houston area and the slab got rejected off a job for being the wrong color. Nobody else on the job wanted it, so he called and asked if I wanted it).
drummer0415
How long do you want to ignore this user?
AG
Week 28: no progress on the bathroom. Busy week, then this weekend we went out of town to visit family and take the kids to Schlitterbahn. Maybe next week I'll get to some trim work.
GrimesCoAg95
How long do you want to ignore this user?
AG
I think the base is extra white. Pure white and alabaster are also great options with your walls. That ProClassic paint is excellent paint. It should spray nicely with your HVLP.
Touchless
How long do you want to ignore this user?
AG
I second Alabaster. Great option for trim, baseboards, doors, etc. Great contrast with grey paint.
drummer0415
How long do you want to ignore this user?
AG
Week 29: sorry to disappoint, but no work in the bathroom again this week. Other house projects (yard work, re-working some sprinkler piping, etc) woodworking business, and kids birthday parties kept me busy all week.

I promise I'll get back to it. Soonish.
HollywoodBQ
How long do you want to ignore this user?
AG
Would love to see pix of the final result.
drummer0415
How long do you want to ignore this user?
AG
It's hard to show pics of the final result if the final result hasn't happened yet. Between spending more time on my day job, my woodworking side business, kids activities, and life in general, I just haven't gotten around to finishing this up.

That being said, I did get to spend a little time on it (like a day) back in March , and I got all the trim work finished up. That included all the baseboard trim, wainscot top cap trim, trimmed out the mirror, and trimmed out the window.

Now pretty much all that's left is to build the doors and drawers for the cabinet, then do the final painting. Final painting will be spraying white enamel on the cabinet and ALL the white trim, then finally finishing up/cutting in the wall paint.


Here's a few pics I snapped back in March after finishing the trim work. (Note in the last two pics there's a very yellow hue going on in the pics. It was early morning and the light coming in the window was a very yellow-orange color. The light in that room is not actually that yellow. It's bright white just like the first room)

https://imgur.com/a/AjMSew0

HollywoodBQ
How long do you want to ignore this user?
AG
drummer0415 said:

It's hard to show pics of the final result if the final result hasn't happened yet. Between spending more time on my day job, my woodworking side business, kids activities, and life in general, I just haven't gotten around to finishing this up.
Understand the competing time demands completely.

The reason I came on the Home Improvement Forum was to try to get some ideas related to a concrete paver project I started in my backyard around Thanksgiving.

I got Covid which wiped me out for a month between December-January and then I took a 6 week long trip to Texas where I was lucky enough to reach San Antonio right as the snowstorm hit. That trip wiped out most of February and March.

So, my project has been running since November but I've really only spent about 5-6 weekends on it so far.

Thanks for sharing your pictures. I'll have to do a write-up of my concrete paver project when I'm all finished.

EDIT: Also, I like your accounting for the various costs, tools, etc. I'll have to try to recreate that. There have been a number of things I haven't kept track of that closely.
 
×
subscribe Verify your student status
See Subscription Benefits
Trial only available to users who have never subscribed or participated in a previous trial.